This post will review “How to Hack or Unblock Cyberoam to Access All Blocked Sites in College or Company.” This tutorial will be noob friendly, I’ll explain everything with the help of snapshots.
First of all, let’s talk about what Cyberoam is and how it blocks the user.
What is Cyberoam:
Identity-based controls and visibility are critical components of network security. With identity and network data combined, enterprises are able to identify patterns of behavior by specific users or groups that can signify misuse, unauthorized intrusions, or malicious attacks from inside or outside the enterprise. Activities and security policy rules can be enforced on network segments based on identity.
THINGS THAT WE NEED TO HACK CYBEROAM:
1. FootPrint IP (our IP address that is being footprinted or traced by any website that we visit. In short, NAT outside local IP).
2. An open port, generally 3128 (3128 port is an active port which is always open if your computer has Network accessibility).
3. Proxifer and its settings (any Version after 2.17).
Those are the only components we need to hack Cyberoam. Please continue reading to see the instructions for hacking, complete with screenshots.
HACKING CYBEROAM (DETAILED HACK)
Stepwise Description:
First of all, we need to get the FootPrint IP.
1. Open your Mozilla Firefox web browser and go to the following site.
https://your-freedom.de
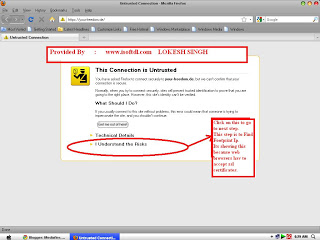
2. When you open the site you will see something like this:
Click on “I understand the risk” (this is to accept the SSL certificate)
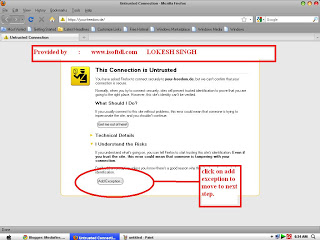
Click on “Add Exception”
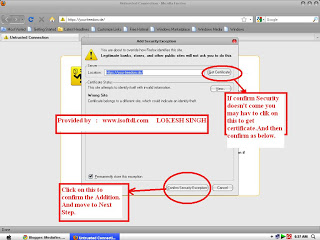
Click on “confirm security certificate”
3. Now we have the footprint IP. Next we need the port for accessing it.
USE PORT 3128, it’s open by default on any system that has access to the internet.
4. Download the following software (Proxifier)
http://www.mediafire.com/?qnmczoxojjw
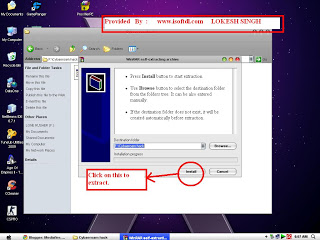
5. This is a portable version of Proxifier. Just click on it and extract it to anywhere you’d like. I prefer in the Pen Drive.
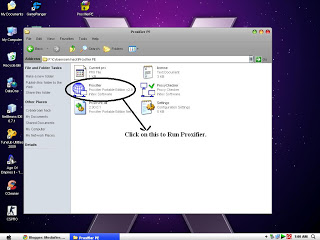
6. After that you will get some files like the ones in the screenshot, click on Proxifier to run it
7. Now see the task bar. You will see something like this box. Click on that.
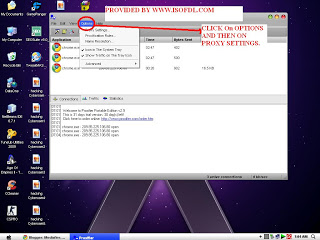
8. Click on options and then on proxy settings
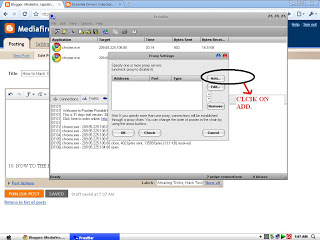
9. Adjust your settings so that they look like the ones in the screenshot.
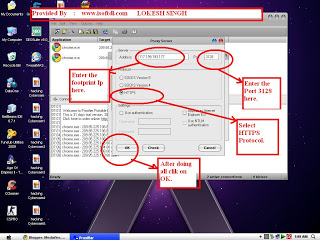
10. Now mimic the settings shown below, and click OK.
11. Click OK and open the website you want.
That’s the full tutorial!
If you have any questions, don’t hesitate to ask.
SPECIAL SETTINGS FOR AMU STUDENTS :
AMU students, you do not need to find the IP Footprint, I have done the work for you:
IN the Proxy setting enter the following:
Address : 210.212.76.241 Port :3128
And select HTTPS protocol. Then click ok and open any site you want.



dhanda says
Thank u lot
Rachit Parihar says
Lokesh bro this isn’t working in our college.Please update this article ASAP.
Anonymous says
the proxifer software comes with a one month free use only…after that you are back to square one….can you suggest anything that is free to download rather than a free trial software
Anonymous says
proxifier no longer works at MDI Gurgaon.What next?