

Legion is an open-source semi-automatic network penetration testing framework that can perform discovery, reconnaissance, and vulnerabilities assessment tasks. The framework can discover live hosts in a network, gather useful information about target hosts, and uncover network attack vectors against target systems through different integrated modules like Nikto, NMAP, THC Hydra, whataweb, sslyzer, Vulners, dirbuster, SMBenum, and webslayer. Although Legion comes with 100 plus built-in/integrated scripts to perform the penetration testing tasks, the framework also allows integration of additional external tools and scripts.
Legion Installation
Legion supports Docker and traditional installation processes. Legion developers endorse Docker over traditional installation due to complexities and dependencies issues. One can follow any of the following Legion installation methods as we have tested both methods without experiencing any errors.
Docker Method
Docker method requires Docker components to be installed before running the Docker commands. Otherwise, the installation fails.
![]()
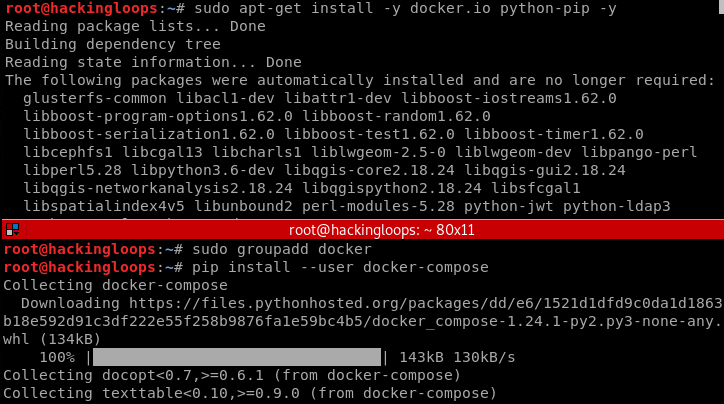
It is wise to update the system packages before running Docker commands.
sudo apt-get update
Follow the following commands to install the Docker components.
sudo apt-get install -y docker.io python-pip -y
sudo groupadd docker
pip install --user docker-compose
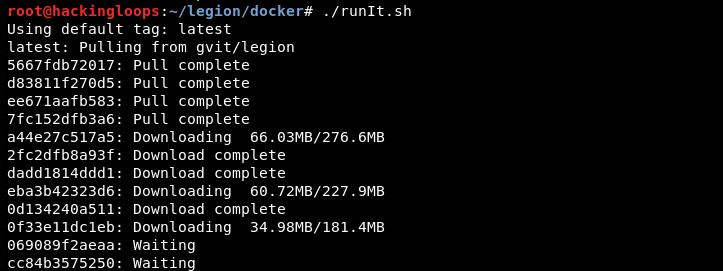
In the next step, clone Legion from Github and navigate to the docker folder.
git clone https://github.com/GoVanguard/legion.git
cd legion/docker
Change file permission for the runIt.sh file and execute it from the terminal using the following commands. All the required packages are automatically extracted and installed.
chmod +x runIt.sh
./runIt.sh
Traditional Installation
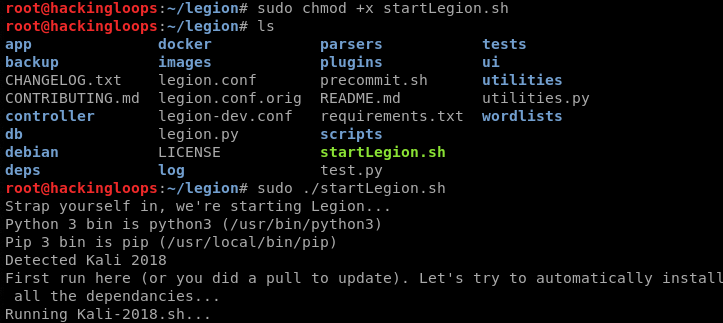
In the traditional installation process, clone the framework and run the following commands to complete the installation.
git clone https://github.com/GoVanguard/legion.git

cd legion
sudo chmod +x startLegion.sh
sudo ./startLegion.sh
Legion Dashboard Overview
Running the following command in the terminal opens the Legion dashboard.
./startLegion.sh

There are three main sections of the dashboard. The input section is on the left side with Scan and Brute as core functionalities of Legion. The output is on the right-hand side of the dashboard.
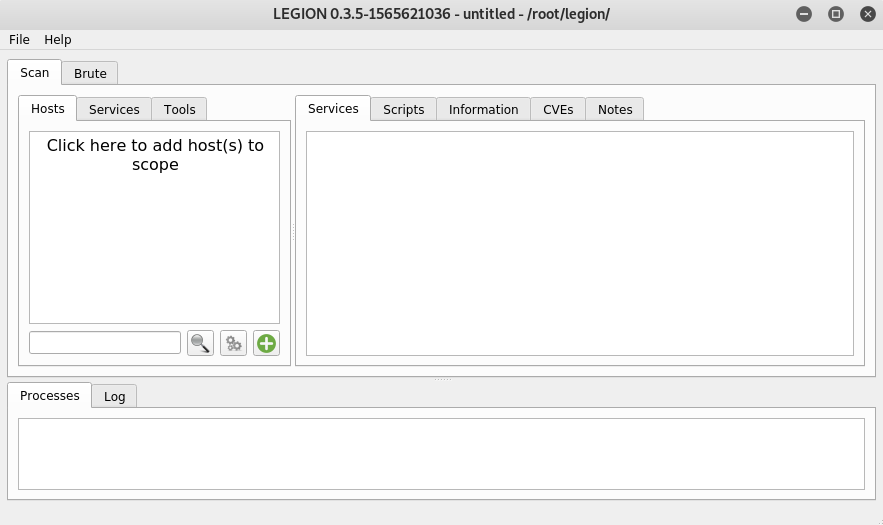
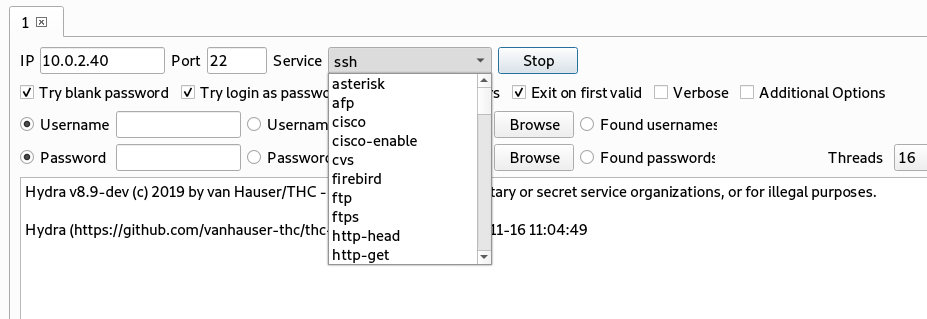
The Scan option in the input section performs host discovery, information gathering, and vulnerabilities finding tasks. The Brute option can be used to brute-force a target host. The Brute option parameters can be seen in the following screenshot.
Information about running processes and logs can be viewed in the bottom section of the dashboard. Any running process can be killed in the same section.
How Legion Works?
In the input section, clicking on add host(s) opens a new window as shown in the following screenshot.
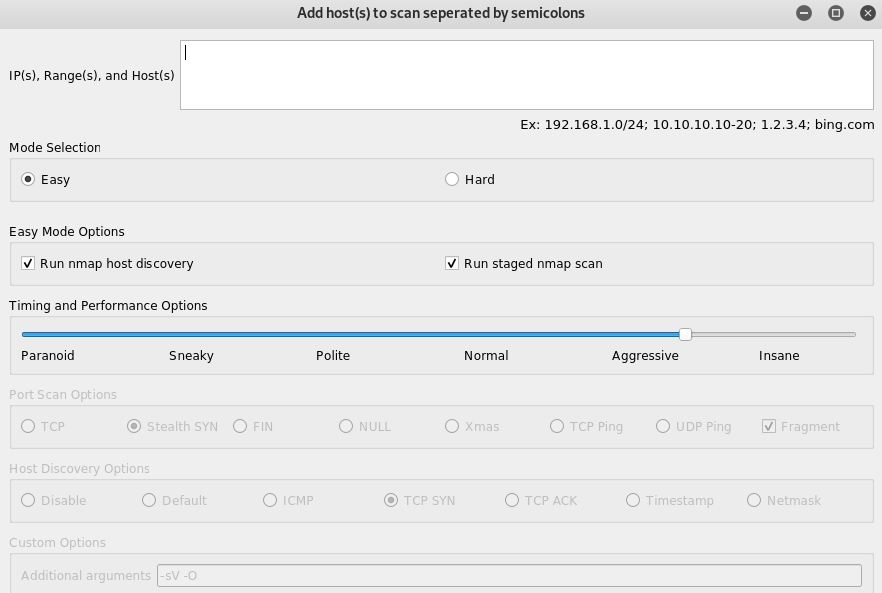
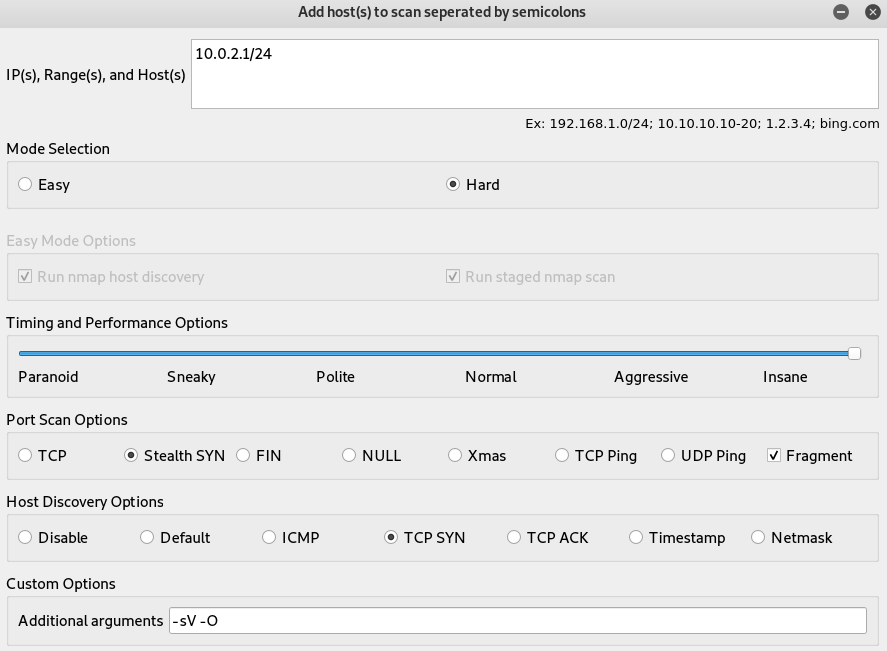
We can add single IP, multiple IPs, a range of IPs, and host names in this window. The window shows two selection modes i-e easy and hard. The easy mode allows Nmap and performance adjustment features. Currently, there are six performance options. A higher performance option takes more time compared to normal options. The hard mode offers additional features like custom port scanning options, host discovery options, and custom argument selection.
To demonstrate Legion working, we have selected hard mode, range of local network IPs, and custom port scanning and host discovery options. We have also mentioned service/version (-sV) and OS detection (-O) parameters as additional arguments.
When the scanning process is initiated, Legion starts populating the live hosts on the left-side of the interface with scan results on the right-side.
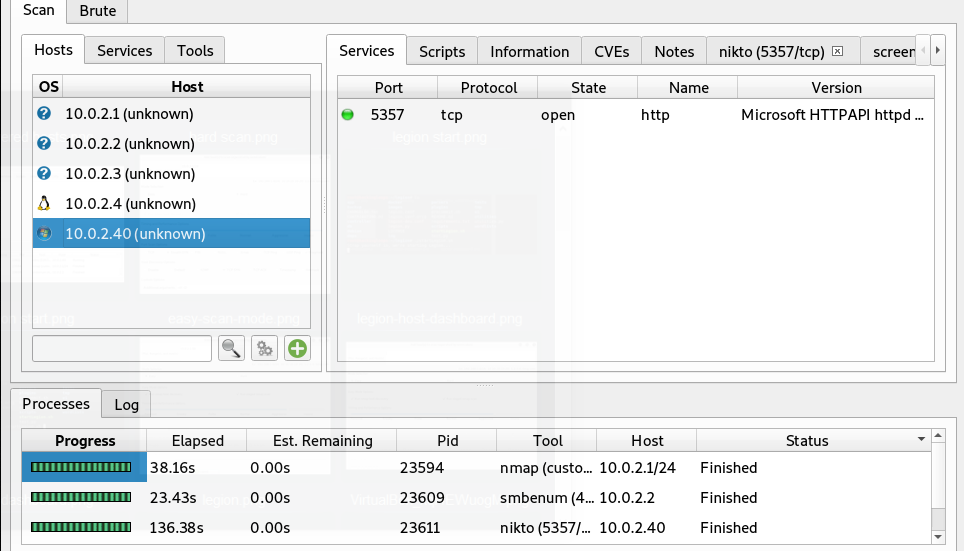
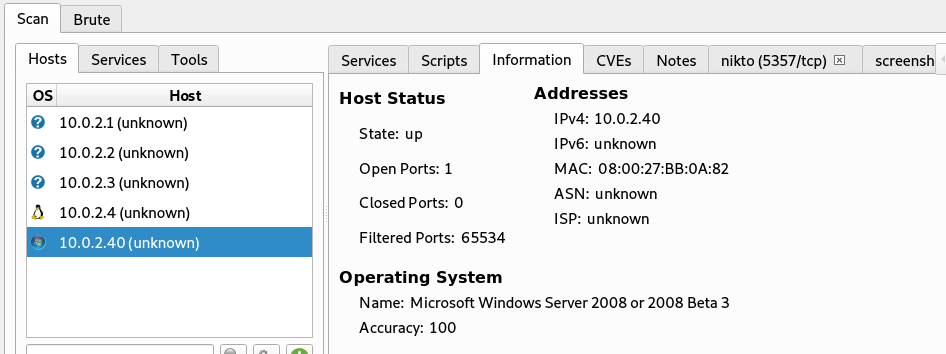
We can analyze the scan results by clicking on the tabs in the right section. For example, if we click the Information tab, we can see the host status, MAC address, and Operating System information.
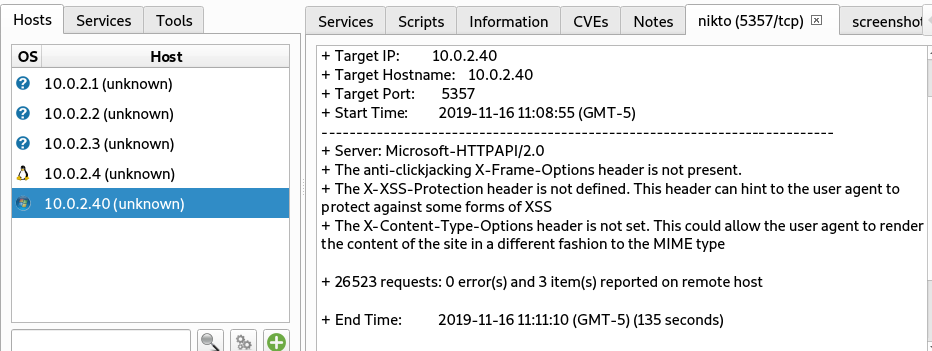
Similarly, we can explore the attack vectors (vulnerabilities) by clicking the Nikto module tab.
The aforementioned scan results are the outcome of default modules triggered by Legion. We can expand the scan results by initiating more tools and scripts through Services and Tools options in the input section.
Summary
Auto scanning, graphical interface, modular functionalities, auto-detection of Common Vulnerabilities and Exposures (CVEs), and binding those CVEs with the Exploit-Database exploits for in-depth analysis make Legion a handy network penetration testing tool.