

Intrusion Detection Systems (IDS) and Intrusion Prevention Systems (IPS) are essential tools for securing networks. Among the many options available, Snort stands out as one of the most popular and powerful open-source IDS/IPS tools. Whether you’re a network administrator, a cybersecurity enthusiast, or just someone curious about network security, this guide will walk you through the basics of Snort, how to deploy it on a Linux system, and how to write custom rules to detect threats.
Introduction and How To Use Snort
What is Snort?
Snort is an open-source network intrusion detection and prevention system (IDS/IPS) created by Martin Roesch in 1998. It’s designed to monitor network traffic in real-time, analyze it for suspicious activity, and alert administrators when potential threats are detected. Snort can also be configured to actively block malicious traffic, making it an IPS.
Snort is lightweight, highly customizable, and widely used in both small and large networks. It’s often referred to as the “de facto standard” for IDS/IPS because of its flexibility and extensive community support.
How Does Snort Work as an IDS/IPS?
Snort operates by analyzing network packets as they travel across your network. It uses a combination of signature-based detection and protocol analysis to identify potential threats. Here is a short introduction how it works:
- Packet Capture Phase: Snort captures network traffic using a network interface card (NIC) in promiscuous mode.
- Preprocessing Phase: The captured packets are preprocessed to normalize and decode them for analysis.
- Detection Phase: Snort compares the packets against a set of rules (signatures) to detect known threats or suspicious behavior.
- Alerting Phase: If a rule matches, Snort generates an alert and logs the event.
- Prevention Mode: In IPS mode, Snort can actively block malicious traffic by dropping packets or resetting connections.
Use Cases for Snort
Snort is incredibly versatile and can be used in various scenarios, such as:
- Network Monitoring: Detect unauthorized access, port scans, or brute-force attacks.
- Threat Detection: Identify malware, phishing attempts, or SQL injection attacks.
- Compliance: Meet regulatory requirements for network security monitoring.
- Incident Response: Provide detailed logs for forensic analysis after a security incident
Deploying Snort on Linux
In this section, we’ll walk through the steps to install and configure Snort on a Linux system (Ubuntu/CentOS).
Step 1: Install Snort
First, update your system and install the necessary dependencies. First add below repositories in the following file /etc/apt/sources.list
deb http://archive.ubuntu.com/ubuntu focal main universe
deb http://archive.ubuntu.com/ubuntu focal-updates main universe
And then update the package list as mentioned below.

Now we can install it using below command

Step 2: Configure Snort
After installation, Snort’s configuration file (snort.conf) is located at /etc/snort/snort.conf. Open it for editing.
Basic Configuration
- Set Network Variables:
- Locate the HOME_NET and EXTERNAL_NET variables.
- Set HOME_NET to your local network (e.g., 192.168.1.0/24).
- To find out local network, you can use below command
ip addr show
- Set EXTERNAL_NET to any or a specific external network.
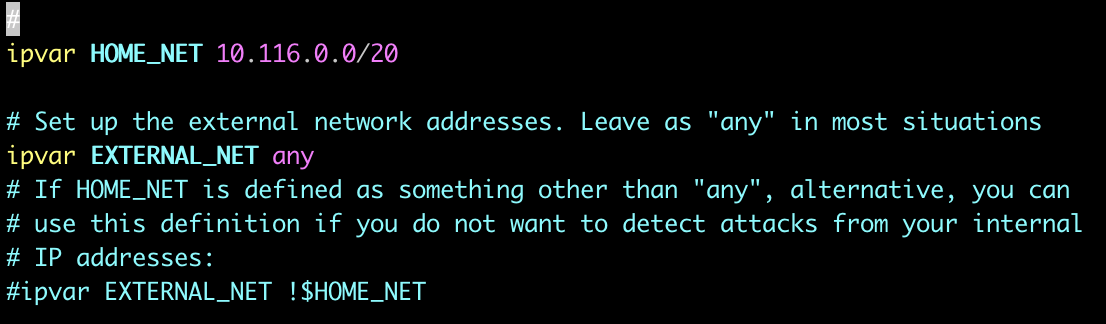
Above variables are just samples. You can adjust the variables according to your own needs.
- Configure Output Logs
- By default, Snort logs alerts to
/var/log/snort. You can customize the log directory by editing the output section in the same file.
- By default, Snort logs alerts to
- Enable Rules
- Snort comes with a set of preconfigured rules. Ensure they are enabled by uncommenting the include lines in the snort.conf file. You can find these rules files in below path
/etc/snort/rules
- Snort comes with a set of preconfigured rules. Ensure they are enabled by uncommenting the include lines in the snort.conf file. You can find these rules files in below path
Step 3: Set Up Network Interfaces
Snort needs to monitor network traffic, so configure your network interface to operate in promiscuous mode.
Identify Your Network Interface
Run the following command to list your network interfaces

Start Snort in IDS Mode
Use the following command to start Snort and monitor traffic on a specific interface (e.g., eth0)
The command is
sudo snort -u snort -g snort -c /etc/snort/snort.conf -i eth0 &
Explanation of the command is as follows
- -u and -g: Run Snort as the snort user and group for security
- -c: Specify the configuration file
- -i: Specify the network interface

Or you can use systemctl to handle its lifecycle
Writing Snort Rules
Snort’s power lies in its rule-based detection system. Rules define what constitutes suspicious or malicious activity. Let’s dive into the basics of writing Snort rules.
Rule Syntax and Structure
A Snort rule consists of two main parts: the rule header and the rule options.
Rule Header
The header defines the action, protocol, source/destination IPs, ports, and direction. For example,
alert tcp $EXTERNAL_NET any -> $HOME_NET 22 (msg:"SSH Brute Force Attempt"; flow:to_server; detection_filter:track by_src, count 5, seconds 60; sid:1000001; rev:1;)
The explanation of above rule headers is as follows
- Action: alert (generate an alert)
- Protocol: tcp (monitor TCP traffic)
- Source/Destination: $EXTERNAL_NET any -> $HOME_NET 22 (traffic from any external IP to port 22 on the home network)
- Direction: -> (traffic from source to destination)
Rule Options
The options define the specifics of what to look for and how to respond. Considering same above example, the rule options are
- msg: A message to include in the alert
- flow: Specify the direction of traffic (e.g., to_server)
- detection_filter: Trigger alerts based on thresholds (e.g., 5 attempts in 60 seconds)
- sid: A unique rule identifier
- rev: Rule revision number
Example Rules
alert tcp $EXTERNAL_NET any -> $HOME_NET any (msg:"Port Scan Detected"; flags:S; detection_filter:track by_src, count 10, seconds 10; sid:1000002; rev:1;)alert tcp $EXTERNAL_NET any -> $HOME_NET 80 (msg:"SQL Injection Attempt"; content:"SELECT"; nocase; content:"FROM"; nocase; sid:1000003; rev:1;)alert icmp $EXTERNAL_NET any -> $HOME_NET any (msg:"Ping Sweep Detected"; itype:8; detection_filter:track by_src, count 5, seconds 10; sid:1000004; rev:1;)
Testing and Validating Rules
If we want to apply our own rules, we need to save them in a local file and include that file in the configuration of snort and restart snort. Let us say we want to detect multiple ssh connections. The rule will bealert tcp $EXTERNAL_NET any -> $HOME_NET 22 (msg:"SSH Brute Force Attempt"; flow:to_server; detection_filter:track by_src, count 5, seconds 60; sid:1000001; rev:1;)
Explanation
- alert tcp: Generate an alert for TCP traffic
- $EXTERNAL_NET any: Monitor traffic from any source network on any port
- -> $HOME_NET 22: Target traffic to port 22 on the internal network
- msg:”SSH Brute Force Attempt”: Custom message for the alert
- flags:S: Check for SYN flag (indicates a connection attempt)
- threshold:type both, track by_src, count 2, seconds 60: Trigger alert if 2 attempts occur within 60 seconds from the same source
- type both: Trigger both alerts and logs
- track by_src: Group attempts by source IP
- sid:1000001: Unique Snort rule identifier
- rev:1: Revision number
Save above rule in below file
/etc/snort/rules/local.rules

Make sure to include this in the configuration file of snort which is located at /etc/snort/snort.conf

To test your rules, use the -T flag to run Snort in test mode.

Monitoring and Alerts
Configuring Alert Outputs
Snort can generate alerts in various formats, such as logs, emails, or database entries. Here’s how to configure alert outputs:
Log to a File
Add the following line to /etc/snort/snort.conf
output alert_fast: /var/log/snort/alerts

For testing, we can create one more vm and use hydra to attack on our testing vm. You can install hydra using apt command as below
apt install hydra -y
Download any passwords list and use below command to attack on testing VM.

Now if we check our alerts file, we will be able to see logs of this attack.

Conclusion
Snort is a powerful and flexible tool for network intrusion detection and prevention. By following this guide, you’ve learned how to deploy Snort on a Linux system, write custom rules, and configure alerts. Whether you’re securing a small home network or a large enterprise environment, Snort provides the tools you need to detect and respond to threats.