In the previous article, a comprehensive discussion of Active Directory concepts was done. In this, we will be going through each and every step of AD Lab Setup For Exploitation. Later on, we will use this lab environment for attacking purposes.
This article and series is inspired from TCM PEH course.
AD Lab Requirements
The lab environment will consist of
- 1 Windows Server 2019 machine
- 2 Windows 10 Enterprise machines
- Virtualization Software (I use VMWare Workstation)
Hardware requirements are as follows for a smooth experience
- 60GB Disk Space
- 16 GB RAM
Downloading ISOs
You can download the ISOs from the following links
Make sure you download ISO (64-bit) and not any other format.
AD Lab Setup
First of all, we need to create virtual machines using ISO files
Setting Up Domain Controller
Open VMWare Workstation and create a new machine. Choose server ISO and you will see the New Virtual Machine Wizard. Make sure to select Windows Server Standard Core as the version and leave everything else at default.
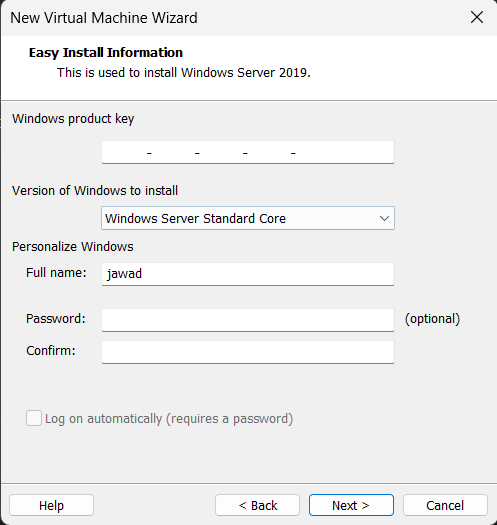
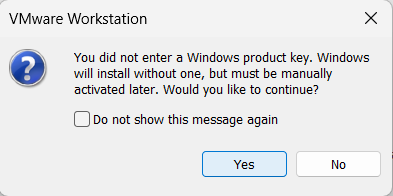
Upon not entering the windows product key, it will show a warning prompt but continue it
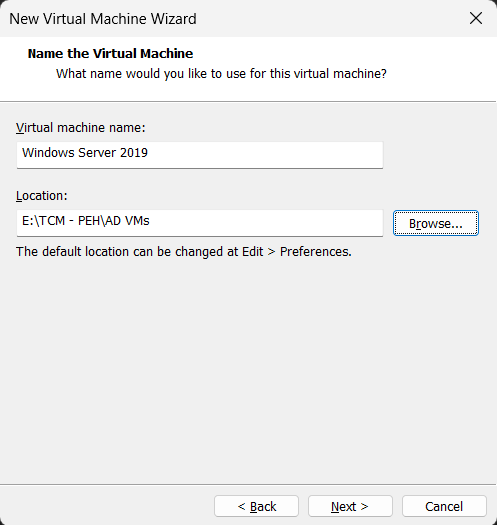
Next, you need to name the Virtual Machine and choose the place where the VM files will be stored
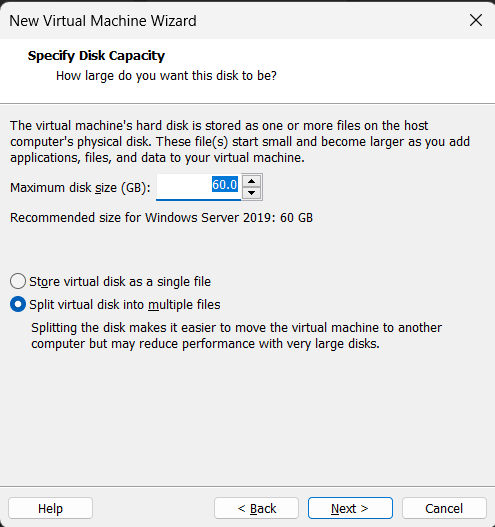
For the space allocations, you can leave the default 60GB and Split virtual disk into multiple files as below
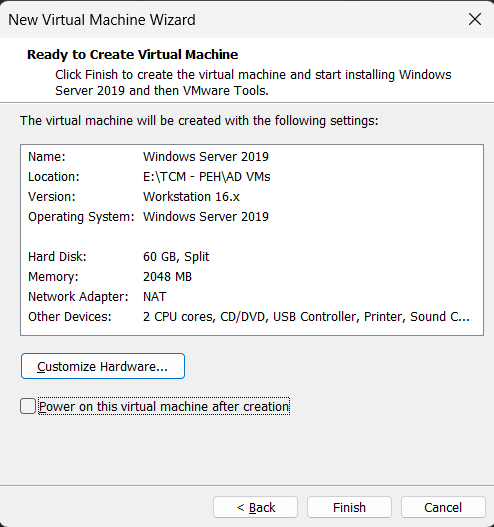
Once these settings are done, you will see a summary. Make sure you uncheck Power on this virtual machine after creation box
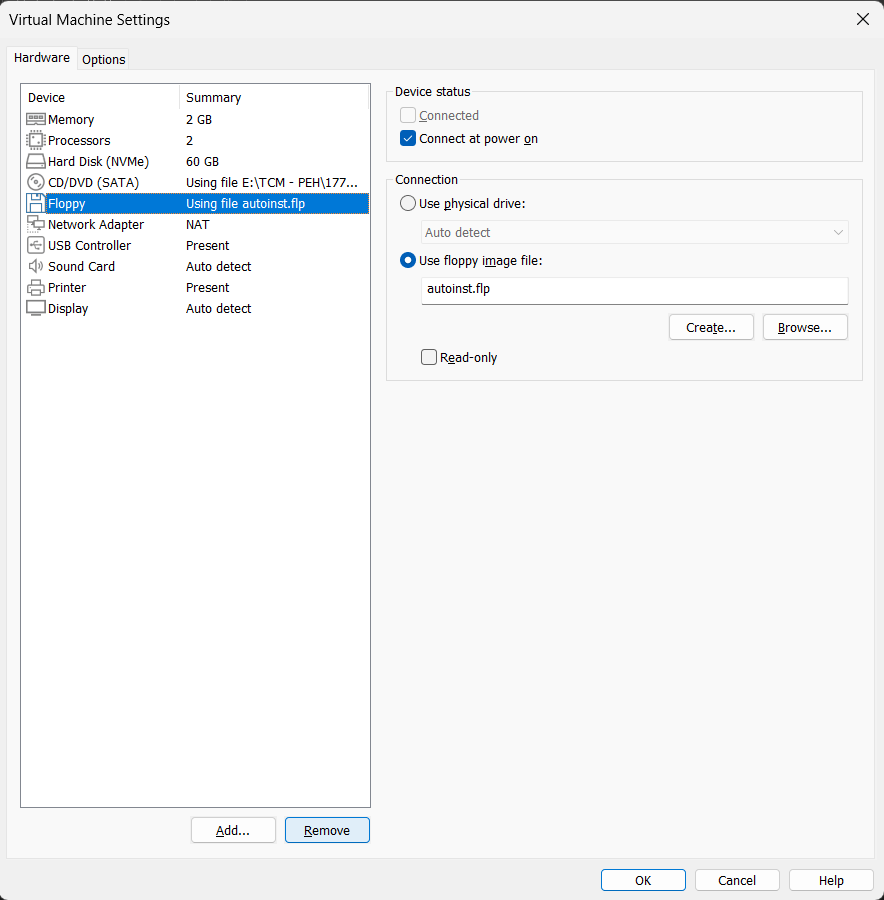
The reason for not turning on the VM after creation is that while attaching the ISO, it includes a Floppy Disc using file autoinst.flp which will ask for an activation key while installation.
To come around this issue, when the machine is created, click on Edit Virtual Machine Settings button and from there remove the Floppy as below
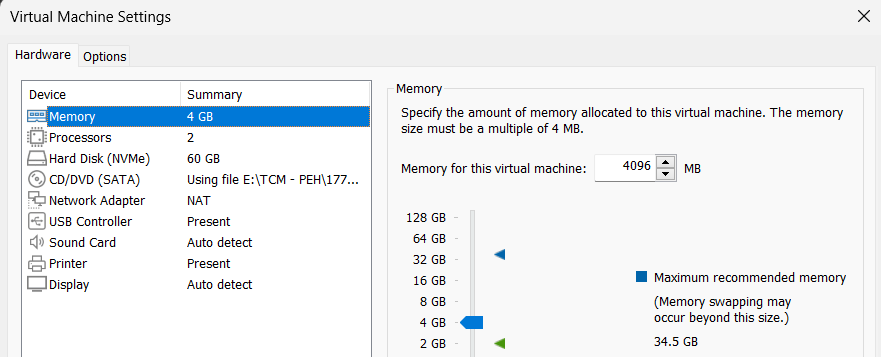
Following that, for a smooth experience, we need to increase the RAM and for this, increase it to 4GB. You can increase as per your available resources.
Also, make sure that the Network Adapter is set to NAT by default. If not, then change to NAT.
Installing Windows Server 2019
After allocating the resources, we are ready to install the Windows Server. Power on the virtual machine and you will see a black screen asking for a key press for installation to begin.

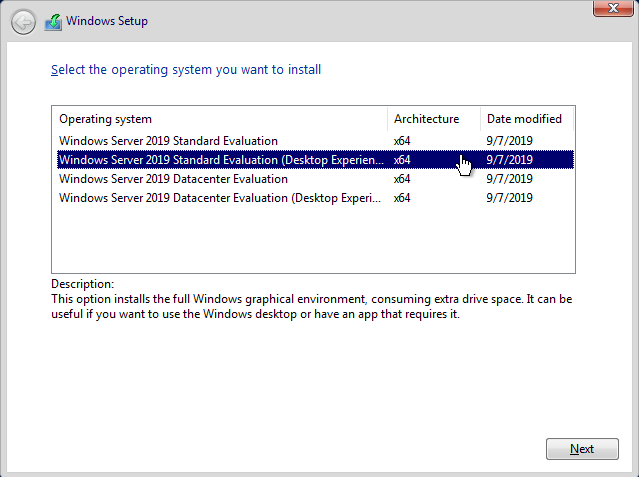
Press any key and you will see the Operating System Selection wizard. In that, you need to choose Windows Server 2019 Standard Evaluation (Desktop Experience) as below
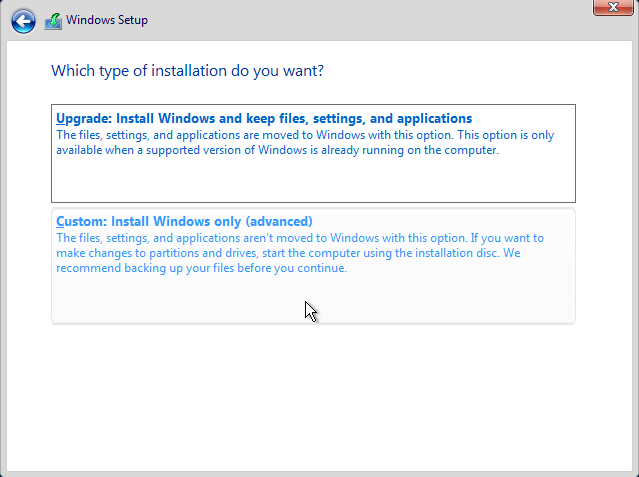
Following that, choose custom install option
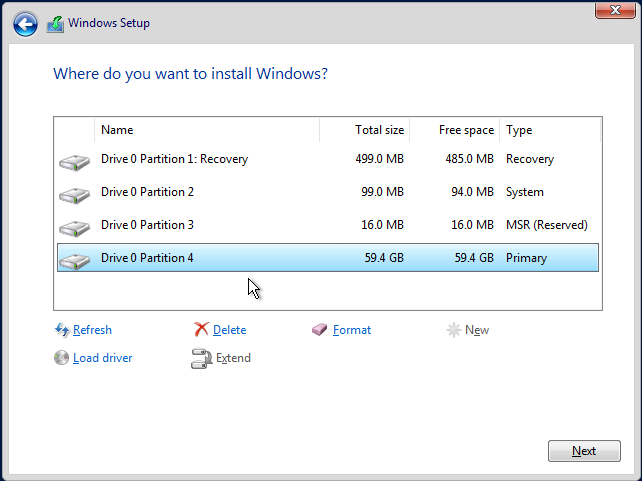
There you will see a drive with unallocated space as below
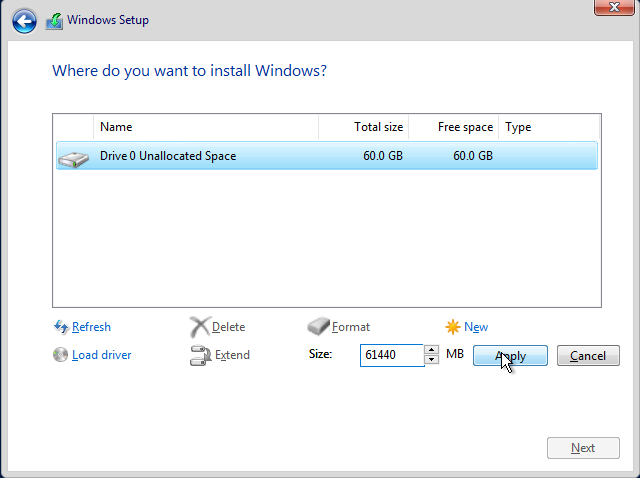
Create a new partition by clicking on New and then Apply. This will create some partitions and you need to select the one with the maximum free space to install the server to and click Next.
This will start installing the Windows Server. Wait till it finishes and you will see a password prompt screen to set a password for the Administrator account. Type the password and let the setup finish.
I set the password for Administrator as P@$$w0rd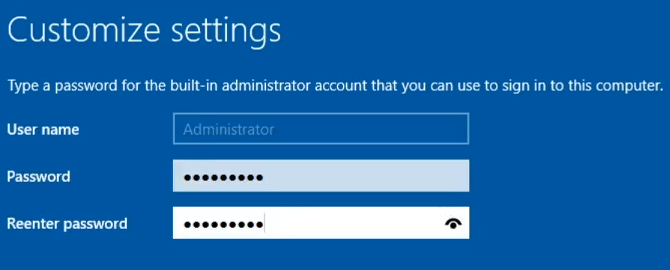
Post Installation
After the installation and logging into the account, you will see a Server Manager. This will open every time you turn on and login into the Server machine.

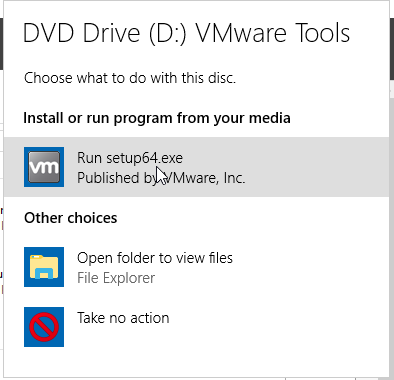
For a better experience of fullscreen, you might need to install VMWare Tools. For that, on the VMWare top navigation buttons, click on VM --> Install VMWare Tools and you will see a setup prompt on the server
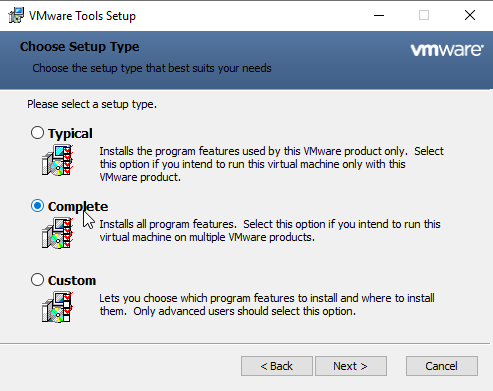
Choose the complete installation package and wait for the installation to finish
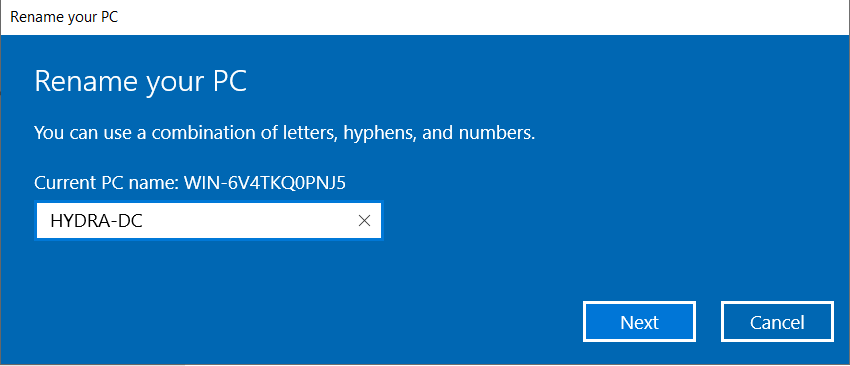
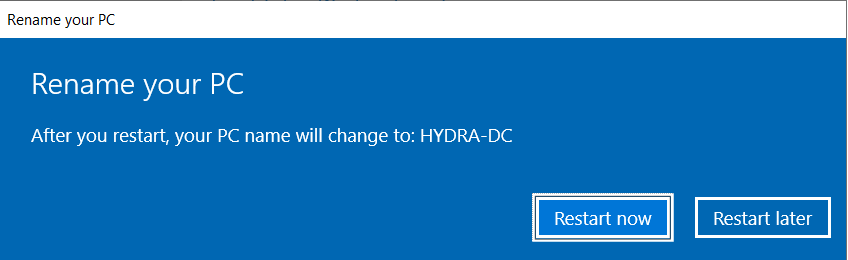
After the installation, it will ask for a reboot but cancel it. Go to Settings --> About and change the PC name to resemble a Domain Controller (I’m using HYDRA-DC)
After this, reboot the machine
Installing Domain Controller
In the Server Manager, click on Manage --> Add Roles and Features
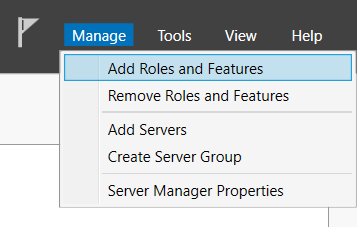
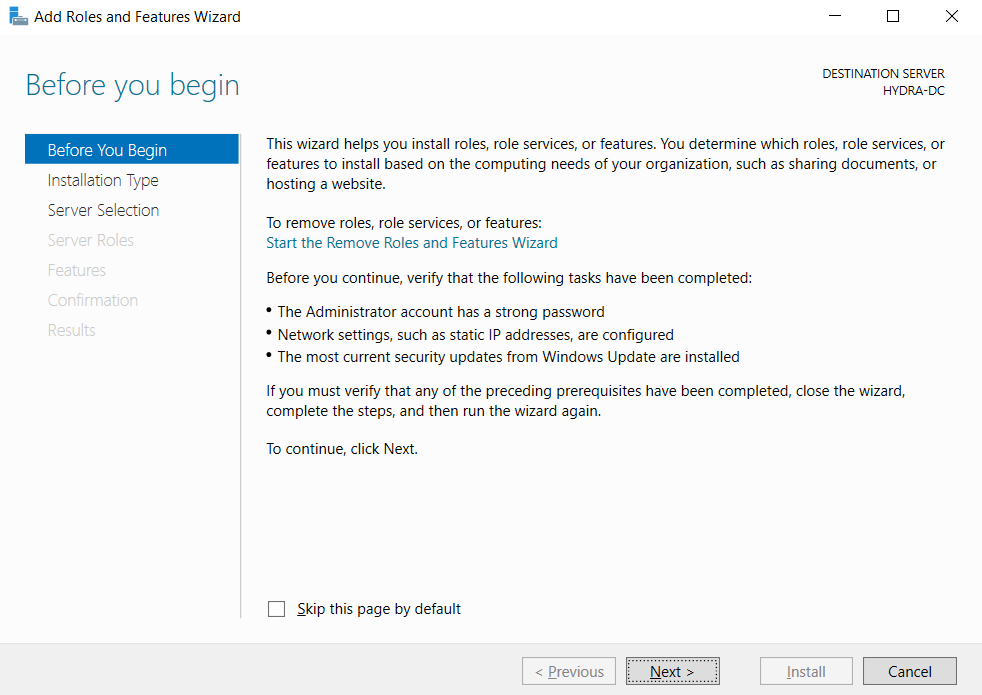
This will bring up the wizard as follows
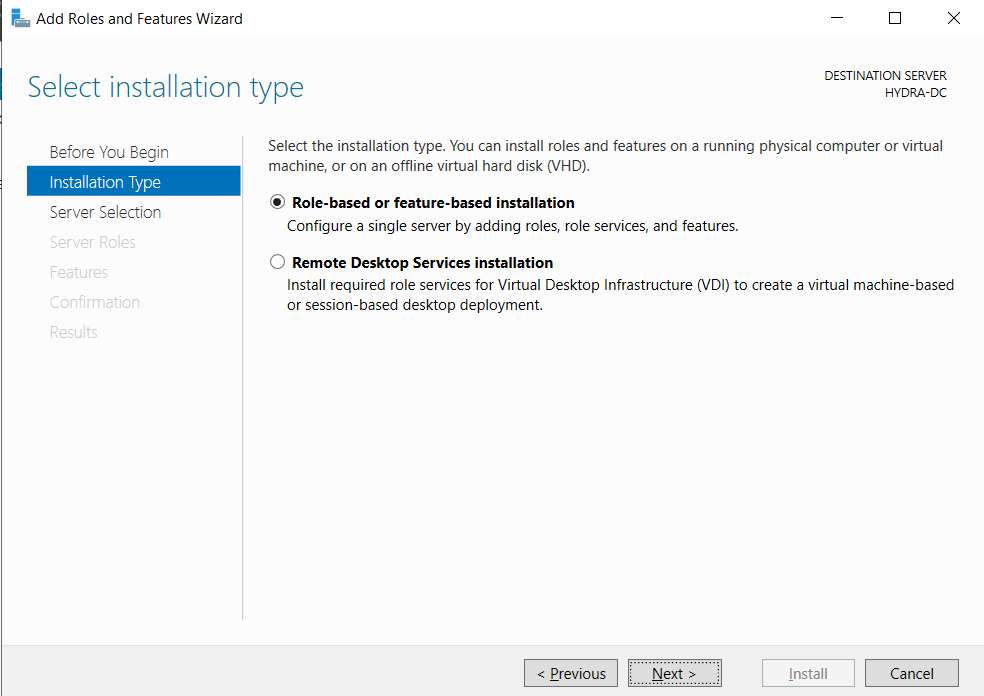
In the Installation Type make sure Role-based or feature-based installation is selected
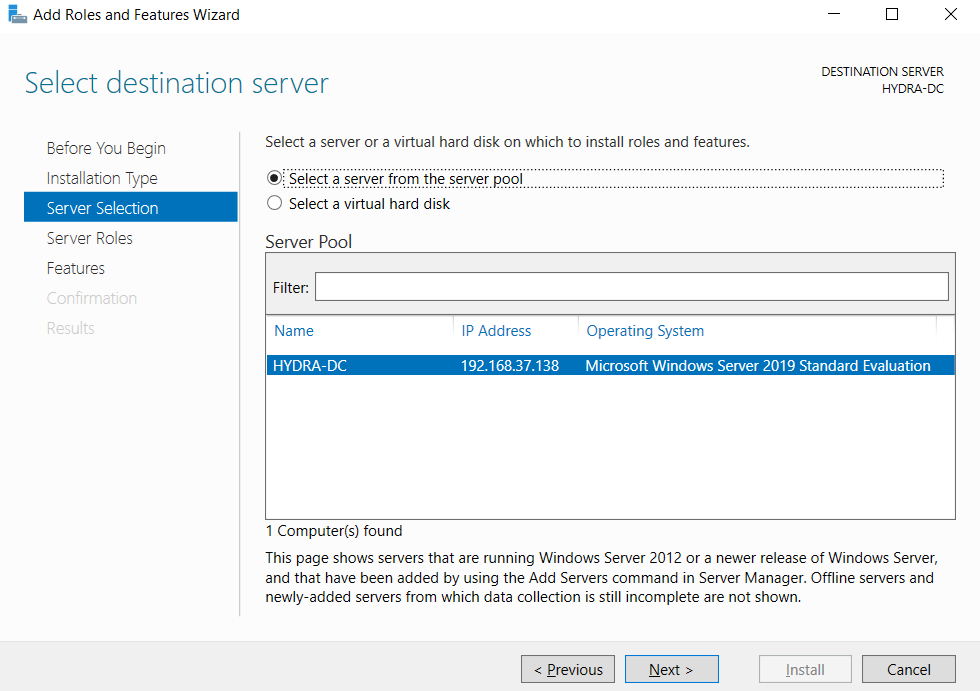
In the Server Selection you will be able to see the PC name
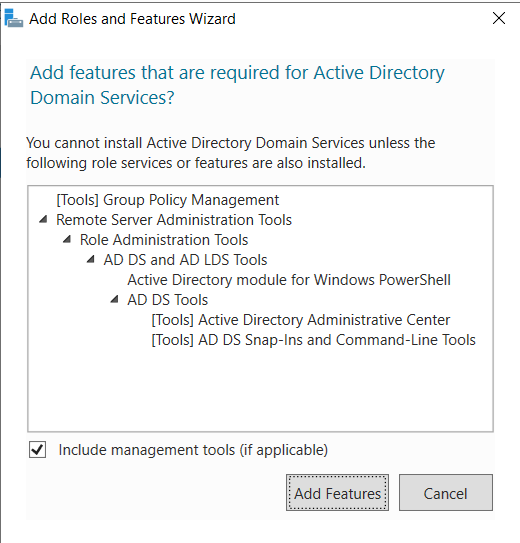
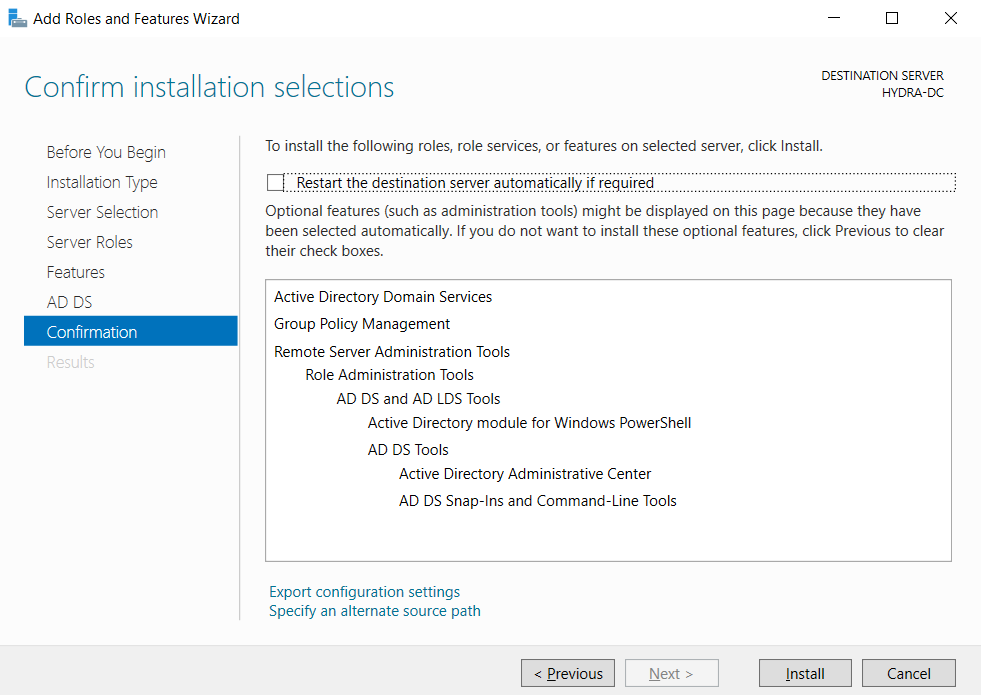
And finally in the Server Roles, you will see Active Directory Domain Services in the roles section

Check that box and a follow through the wizard and click Add Feature
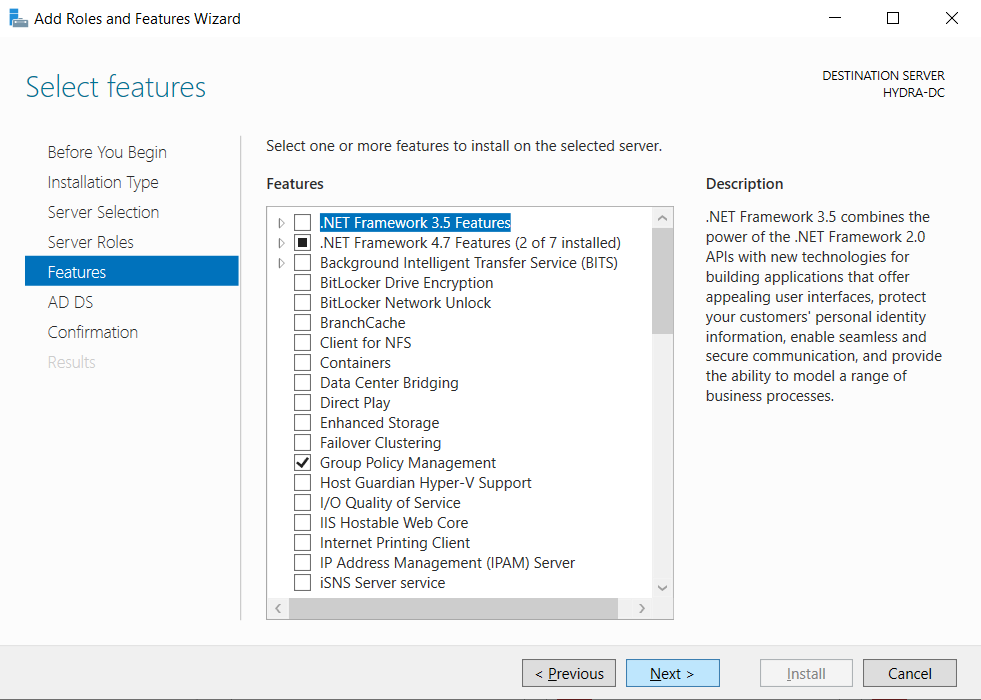
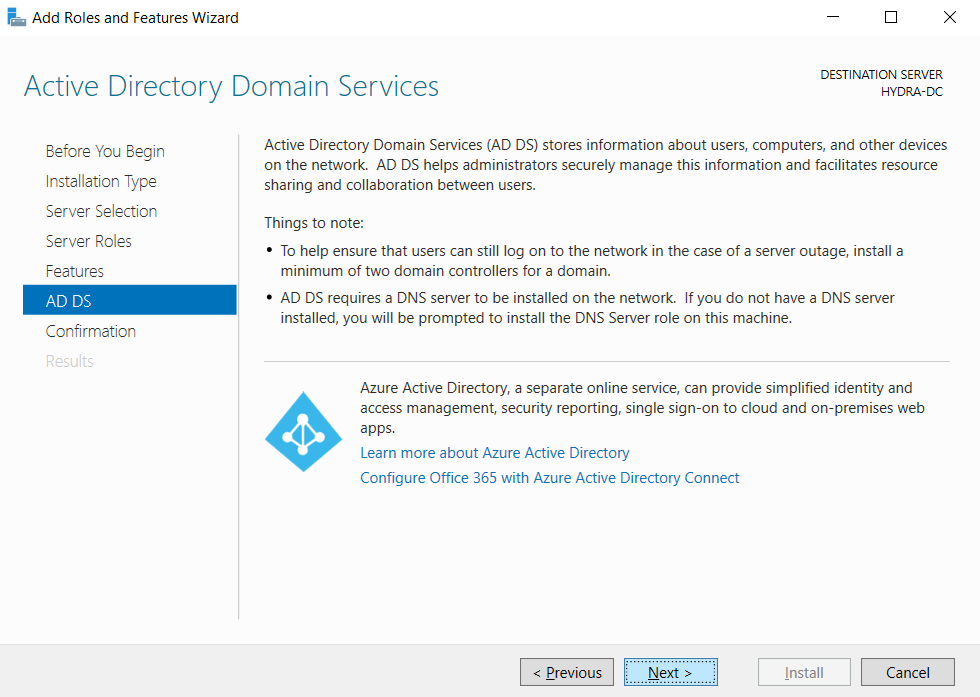
For the next steps of the wizard, choose the default options and keep going next till the Active Directory Domain Service is completely installed. Following images will help you show the exact screens
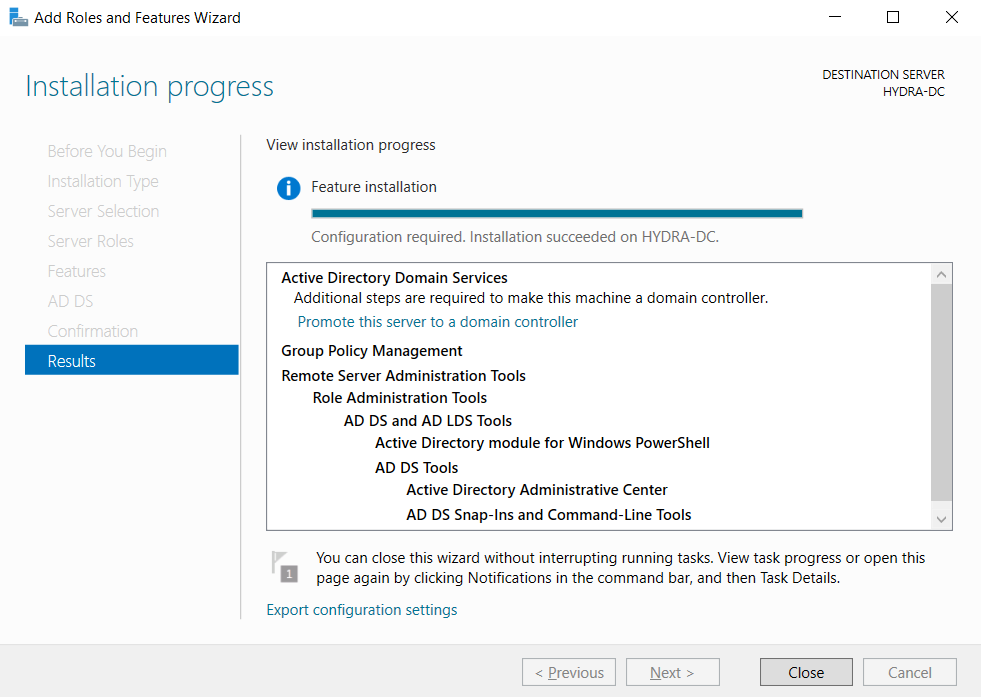
Promoting to Domain Controller
After the Domain Service is installed, you will be able to see an alert notification to promote the server to a DC
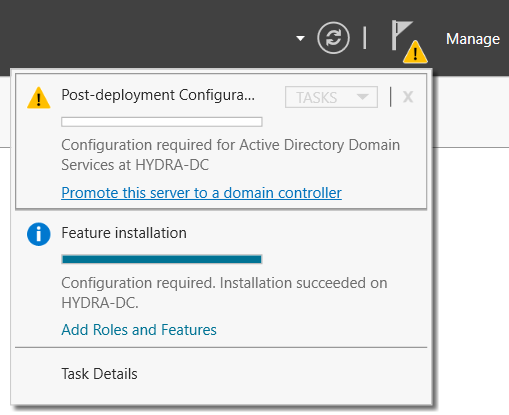
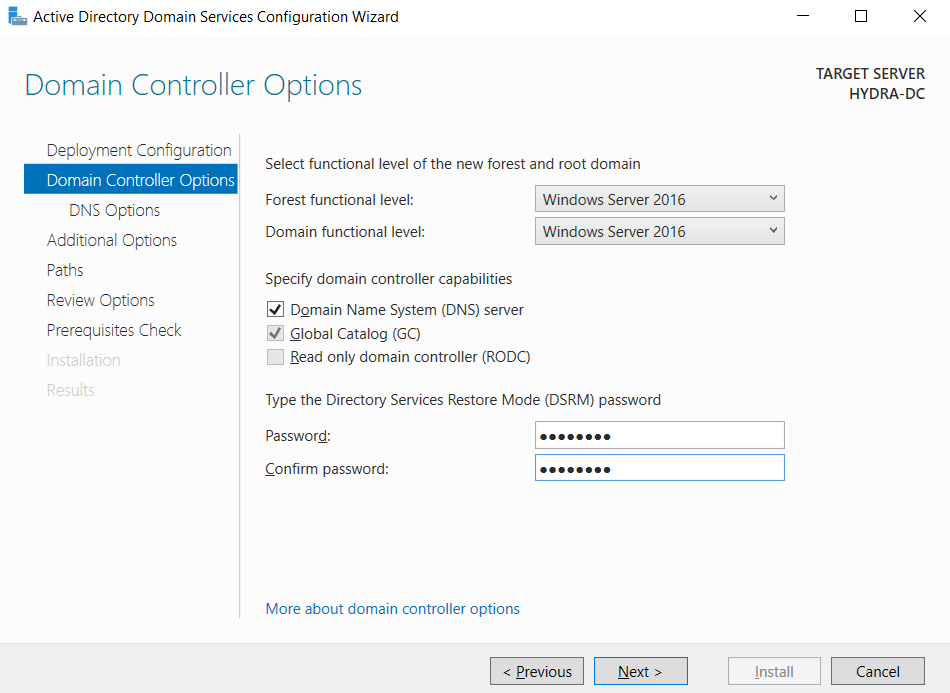
Click on the blue link and a configuration wizard will popup. In the deployment configuration, make sure to select Add a new forest and write the domain name (I’m using MARVEL.local)
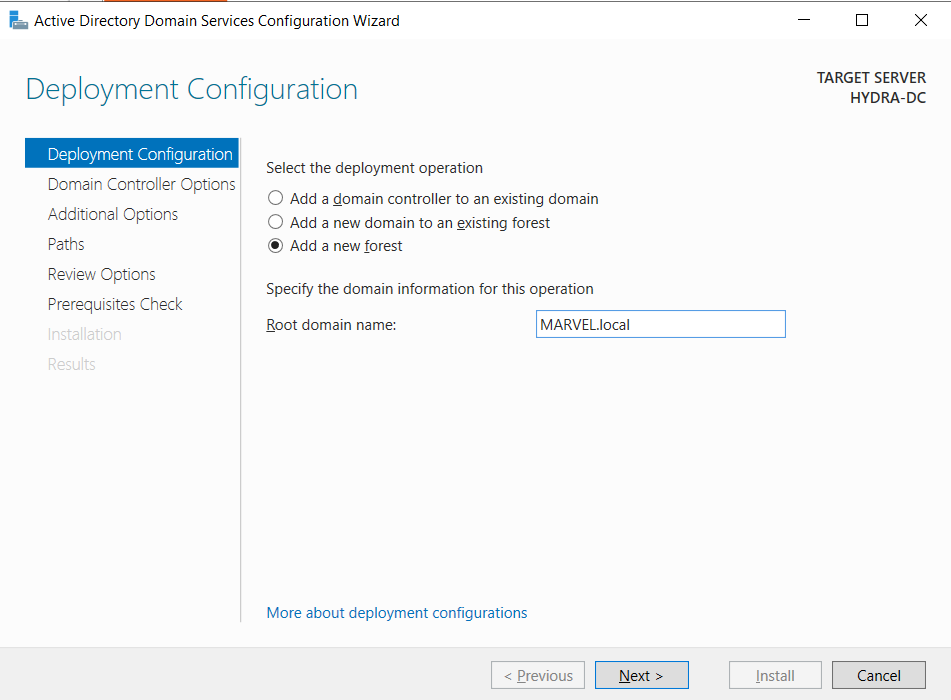
Next, it will ask for Directory Services Restore Mode password, type in the password (I’m using P@$$w0rd)
Keep clicking next and you will reach Prerequirsites Check.
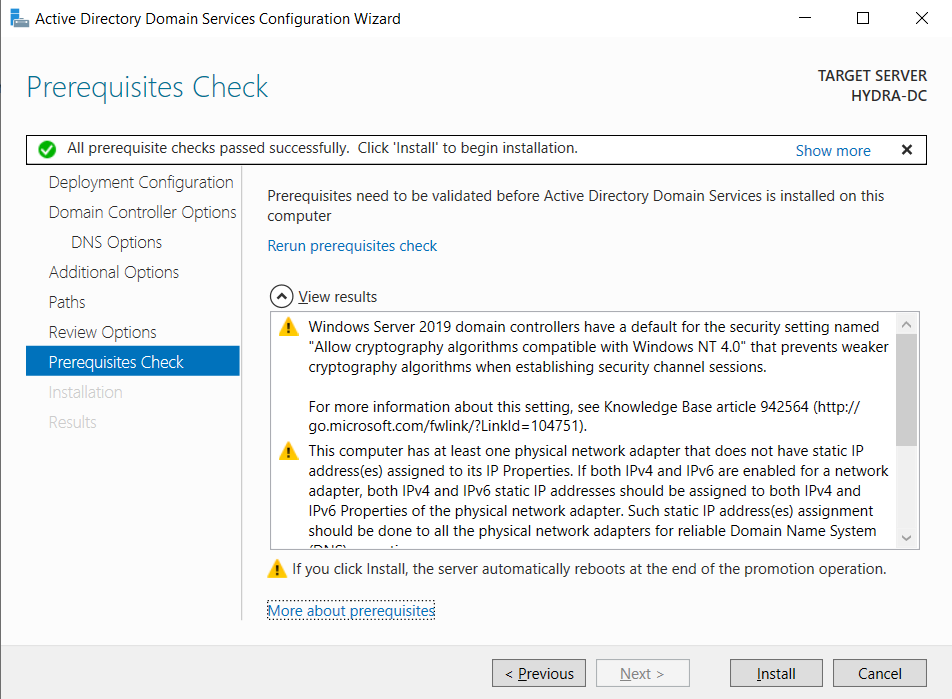
Click on Install and the server will become a DC after installation is complete. The machine will reboot and now the login screen will show the username along with the domain name as below
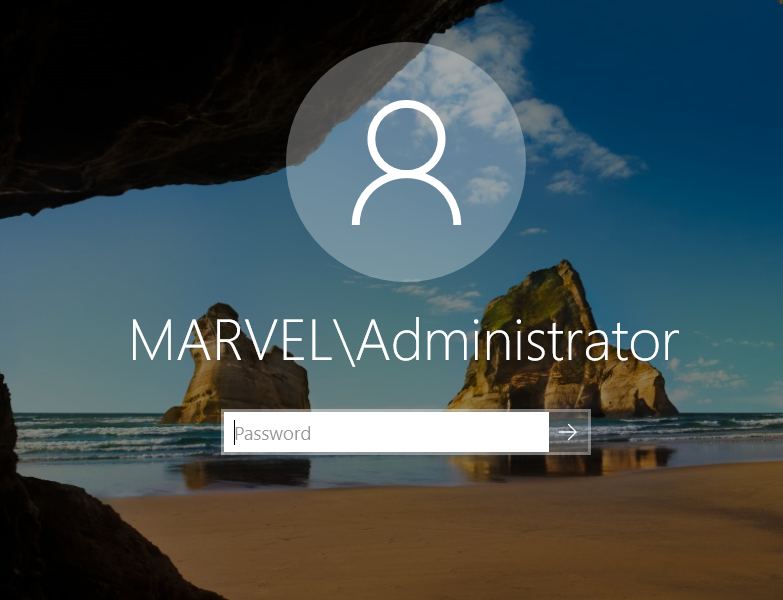
This indicates that we are now logging into the domain as administrator.
Setting Up User Machines
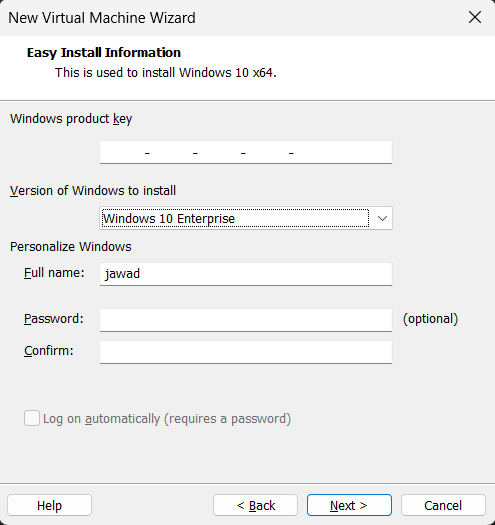
Now that we have setup the server, we will now setup user machines. For this, similar to server installation, choose ISO in VMWare Workstation and make sure to choose Windows 10 Enterprise in the version dropdown
Installation process is similar as that of the server installation till you reach the following sign in screen

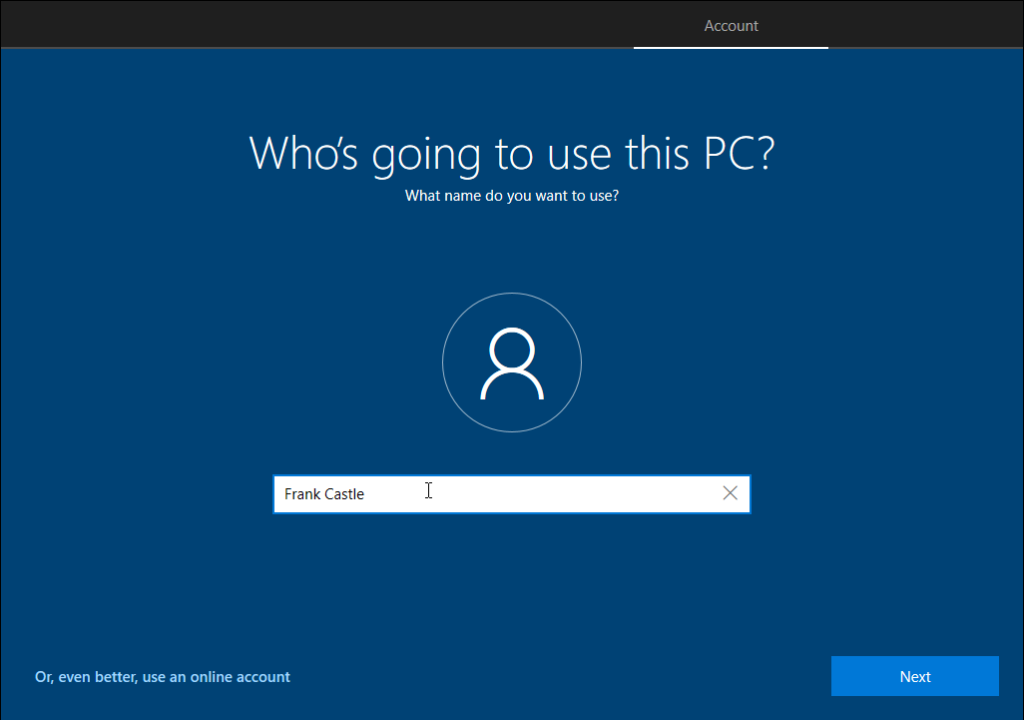
In the bottom, there’s a Domain join instead button which will enable to join this machine to the domain. Clicking on the button, the usual user prompt will ask for the username (I’m using Frank Castle)
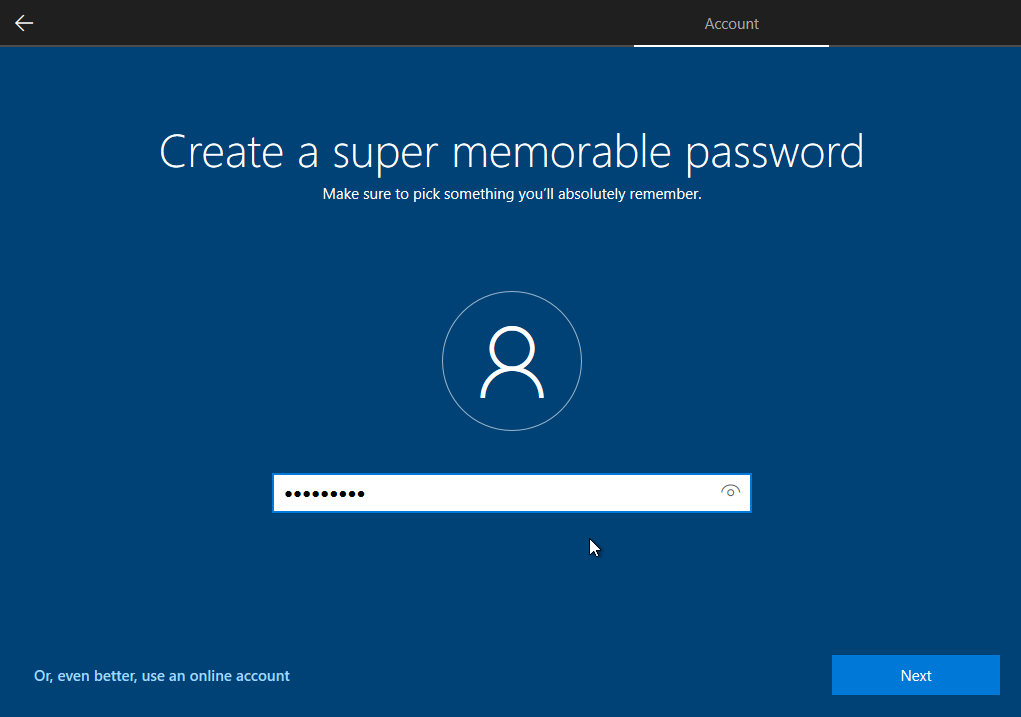
Following that, enter the password (I’m using P@$$w0rd1)
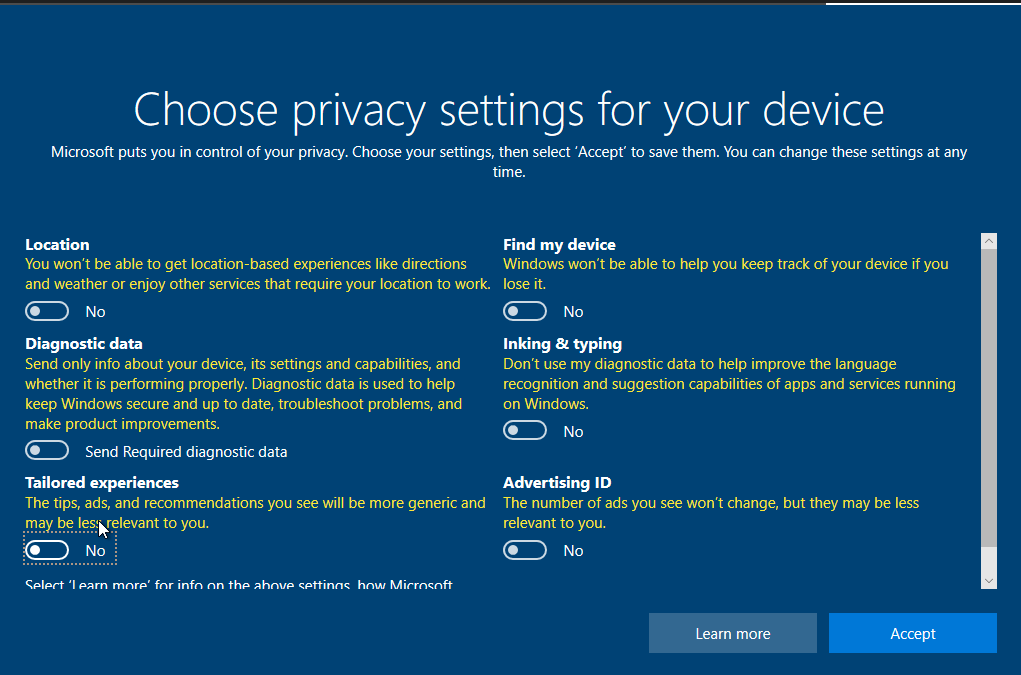
Also set some security questions and for privacy you can deselect all options (totally up to you)
Let the setup to finish. Now similar to the previous machine, install VMWare Tools and change the PC name (I’m using THEPUNISHER)
The machine will reboot.
Similar to this machine, create another machine.
I’m using the following information to setup the second machine
PC Name: SPIDERMAN
Username: Peter Parker
Password: P@$$w0rd2
Setting Up Users, Groups, and Policies
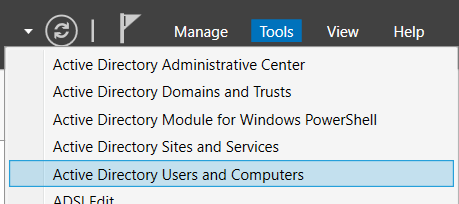
Having main things setup, we are ready to set the configurations and settings. Navigate to Server machine and in the Server Manager, click on Tools --> Active Directory Users and Computers
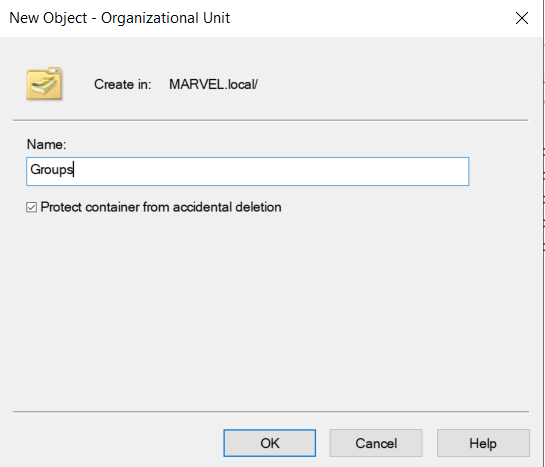
There you will see the domain MARVEL. Right click on it and create a new OU
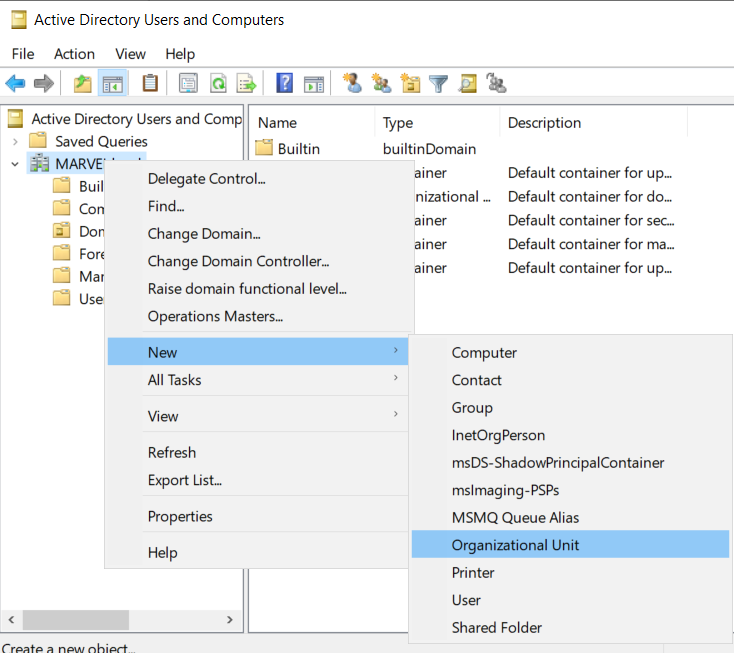
Name that OU as Groups to put all groups into it and proceed
Now, from the left navigation bar, click on Users and then select and drag all groups to the Group OU in the navigation bar
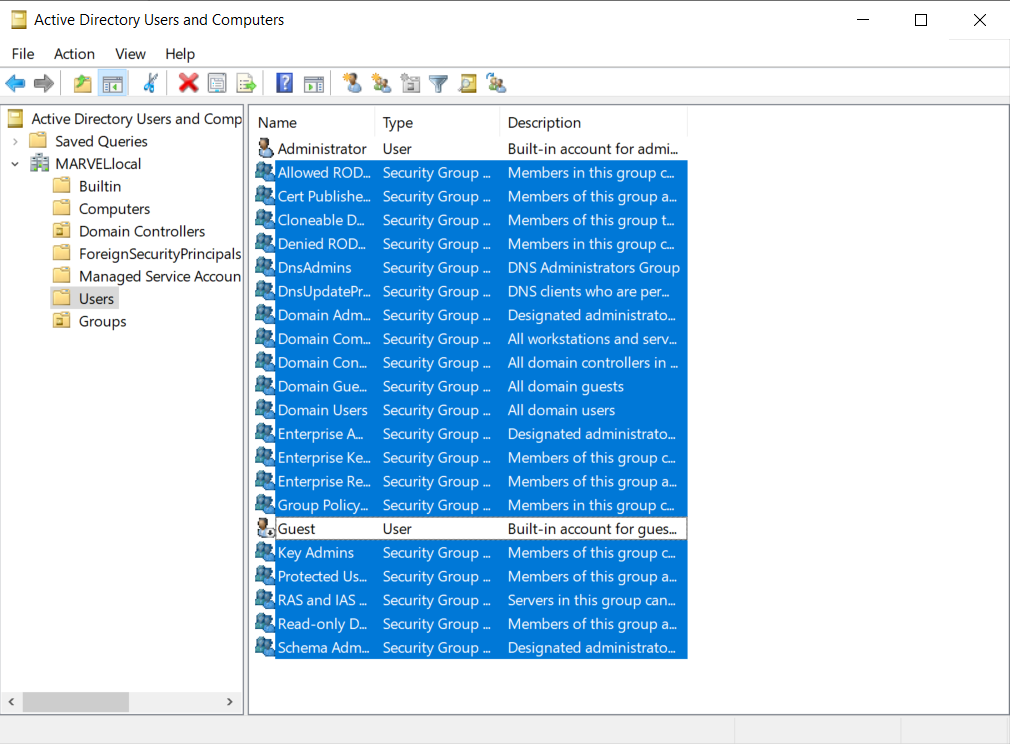
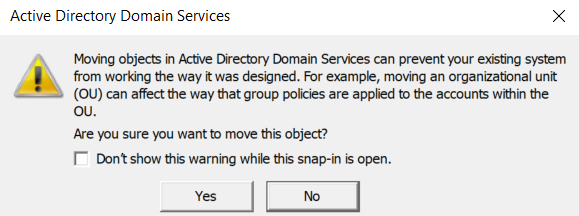
You will see a warning popup but click yes and proceed
This will leave the Users clean

Adding Users
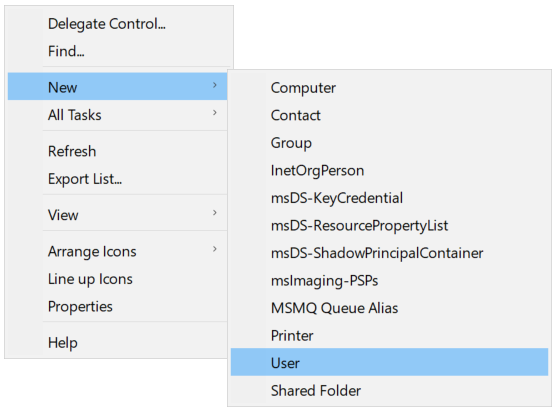
Now we need to add some more users. For this, right click and create new user
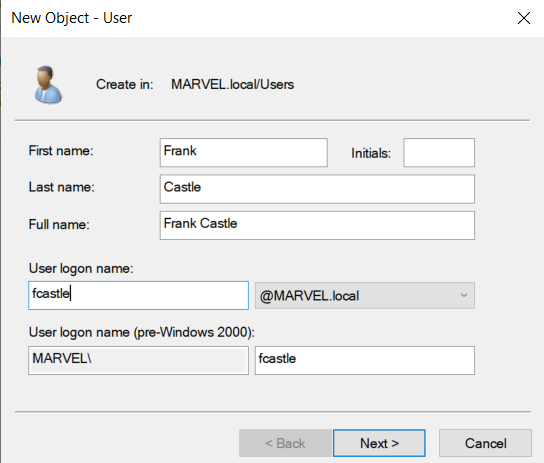
In the wizard, put the details. I’m using the details as of the machine users I created before. Also for the logon name I’m using first name initial and last name convention.
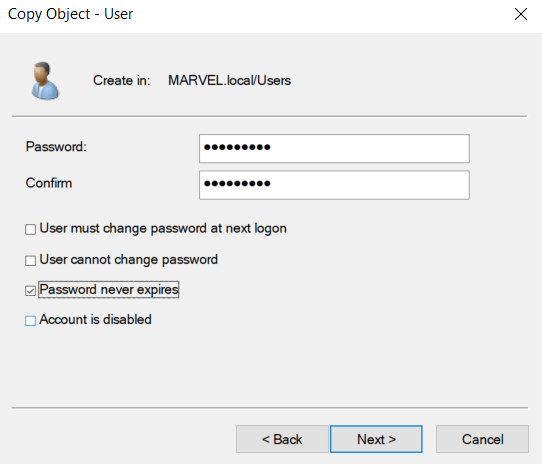
Next, enter the password for the domain user (I’m using the same password as of the machines). Make sure to uncheck all boxes except Password never expires
Upon next, you will see a summary of the user config
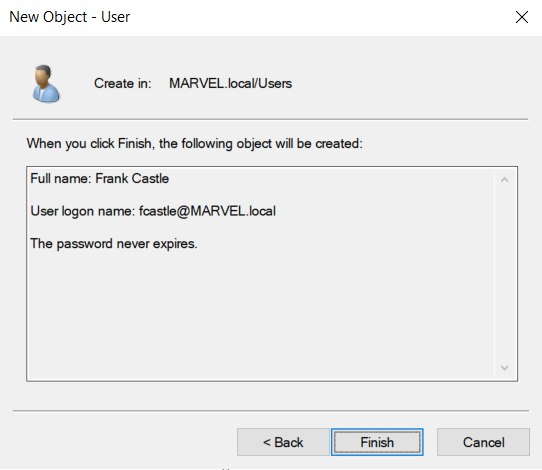
Click finish and the new user will be created.
To add one more normal user account, right click on the created user and click copy. Then enter the details similarly.
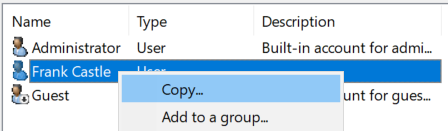
We also need 2 admin accounts. So copy the default Administrator account and create 2 accounts.
For your ease, following are the credentials I’m using for the setup.
User1
Name: Frank Castle
Logon: fcastle
Password: P@$$w0rd1
User2
Name: Peter Parker
Logon: pparker
Password: P@$$w0rd2
Admin User1
Name: Tony Stark
Logon: tstark
Password: P@$$w0rdadmin123!
Admin User2
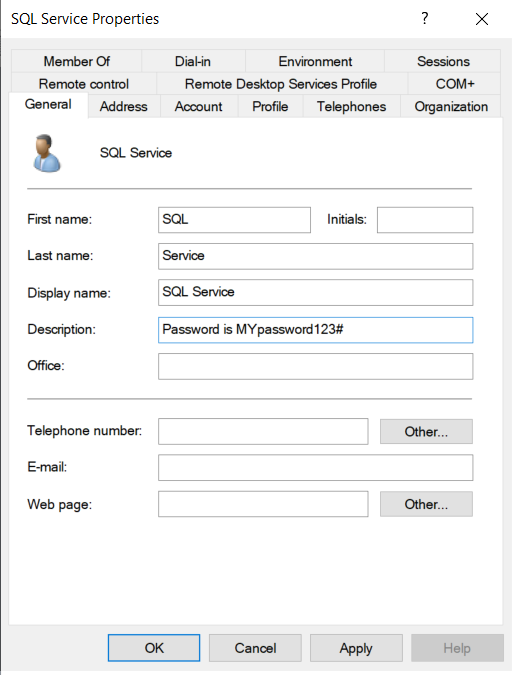
Name: SQL Service
Logon: SQLService
Password: MYpassword123#We created SQLService account to have a service account running as administrator (as a vulnerability). Also for this user, we put a description for the password (assuming the network admin would put something in description for later remembrance)
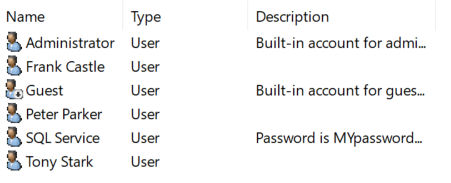
Following is the final list of users
Setting SPN
We will setup a SPN (Service Principal Name) as an attack vector for kerberoasting. As we have a SQLService, we will setup SPN for this service. For this, open cmd as admin and type in the following command (you can pick any port instead of 60111)
setspn -a HYDRA-DC/SQLService.MARVEL.local:60111 MARVEL\SQLService
To ensure that SPN is created, use the following command
setspn -T MARVEL.local -Q */*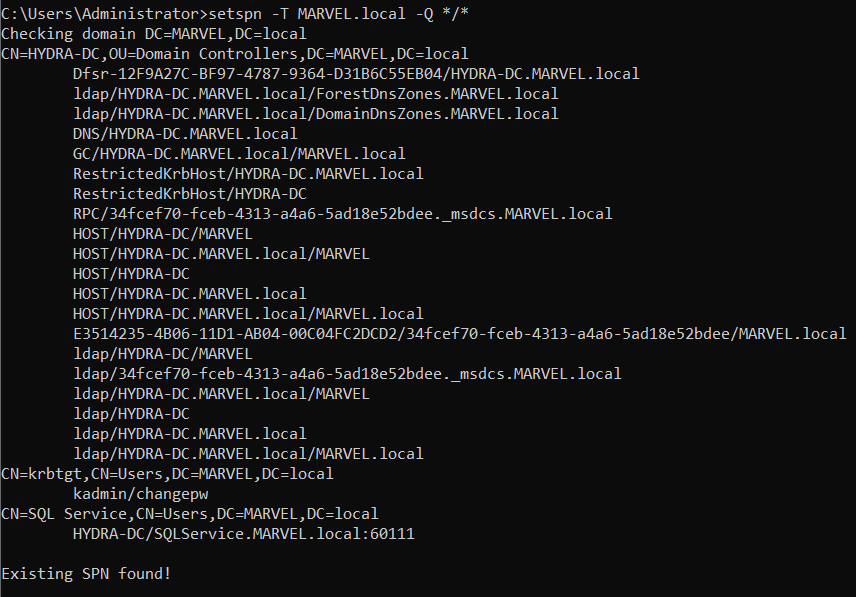
In the end, you can see the SPN is created for SQLService.
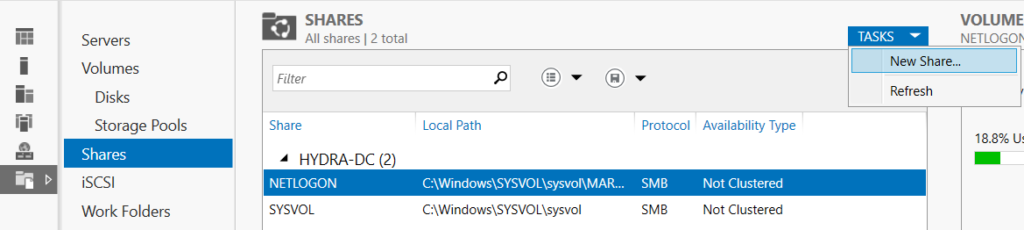
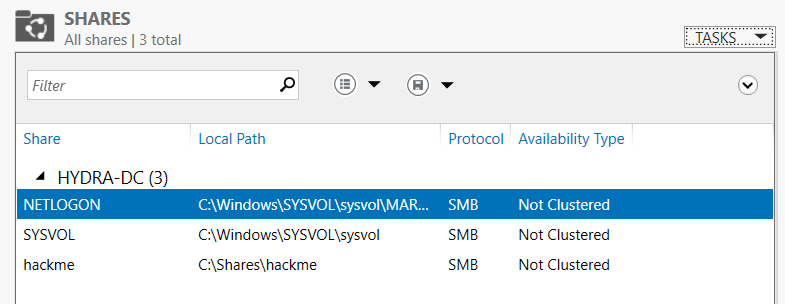
Setting Fileshare
For this, from the server manager, click on File and Storage Services

Next click on Shares and from dropdown, create a new task
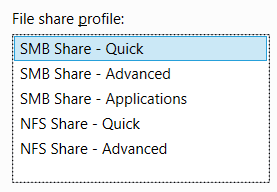
Make sure to choose SMB Share - Quick profile
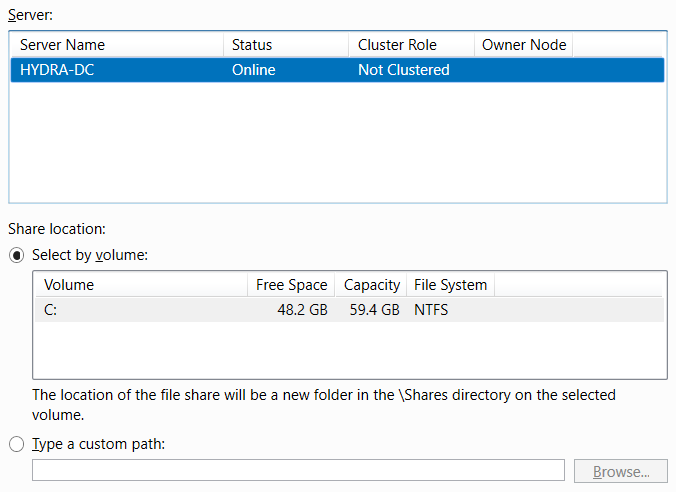
Leave the settings to be on default
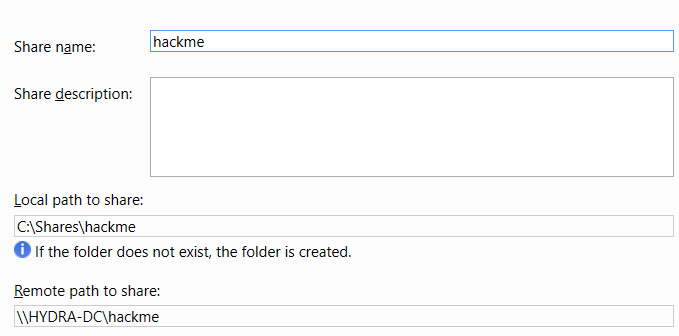
Next set a name for the share (I’m using hackme)
Finally, you will be able to see the share in the list
Setting Policy
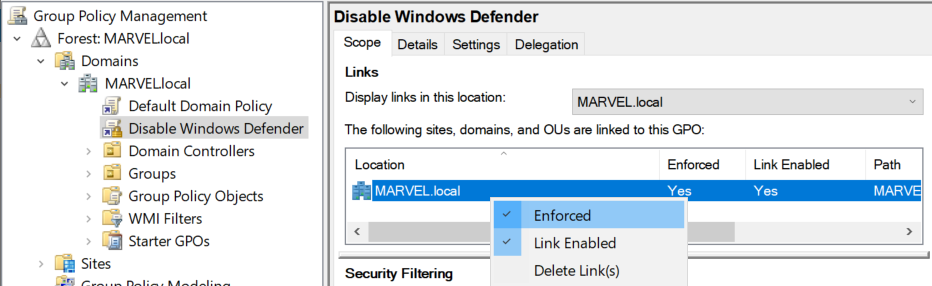
Now we need to set the policy for every machine that will be connected to the domain. For this, open Group Policy Manager from start. There you will see the domain. Right click on it and create a GPO
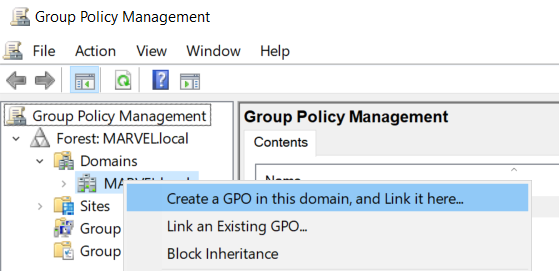
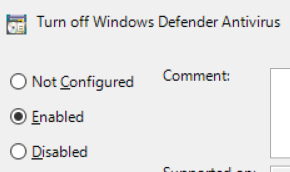
Name that GPO as Disable Windows Defender since we want all machines that connect to domain to have antivirus turned off.

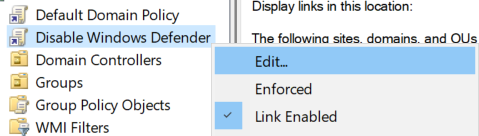
Next edit the created GPO to disable AV
In the wizard, go to Computer Configuration --> Policies --> Administrative Templates --> Windows Components --> Windows Defender Antivirus. There will be an option for Turn off Windows Defender Antivirus
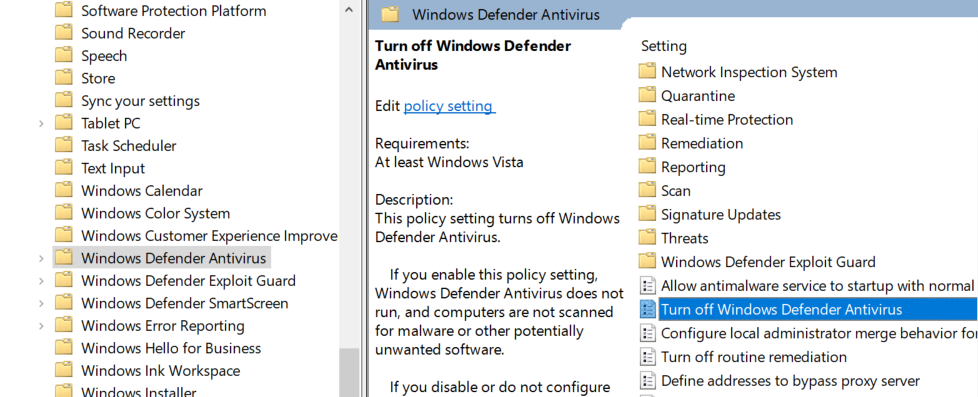
Double click on it and choose Enable and then apply.
Also, from the GPO settings, make sure to choose Enforced as follows
Join Machines to Domain
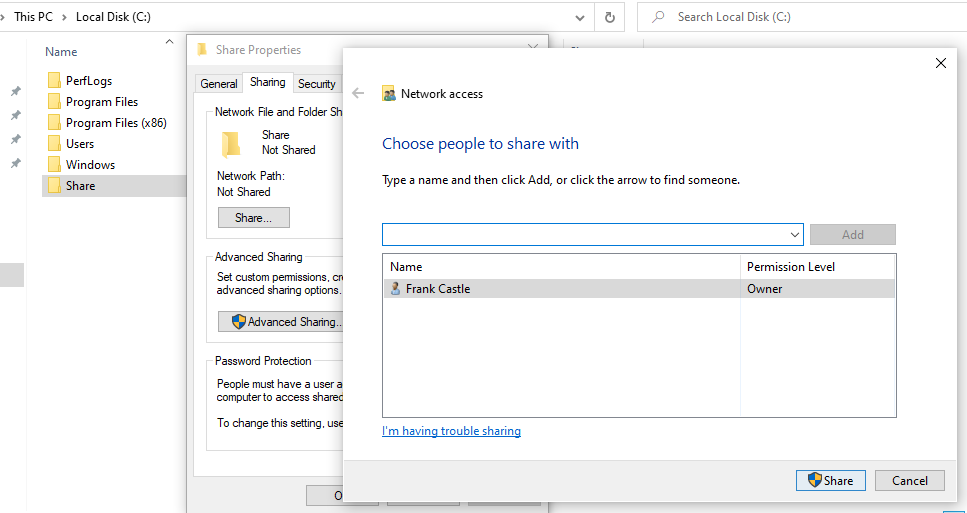
Setting Up Share
Navigate to one of the Enterprise machines and create a folder (named Share) to share in the C drive and share it
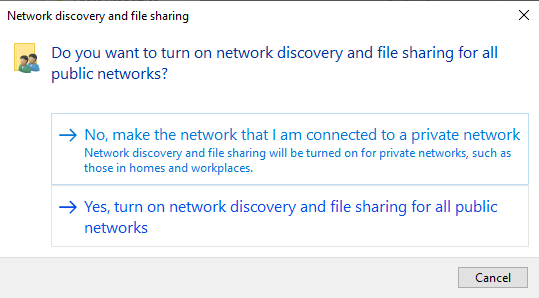
Upon sharing, it will ask for network discovery. Turn it on and click yes
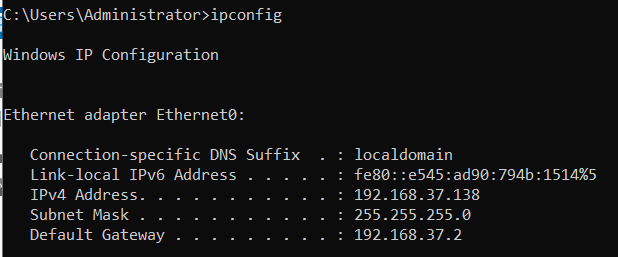
Setting Up DNS
Since we are connecting to the domain, we want to use domain as our DNS. For this, check the IP address of the Domain Server as follows
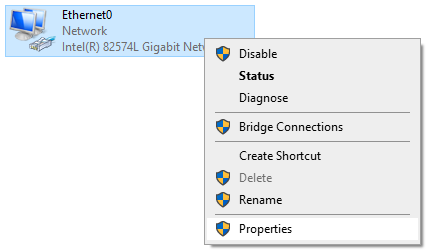
Next, go to adapter options and go to the properties of the connection
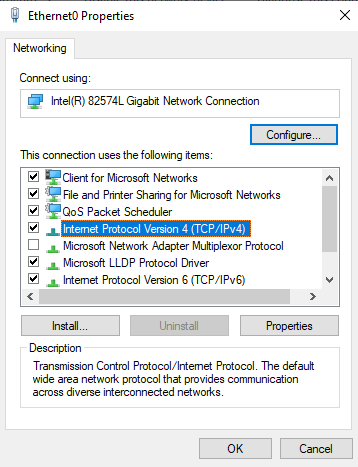
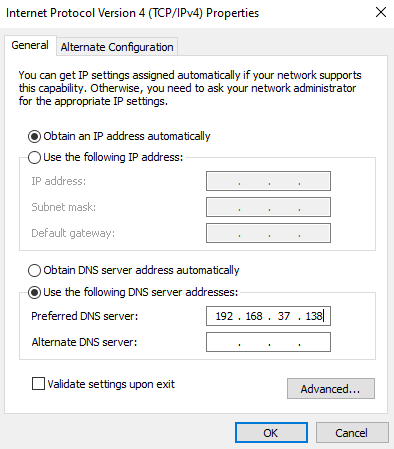
From the options double click IPv4 and just change the DNS radio button and enter the IP of Domain Server
Connecting to Domain
Finally, go to Access work or School from the start search menu and click Connect
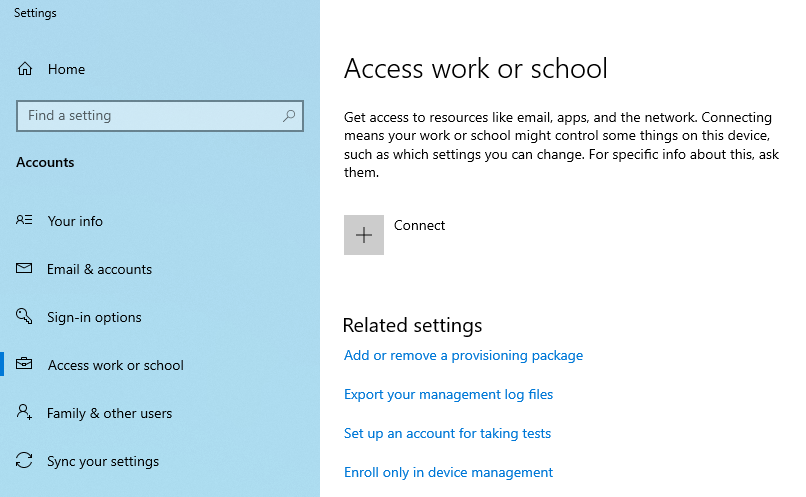
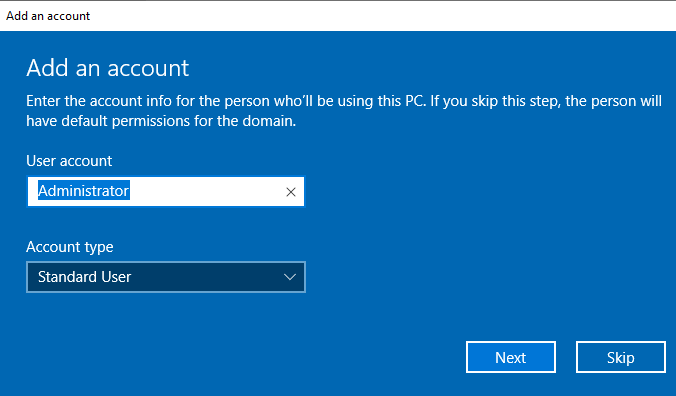
You will see a prompt to enter the account but at the bottom there is an option for connecting the device to local AD domain.
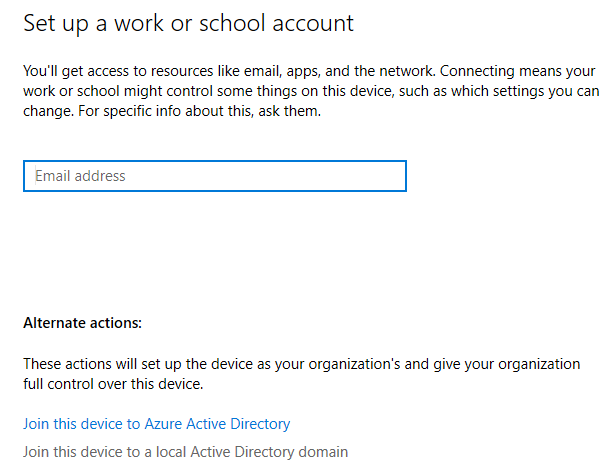
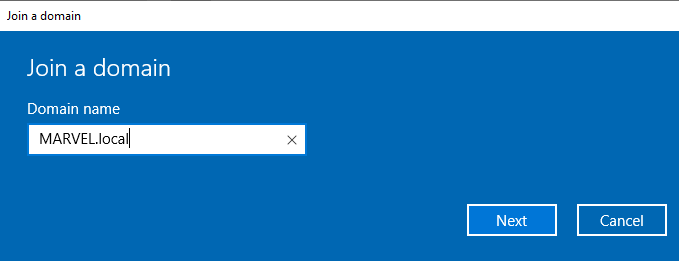
Next you will be asked to enter the domain name. Enter the domain name that was set previously and click next
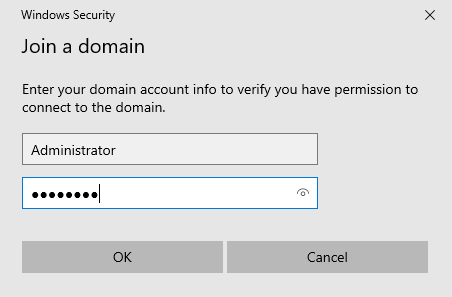
Next it will prompt to enter the admin credentials. Make sure to enter the domain admin credentials to connect to the domain.
In the end it will prompt for the user of machine, just skip it and the machine will reboot
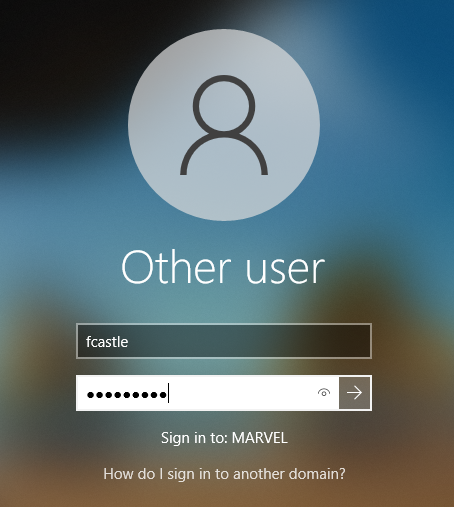
When the machine will reboot, you can login into the domain as the domain user as below
Giving Local Admin Privileges
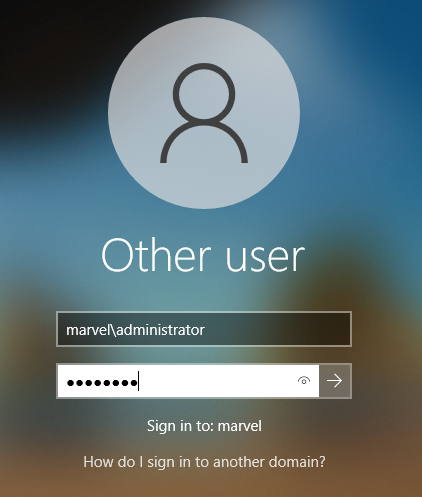
Now we will give the local admin privileges to the user over the machine. For this, signout of the current user from the machine and login again with the domain admin
After that, right click on start button and choose Computer Management
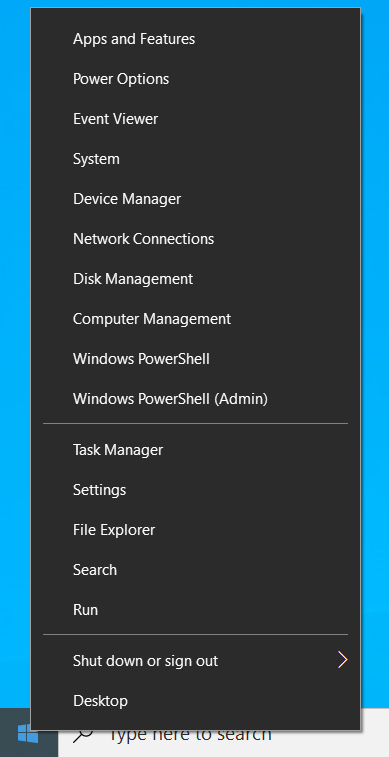
From there, go to Local Users and Groups --> Groups

Double click on Administrators and you can see the default accounts
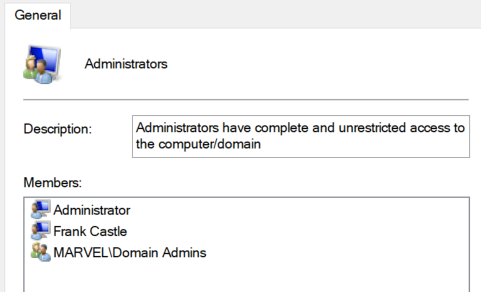
Add an entry and in the object name, you can just enter the logon name
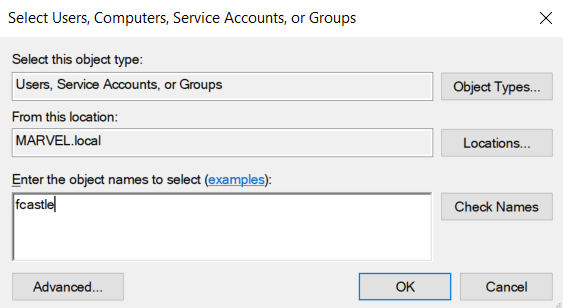
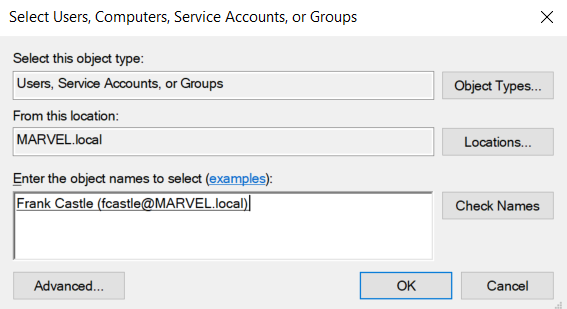
Click on Check Names and it will auto complete to the full domain name
Click on OK and then apply. The final list will be as follows
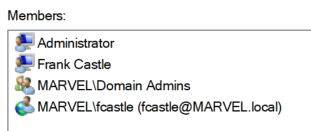
Repeat the same process for the other Enterprise machine to share a folder and giving local admin privileges but add fcastle as well in the list as administrator. So with this, we will have a user (fcastle) having admin privileges on 2 machines.

AD Lab Setup Complete
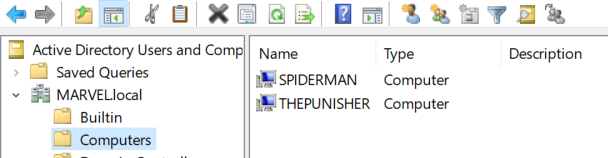
Finally, navigate back to the Server machine and open Active Directory Users and Computers. From there, expand the domain and click Computers. You will see the both machines connected to the domain.