

In the previous Database tutorial, we have set up a Database working environment. In this tutorial, we shall cover all the important commands (statements) that are used to manipulate a relational database. The standard language to interact with a relational database is called the Structured Query Language (SQL). Although there are multiple SQL formats in use by different Relational Database Management Systems (RDBMS’s), all versions support the following basic SQL commands to comply with the ANSI’s standardization requirements.
SQL Commands
- CREATE
- INSERT
- SELECT
- UPDATE
- DELETE
- ALTER
- DROP
The SQL commands in conjunction with other key terms constitute SQL statements. The SQL statements are passed to the RDBMS to perform the desired database functions, such as creating new tables, inserting data into tables, updating tables with new data, and modifying the tables either by editing or deleting the existing record. This article covers how to write these SQL statements in order to understand database manipulation techniques. Before going into details of each SQL statement, it is important to under the DATA-TYPE and CONSTRAINT parameters used in the statements.
DATA-TYPES
The data-type is the format of data that can be mentioned during the table creation statements. Some common data-types supported by SQL are listed below.
| Data Types | Examples |
| Numeric | INTEGER, DECIMAL, FLOAT, etc.) |
| String | TEXT, CHAR, VARCHAR, etc.) |
| Date/Time | DATE, TIME, YEAR, etc. |
| Binary | BINARY, VBINARY, IMAGE |
| Unicode String | NCHAR, NVARCHAR, NTEXT, etc.) |
| Other | XML, JSON, etc. |
CONSTRAINTS
The constraints are the set of rules that are applied to the data-types. If the data to be inserted does not adhere to the defined constraints, it does not appear in the database. Some important constraints are listed below.
| Constraint | Explanation |
| PRIMARY KEY | The identifier id for each row automatically assigned by the database |
| UNIQUE | Any duplicate value for the specified column shall be ignored |
| NOT NULL | Some value must be provided for the specified column |
| DEFAULT | The default value shall be added if no value is assigned to the column |
(1): CREATE (TABLE) STATEMENT
The CREATE TABLE statement is used to create a new table in the database. The following syntax is used to create a new table in the database.
SYNTAX:
CREATE TABLE <table name> (
  <column-1>  <data-type> ,
  <column-2>  <data-type> ,
  <column-3>  <data-type> ,
.
.
<column-n>  <data-type>
);
CREATE TABLE =Basic SQL command to create a new table in the database. Although it is not case sensitive, writing the CREATE TABLE command in the upper case is a good practice.
<table name> = Name of the table to be created in the database.
<data-type> = The type of data that should appear under the respective column.
EXAMPLE:
To demonstrate the SQL statements, we have created a new database file called tutorials.db using the SQLite Studio editor.
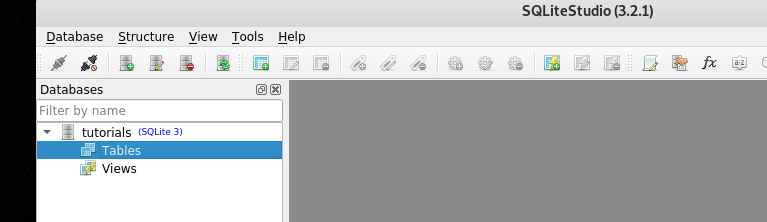
Let’s create a new table called hackingloops with id, course, duration, and subscription columns (attributes) using the aforementioned CREATE TABLE syntax.
STATEMENT:
CREATE TABLE hackingloops (
id INTEGER,
course TEXT,
duration TEXT,
subscription TEXT
);
OUTPUT:

(2): INSERT INTO STATEMENT
The output results in the above screenshot show the table with the desired columns but without any values. In order to add values to each column, we need to follow the following INSERT INTO syntax.
SYNTAX:
INSERT INTO <table name> (column-1 name, column-2 name,. ., column-n name)
VALUES (value-1, value-2, value-3, ……………….……………………………, value-n);
The values inserted into the table using the above command appears in the subsequent rows.
EXAMPLE:
Let’s assume we want to insert the following values in the hackingloops table columns.
{id = 1, course = ethical hacking, duration = 5 weeks, subscription = free}
We can do this using the following INSERT INTO statement.
STATEMENT:
INSERT INTO hackingloops (id, course, duration, subscription)
VALUES (1, 'ethical hacking', '5 weeks', 'free');
OUTPUT:
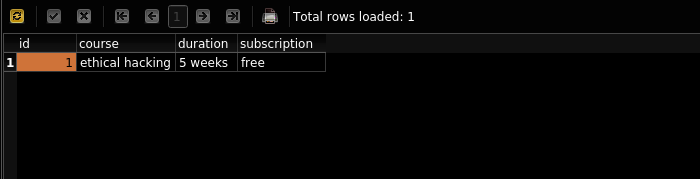
As we can see in the above screenshot, the desired data is added, creating the first row of the table. We can repeat the process to add as many rows as we desire. We have created a table with five rows using the following additional data.
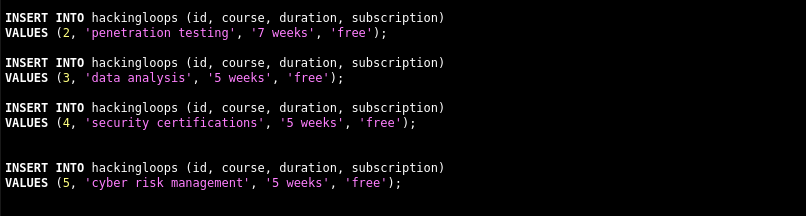
The data appears in the table in the following format.

(3): SELECT STATEMENT
The SELECT statement is used to fetch the results from tables. The statement can be used to fetch all or specific data based on provided attributes.
SYNTAX:
The following syntax is used to fetch the complete table.
SELECT * FROM <table name>
We can define the attributes name to display data from specific columns using the following format.
SELECT <column-1, column-2,…column-n> FROM <table name>
EXAMPLES:
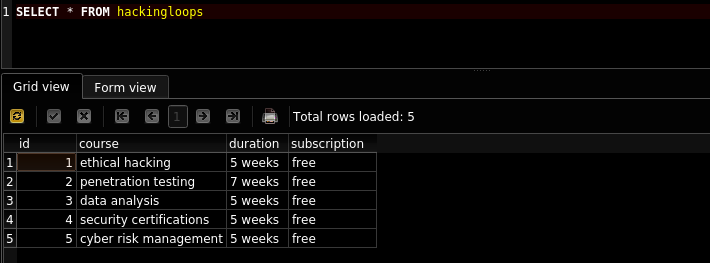
1) To select the whole table.
SELECT * FROM hackingloops
OUTPUT:
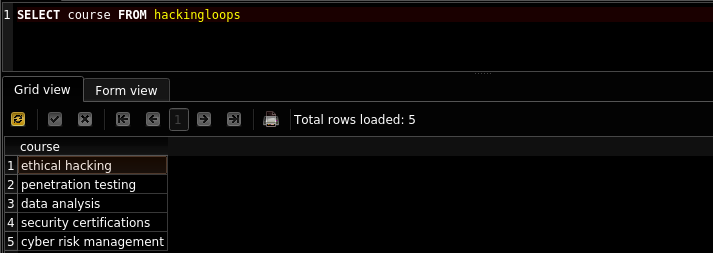
2) To select a single column
SELECT course FROM hackingloops
OUTPUT:
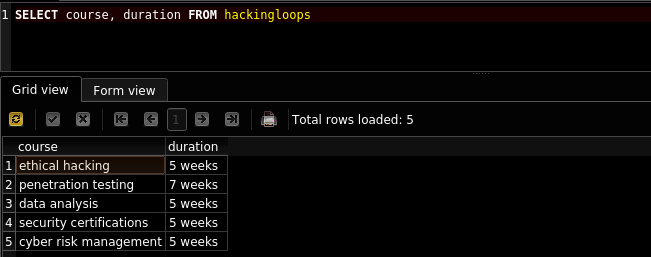
3) To select more than one column.
SELECT course, duration FROM hackingloops
OUTPUT:
(4) ALTER STATEMENT
The ALTER statement is used to update the database by adding new columns to the existing tables.
SYNTAX:
ALTER TABLE <table name>
ADD COLUMN <new column name>;
EXAMPLE:
Let’s assume we want to add a new column called commencement to the existing hackingloops table. We can achieve this by defining the following statement.
STATEMENT:
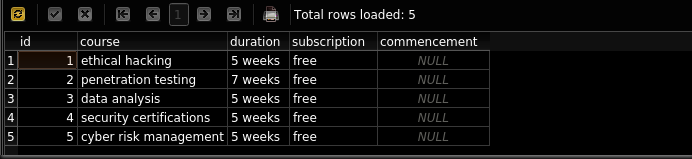
ALTER TABLE hackingloops
ADD COLUMN commencement;
OUTPUT:
(5) UPDATE STATEMENT
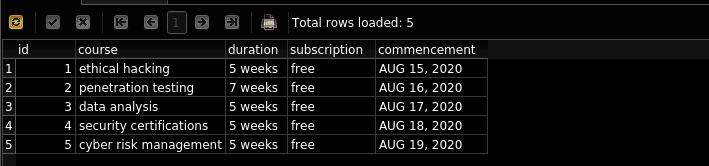
The table from the ALTER statement shows the new column with NULL entries. The UPDATE statement can be used to add data to the new table columns.
SYNTAX:
The UPDATE statement requires two columns. The first column indicates the column name with desired data; the second <reference> column pinpoints the row where we want to insert the data.
UPDATE TABLE <table name>
SET <column name> = “some value”
WHERE <reference column name> = <reference column value>;
EXAMPLE:
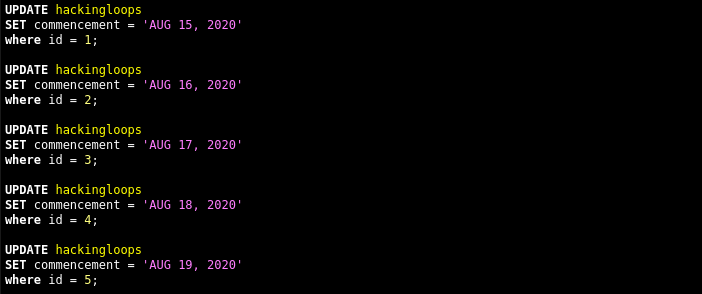
Let’s suppose we want to add a commencement date to the first row. We can do this using the following statement.
STATEMENT:
UPDATE table hackingloops
SET commencement = 'AUG 15, 2020'
WHERE id = 1;
OUTPUT:
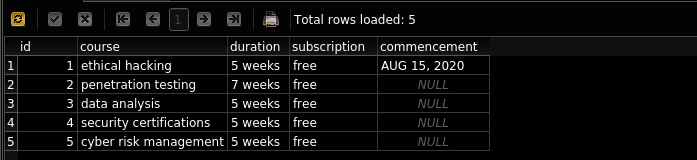
We can repeat the above statement for all rows.
(6) DELETE STATEMENT
The DELETE statement can be used to delete a specific row from the table. A reference column name and value is required to identify the row to be deleted.
SYNTAX:
DELETE FROM <table name>
WHERE <column name> IS “column value”;
EXAMPLE:
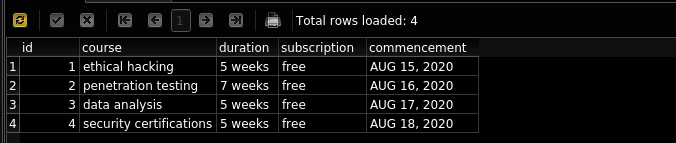
We can delete the row containing the ‘cyber risk management’ course in the table.
STATEMENT:
DELETE FROM hackingloops
WHERE course = 'cyber risk management';
OUTPUT:
(7) DROP TABLE
We can delete the whole table from the database using the DROP TABLE statement.
SYNTAX:
DROP TABLE <table name here>
(8) CREATE (TABLE) with CONSTRAINTS
We can use the CREATE TABLE statement with constraints to pre-define the rules for data-types.
SYNTAX:
CREATE TABLE <table name> (
  <column-1>  <data-type> <constraint>,
  <column-2>  <data-type> <constraint>,
  <column-3>  <data-type> <constraint>,
.
.
<column-n>    <data-type> <constraint>
);
EXAMPLE:
To demonstrate the constraint usage, we have created a new table called hackingloops_special using the following constraint rules.
STATEMENT:
CREATE TABLE hackingloops_special (
id INTEGER PRIMARY KEY,
course TEXT UNIQUE,
duration TEXT NOT NULL,
subscription TEXT DEFAULT 'free',
commencement TEXT NOT NULL
);
To test the constraints, we have used the following INSERT statements.
INSERT INTO hackingloops_special (course, duration, commencement)
VALUES ('wifi security', '2 weeks', 'AUG 22,2020');
INSERT INTO hackingloops_special (course, duration, subscription, commencement)
VALUES ('wifi security', '3 weeks', 'paid', 'AUG 22,2020');
INSERT INTO hackingloops_special (course, duration, subscription, commencement)
VALUES ('network security', '4 weeks', 'paid', 'AUG 22,2020');
OUTPUT:

The database automatically assigns PRIMARY Key ids to each row in the table. Since we have mentioned the UNIQUE constraint for the course column, the table ignores the duplicate ‘wifi security’ course. Similarly, the table utilizes the default ‘free’ text in the subscription column in the absence of no subscription text mentioned in the INSERT statements.
Conclusion
In this tutorial, we have learned the basic commands to manipulate the database by adding, modifying, and delete the data. In the next article, we shall cover the important database queries from the Cybersecurity perspective.