
Flashlight is a network scanning tool that can automate the information discovery process using different scanning techniques. The tool is capable of performing the following information-gathering tasks.
1) Active Scanning
2) Passing Scanning
3) Screen Scanning
4) Data Filtering
The active scanning process involves the use of NMAP script to probe the network. Flashlight directory contains a configuration file (flashlight.yaml) that contains information about TCP and UPD ports used for communication during active scanning process. We can edit the file to redefine these ports. In the passive scanning process, no packets are sent over the network. Flashlight sniffs the network packets to perform the analysis. Screen scanning is another feature of Flashlight that enables the users to capture the screenshots of target websites and applications. The packet captured (pcap) files generated during the scanning process contain data in a complex format. Flashlight data filtration feature can filter pcap file data to present data into different categories, such as IP addresses, ports, hosts, and DNS information.
Flashlight Installation
Flashlight requires nmap, tshark, tcpdump, dsniff, and phantomjs packages to operate. nmap, tshark, tcpdump, dsniff can be installed using the following command.
apt-get install nmap tshark tcpdump dsniff

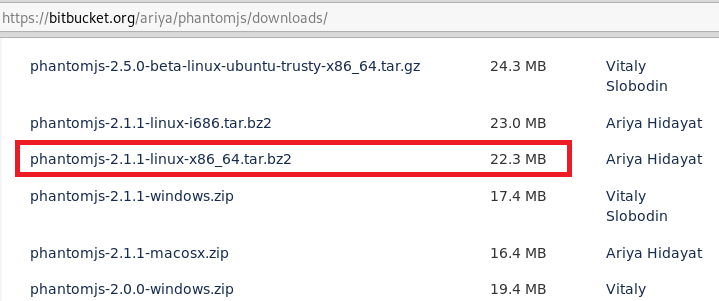
The phantomjs package can be downloaded from bitbucket.org/ariya/phantomjs/downloads link. The link contains different phantomjs versions for different operating systems. In our case, it is phantomjs-2.1.1-linux-x86_64.tar.bz2.
Before extracting Phantomjs, run the following commands to install Phantomjs prerequisites.
sudo apt-get install build-essential chrpath libssl-dev libxft-dev
sudo apt-get install libfreetype6 libfreetype6-dev libfontconfig1 libfontconfig1-dev
In the next step, extract the Phantom.js file from the downloaded package and place it in /usr/local/bin path. The downloaded package also contains rasterize.js file. Add this file to the same /usr/local/bin directory as this file shall be required during the screen scanning step.
Once all the above requirements are fulfilled, clone Flashlight using the following command.
git clone https://github.com/galkan/flashlight.git

How Flashlight Works
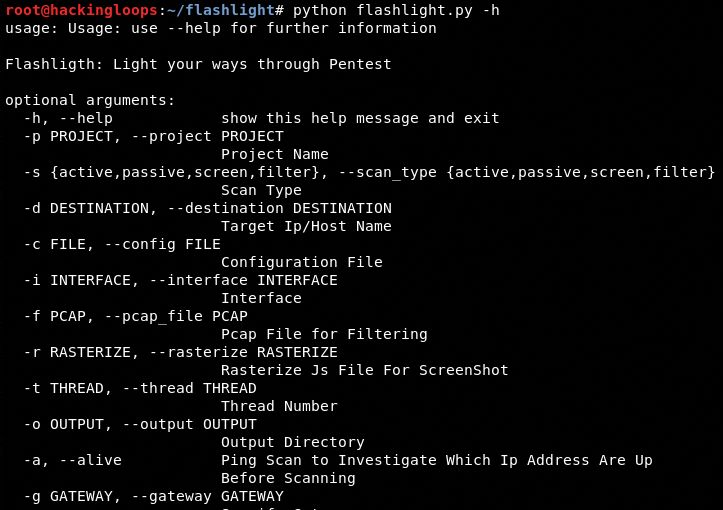
Navigate to Flashlight directory and run the help command to view all the arguments that can be used to accomplish the scanning processes.
python flashlight.py –h
As mentioned above, Flashlight tool can perform passive scanning, active scanning, screen scanning, and data filtration tasks. A brief demonstration of these tasks is presented below.
Passive Scanning
Following is general command syntax for running Flashlight in passive mode.
./flashlight.py –s <scan type> -p <project name> -i <interface> -o <path to result file> -l <path to log file> -v <it is optional verbose mode>
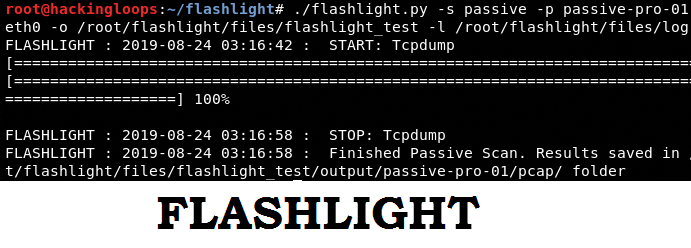
As a demonstration, consider the following example containing all the parameters and arguments.
./flashlight.py -s passive -p passive-pro-01 -i eth0 -o /root/flashlight/files/flashlight_test -l /root/flashlight/files/log –v
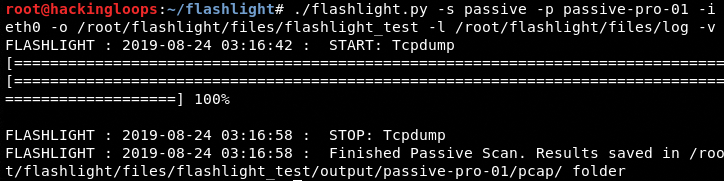
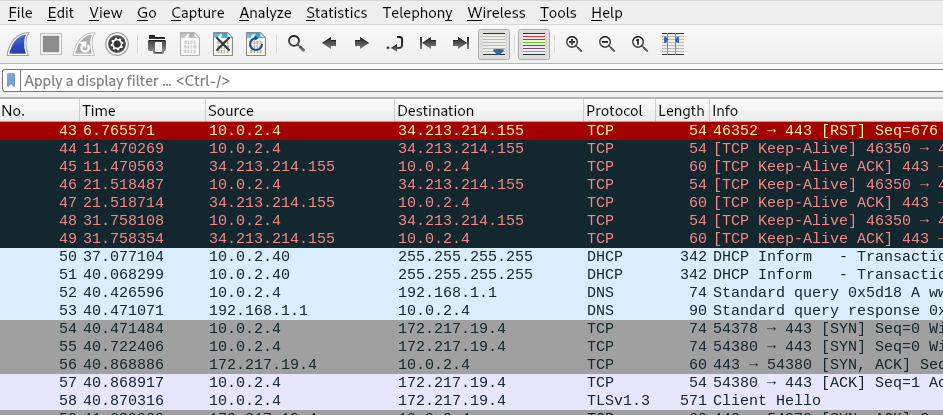
The above command sniffs the traffic for interface eth0, captures the results (packets) in a pcap file, and stores it at the defined location (/root/flashlight/files/). The content of pcap file can be analyzed using Wireshark tool.
We can also introduce man-in-the-middle-attack in the passive scanning mode using the following command.
./flashlight.py -s passive -p passive-project-02 -i eth0 -g 10.0.2.1-m -k 50 -v

Here –g represents the default gateway, -m represents man-in-the-middle-attack, and –k shows the passive timeout period.
Active Scanning
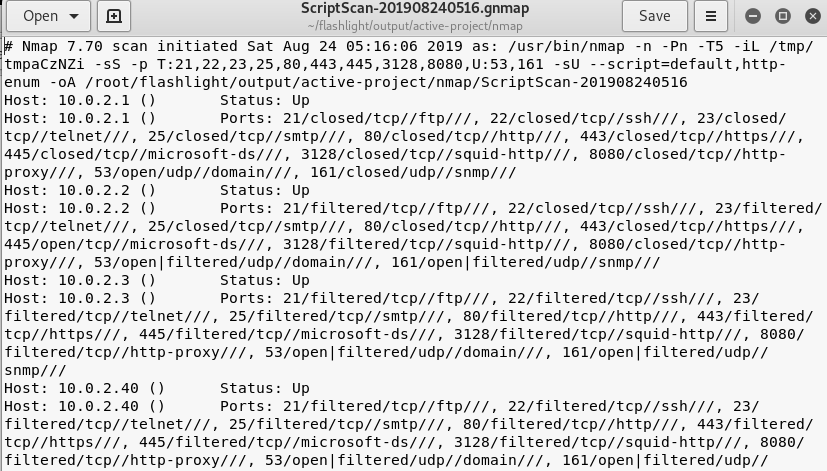
In the active scanning process, Flashlight uses the following command to ping a range of hosts in the target network.
./flashlight.py -p active-project -s active -d 10.0.2.0/24 –t 30 -a –v
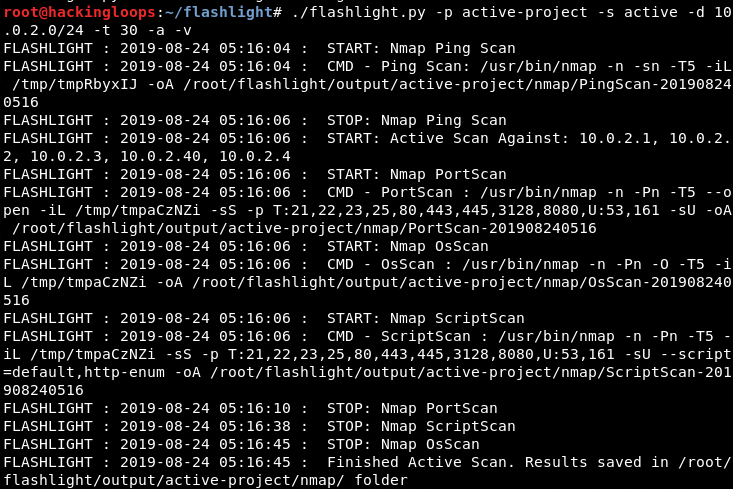
The –d argument in the command represents the target IP addresses, –t represents the number of threads, and –a represents the pining process for finding the live IP addresses in the target IP addresses. The output of the above command is 4 different types of information files shown in the following screenshots.
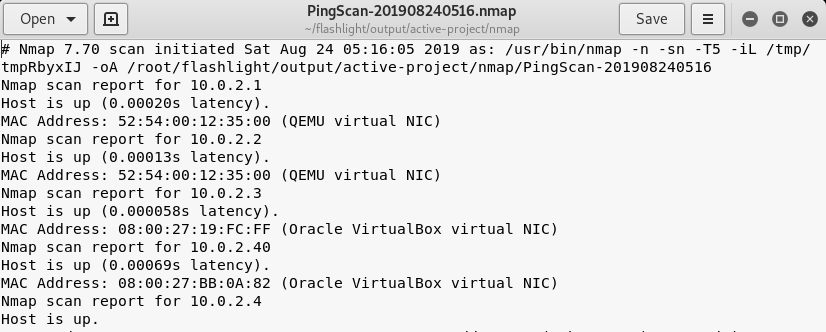
Ping scan results
Operating System (OS) scan results

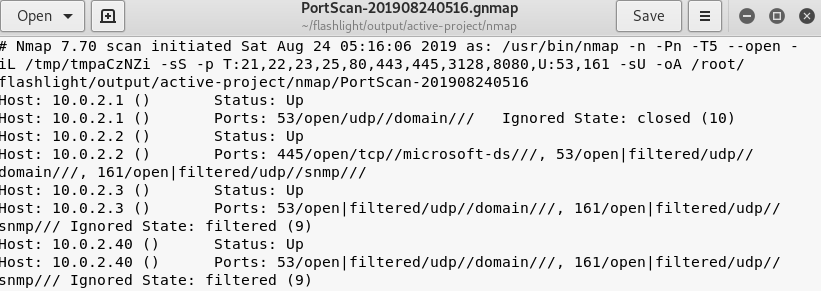
Ports scan information
Scripts scan
Screen Scan
Screen scan feature allows capturing the screenshot of target websites and applications using the following command.
./flashlight.py -p project -s screen -d <ip or range of ip addresses> -r /usr/local/rasterize.js -t 10 -v

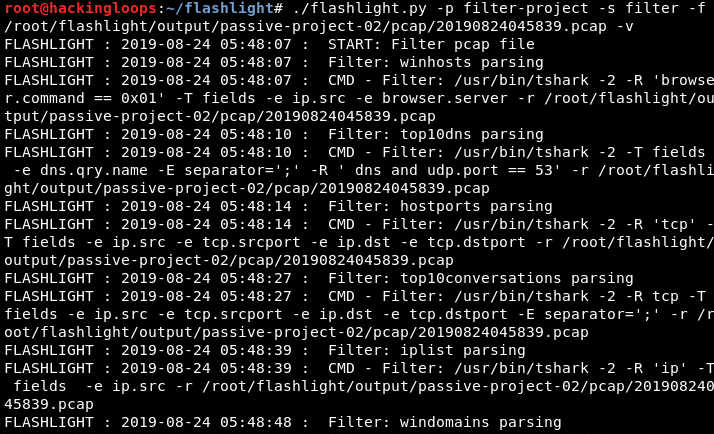
Data Filtration
Data filtration is one of the important features of Flashlight that allows filtering of data into different categories, such as top 10 IP addresses, DNS information, and top 10 conversations.
./flashlight.py -p filter-project -s filter -f <path to .pcap file> -v
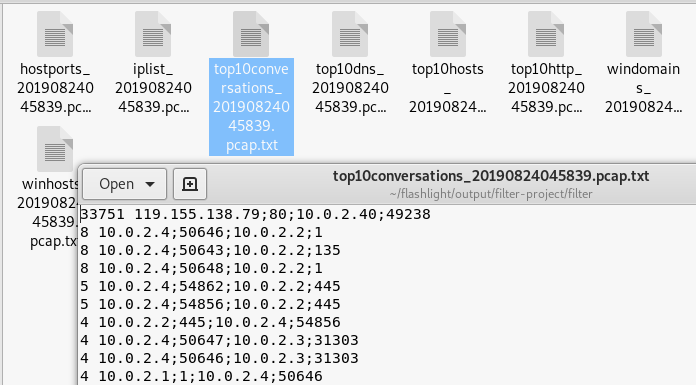
Top 10 Conversations
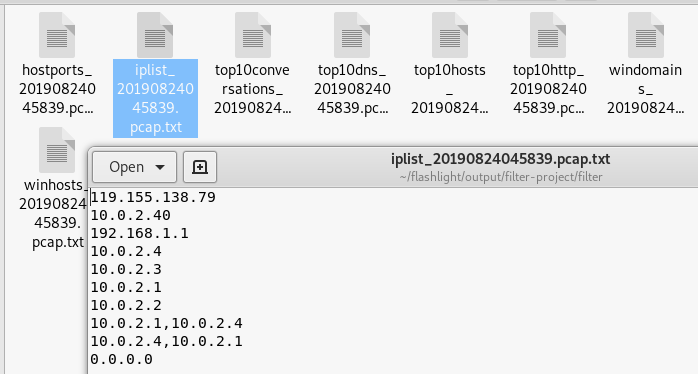
IPs Filtration
Summary
Flashlight can assist penetration testers during the network information gathering process. The data filtration feature can be very helpful in analyzing a specific type of data captured during the active or passive scanning.