

Many security experts believe that ethical hacking/penetration testing is incomplete without programming knowledge. They are of the view that Cybersecurity experts with programming knowledge can easily foil the vulnerable scripts even without using any tool. On the other hand, people with no programming expertise rely on the findings of automated security tools. Cybersecurity individuals with programming skills can even modify the tools/scripts to get customized results. On the other hand, people without these skills can only get the default results from the scanners. Therefore, learning programming languages like JavaScript is equally important for developers and Cybersecurity experts.
Where is JavaScript Used?
JavaScript is one of the fastest-growing programming languages widely used in front-end, back-end, and full-stack development projects. It is best known as a client-side scripting language that can make web pages interactive and dynamic with a little piece of JavaScript codes. Apart from enhancing the web pages functionalities, JavaScript can be used in full-stack web applications, mobile applications, network applications, gaming, and many other projects. There are a number of javascript libraries and frameworks available online to help developers. JQuery, ReactJS, NodeJS, AngularJS, and Slick are a few examples of the popular JavaScript libraries/frameworks widely used in development projects.
JavaScript Can Lead to Cyber Attacks
The use of JavaScript in development projects also expands the attack vector for cybercriminals, making the security personnel job tougher. A little misconfiguration or loophole can lead to many security problems including the well-known Cross-Site Scripting, Injection, Session Hijacking, and Cross-Site Request Forgery attacks.
Getting Started With JavaScript
Many novice penetration testers mix JavaScript with Java. In reality, Java and JavaScript are two different programming languages. This article explains how to get started with JavaScript as a newbie penetration tester. The first and most important requirement for getting started with JavaScript is having essential tools/environments to get acquainted with the language. Once we have the proper environment, we can run the JavaScript codes. The following section of the article shows how to install a JavaScript environment and running a few example scripts to demonstrate the working of the tools.
How to Setup JavaScript Environment
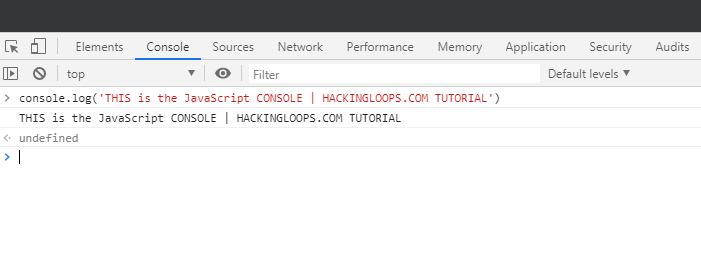
JavaScript environment is the engine where we can run/test our code. There are two options available for running the JavaScript codes. The first method involves web browsers like Firefox and Chrome with built-in JavaScript engines providing runtime environment to test JavaScript codes. We can use the browsers’ integrated console box for writing the JavaScript codes. Right-click on the display window of your web browser and look for the console tab. In the console box, we can type any JavaScript command. To demonstrate the working, we have used the built-in console.log() JavaScript function to display the dummy text as shown in the following screenshot.
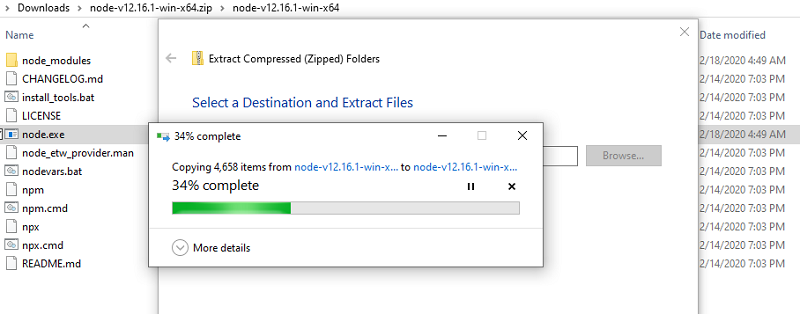
The second more practical method for running JavaScript codes is the Node.JS program. Node.JS is a runtime environment that combines the features of web browsers engines to run JavaScript codes. The program can be downloaded from nodejs.org repository.
1) Open nodejs.org website and navigate to the download section.
2) Select the appropriate version of the Node.JS program according to your operating system specifications. If you have selected the ZIP package, extract and execute the node.exe file to complete the installation process.
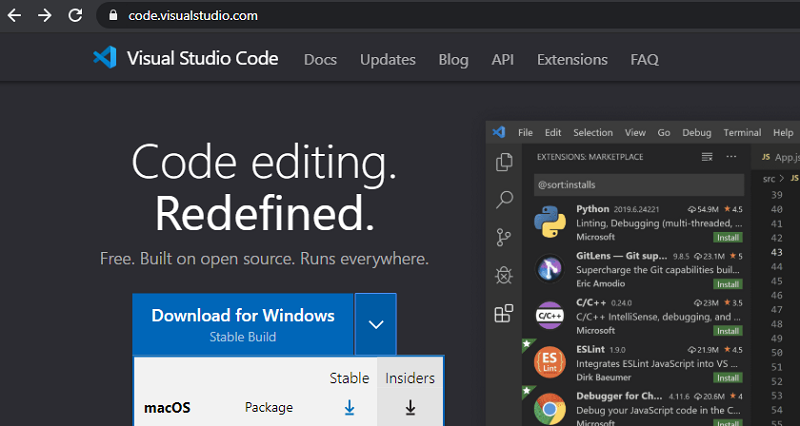
3) We also require an editor to write the JavaScript codes. There are many editors available but the Visual Studio is considered more appropriate since it has a lot of interesting features/extensions.
To install the Visual Studio Editor, visit the code.visualstudio.com link and down the installation file according to your OS specifications.
Once the executable/setup file is downloaded, run it and follow the setup wizard to complete the installation process. After the installation is completed, a welcome window pops-up on the screen as shown below.
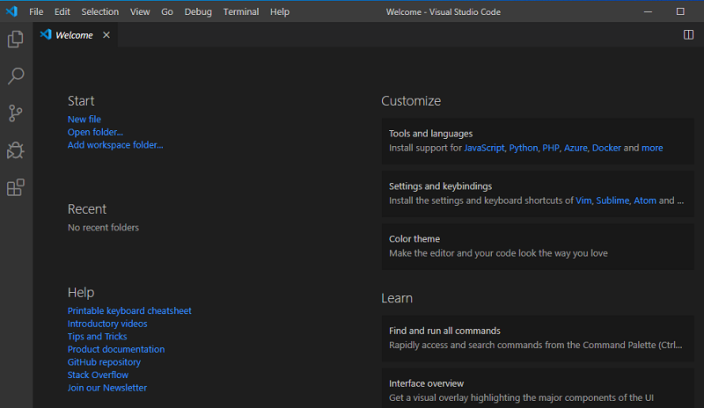
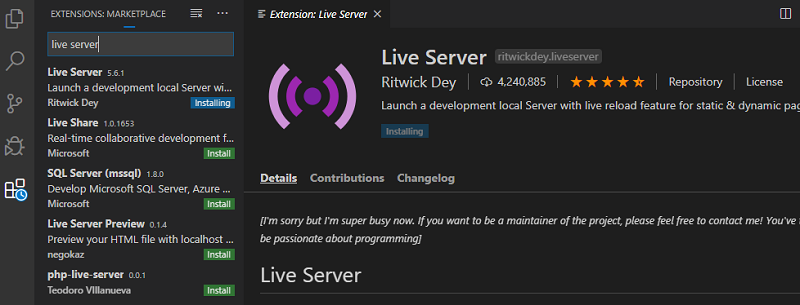
The left panel of the window contains options like folder, search, source code, run & debug, and extensions. Click on the extensions tab to install the necessary extensions. For example, we can install the live server extension, a useful utility to test JavaScripts codes live on a local server in real-time.
Writing the First JavaScript Code
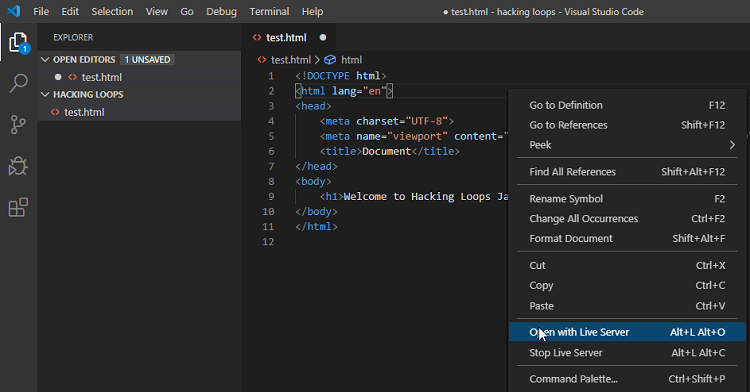
To write our first JavaScript code, we need to create a folder and a file with the desired extension. For demonstration purposes, we have created a folder called Hacking Loops and a file named as test.html. This is an empty HTML file. In the file editor, type the ‘!’ mark and press the TAB button to have some basic dummy HTML code. In order to test that everything is in working order, we add some text (H1 tag) in the body section of the document and see the response of the live server.
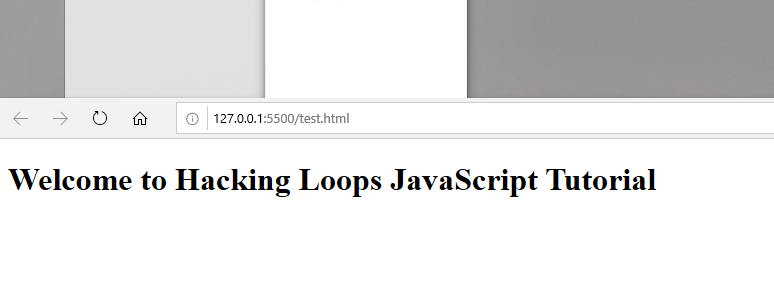
The live server successfully opens the document showing the input text on the screen. Hence, we can proceed with the JavaScript code.
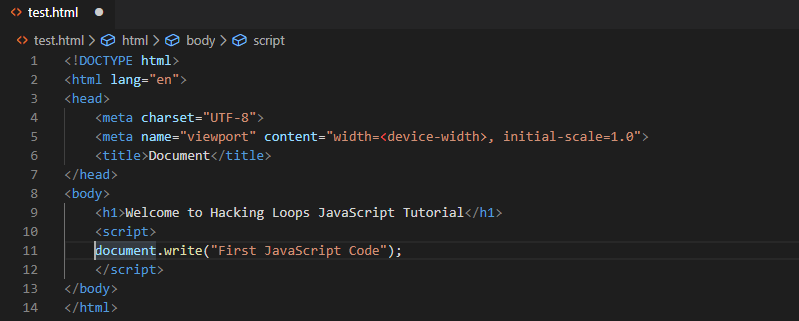
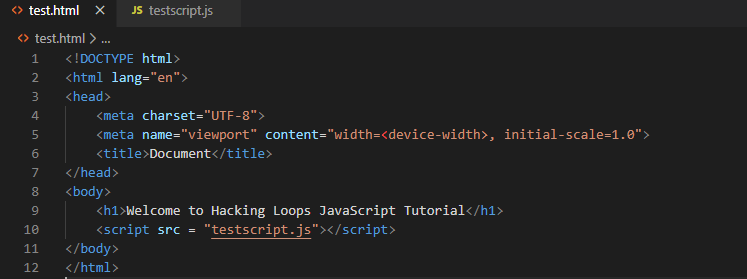
In order to write the JavaScript code, we need to insert the <script> element in the document. The <script> element can be added in the <head> or <body> section depending on the code objectives. In many cases, the preferred location is the <body> section of the document. We can either write the JavaScript code within <script> element tags or we can create a separate JS file and declare its path in the tags. The following screenshot demonstrates our first JavaScript code written in the same test.html document.
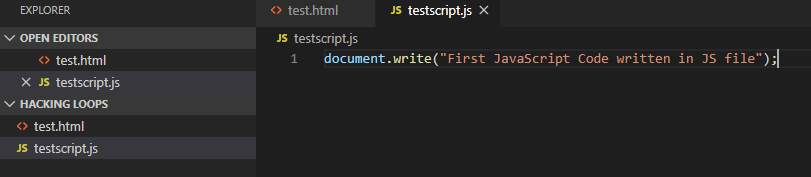
In order to write the JavaScript codes in a separate file, we need to create a JS file. Let’s call it testscript.js. We can write the JavaScript code here and refer the file in <script> elements in the HTML document in the following manner.
This is how newbies can set up a JavaScript learning environment to learn and test their JavaScript programming skills. There are some great online resources (like w3schools) available to get familiar with JavaScript syntax and command structure. Since the actual goal of learning JavaScript is to transform the JavaScript knowledge into penetration testing capabilities, the next step should be finding JavaScript vulnerabilities in demo applications. Node Goat by OWASP is one such project that helps penetration testers in utilizing their JavaScript knowledge in finding the most trending JavaScript vulnerabilities in web applications. Penetration testers can simply visit the http://nodegoat.herokuapp.com/ link to utilize their JavaScript programming skills to hunt the JavaScript vulnerabilities.
Once the penetration testers are able to solve the demo projects and CTF challenges, they can take on the real projects to hunt and report JavaScript vulnerabilities.