

This NetExec Cheat Sheet introduced a network security tool that helps you test the safety of Windows networks. It has become very popular among people who do security testing because it can do many different tasks. This tool can find information about computers on a network, test passwords, run commands on remote machines, and help you understand how a network is set up.
This guide will teach you how to use NetExec from the beginning to more advanced tasks. All commands shown here can be run from your Linux virtual machine.
What is NetExec and Why Use It?
NetExec started as a new version of an older tool called CrackMapExec. When the old tool stopped getting updates, a group of developers decided to make a new one with more features and better performance. They called it NetExec. The main jobs NetExec can do include:
- Finding what computers are on a network and what services they run
- Testing if passwords work on multiple computers at once
- Running commands on remote Windows machines
- Getting password data from Windows computers
- Moving from one computer to another on a network
NetExec works with many different Windows services including file sharing (SMB), user directories (LDAP), remote management (WinRM), and databases (MSSQL).
How to Install NetExec on Linux
Since we are using Linux, we can have several ways to install NetExec. Let us show you a method in detail and an overview of a few others. See linux commands cheat sheet for additional help with linux if you need it.
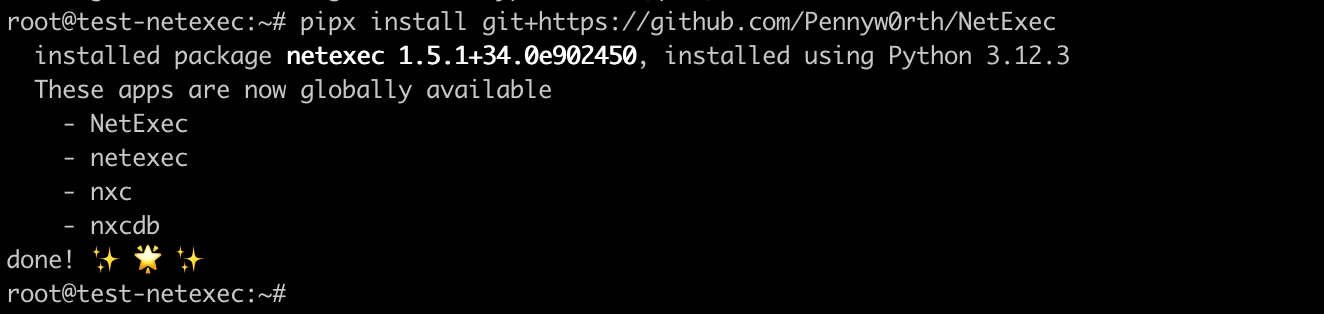
NetExec Cheat Sheet Install Method 1: Install Using pipx
If you use Kali Linux or another Debian-based system, this is the simplest way. Open the terminal and run below commands
Then

And then
After this, do not forget to install GCC compiler before running the next command. The Python package arc4 (a dependency of NetExec) needs to compile C code, and without a compiler pip cannot build it.
Now we can finally run
The installation steps on the official page https://www.netexec.wiki/getting-started/installation/installation-on-unix do not show installation of gcc due to which installation gets stuck with errors. With above commands, it will be easy to install our tools.
NetExec Cheat Sheet Install Method 2: Install Using apt
If you use Kali Linux or another Debian-based system, this is the simplest way.
For installation instructions on other operating systems, please refer to the official installation guide
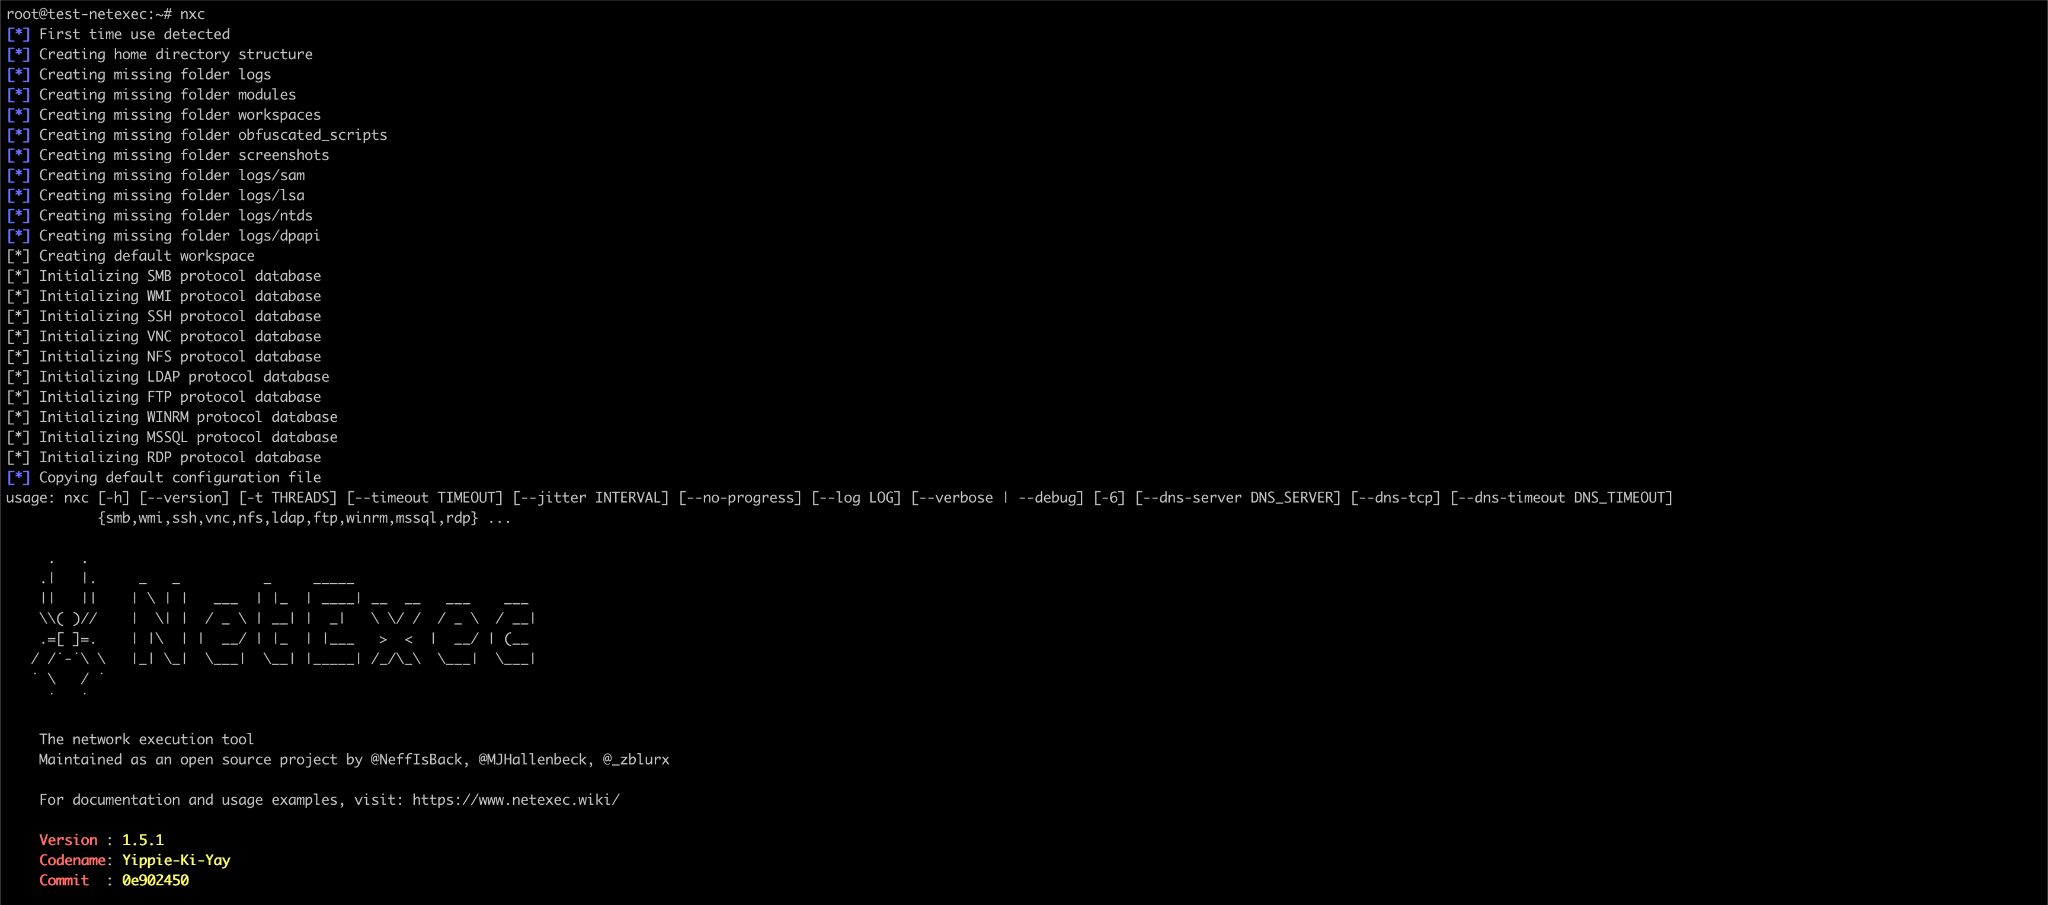
After installation, you can run below command to verify the installation
Setting Up a Practice Environment
If one does not have Windows machines, one can use below two good options for practice.
Option 1: TryHackMe or HackTheBox
These websites give you access to Windows machines you can attack from your Linux computer. You connect to them using a VPN. Both have free options and rooms specifically for learning Active Directory attacks.

Option 2: Create Your Own Lab
You can use a tool called “BadBlood” that creates a vulnerable Active Directory environment. You would need to install a Windows virtual machine first, but this gives you full control over your practice network.
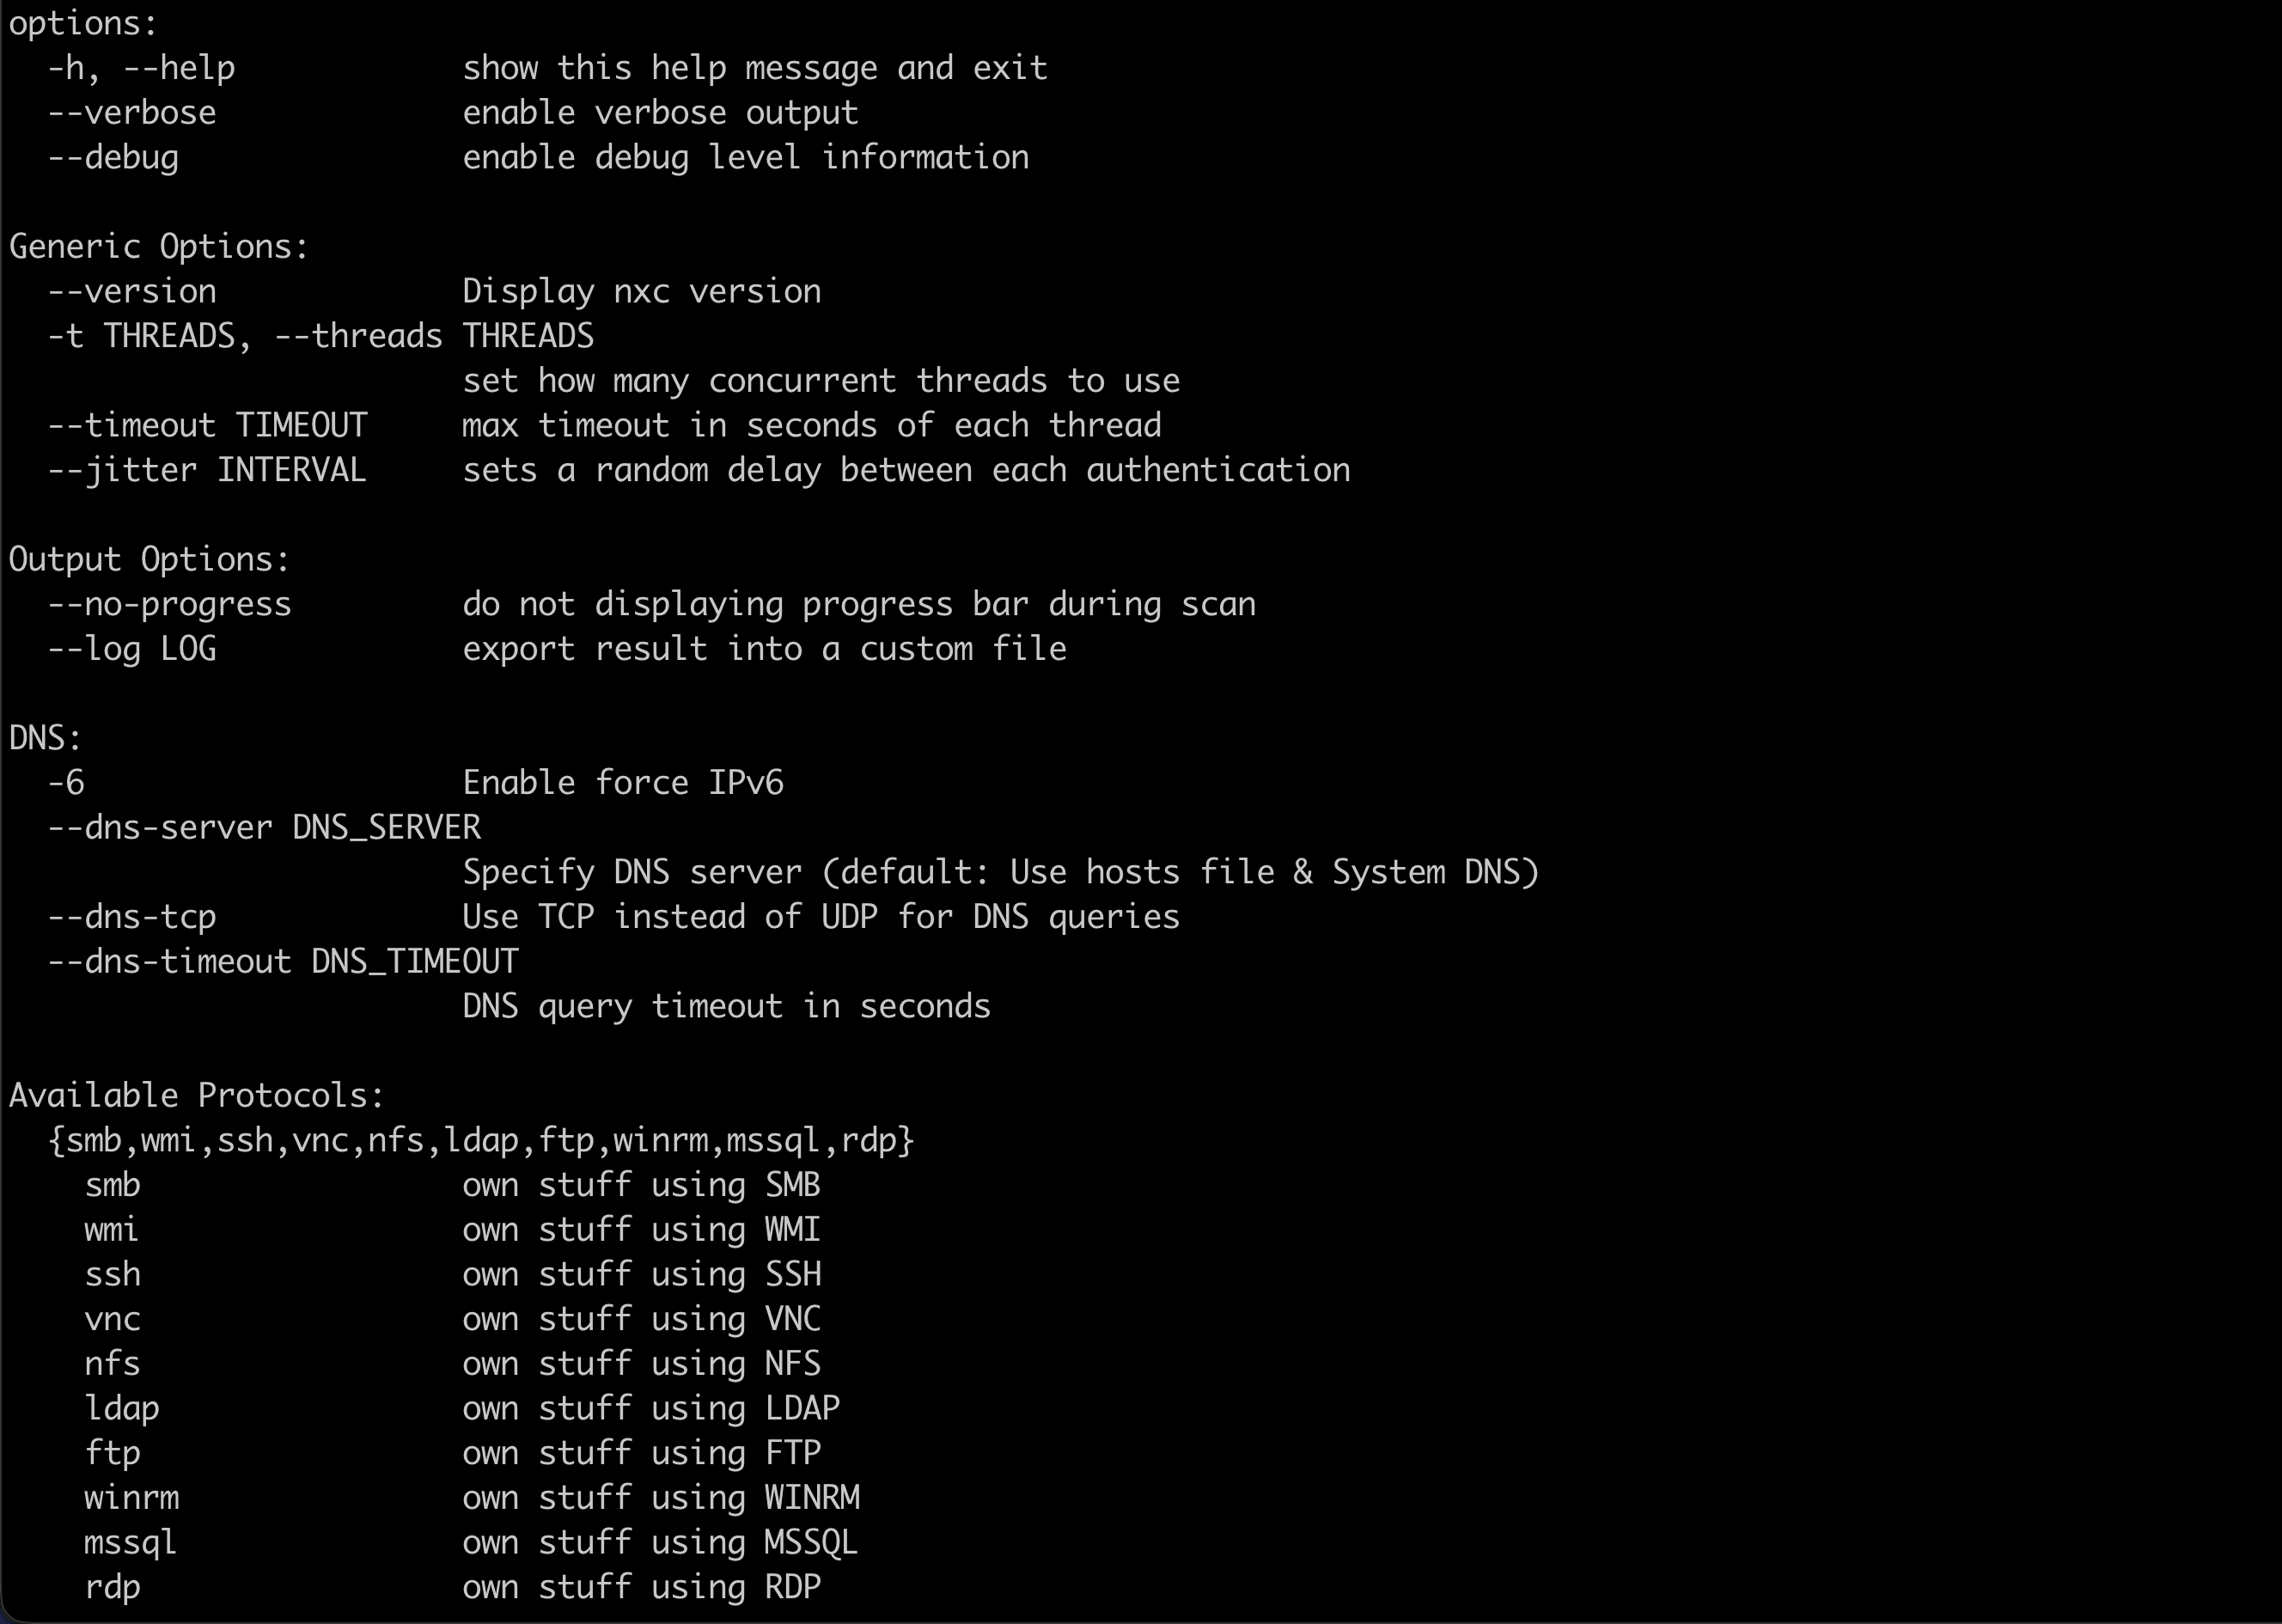
Understanding NetExec Command Structure
Every NetExec command follows a consistent structure. Once you understand this pattern, creating your own commands becomes much easier.
Basic command structure
Below is what each part means:
- Settings – Control how NetExec runs. Common settings include:
-
-h => Displays the help screen
-
-t 10 => Uses 10 threads to increase speed
-
–timeout 5 => Waits a maximum of 5 seconds for each connection
-
- Protocol – Specifies the protocol NetExec should interact with. Common services include:
-
smb => SMB file sharing
-
ldap => Directory and user information queries
-
winrm => Remote command execution on Windows
-
rdp => Remote Desktop Protocol
-
ssh => Secure Shell access
-
mssql => Microsoft SQL Server databases
-
- Target – The system or network you want to scan or interact with. Examples include:
-
192.168.1.10 => A single IP address
-
192.168.1.0/24 => A network range
-
dc01 => A hostname or computer name
-
- Options – Used to provide credentials or execution parameters. Common options include:
-
-u => Username or a file containing usernames
-
-p => Password or a file containing passwords
-
-d => Domain name
-
-H => NTLM hash for pass-the-hash authentication
-
-x => Execute a command on the target system
-
-X => Execute a PowerShell command on the target
-
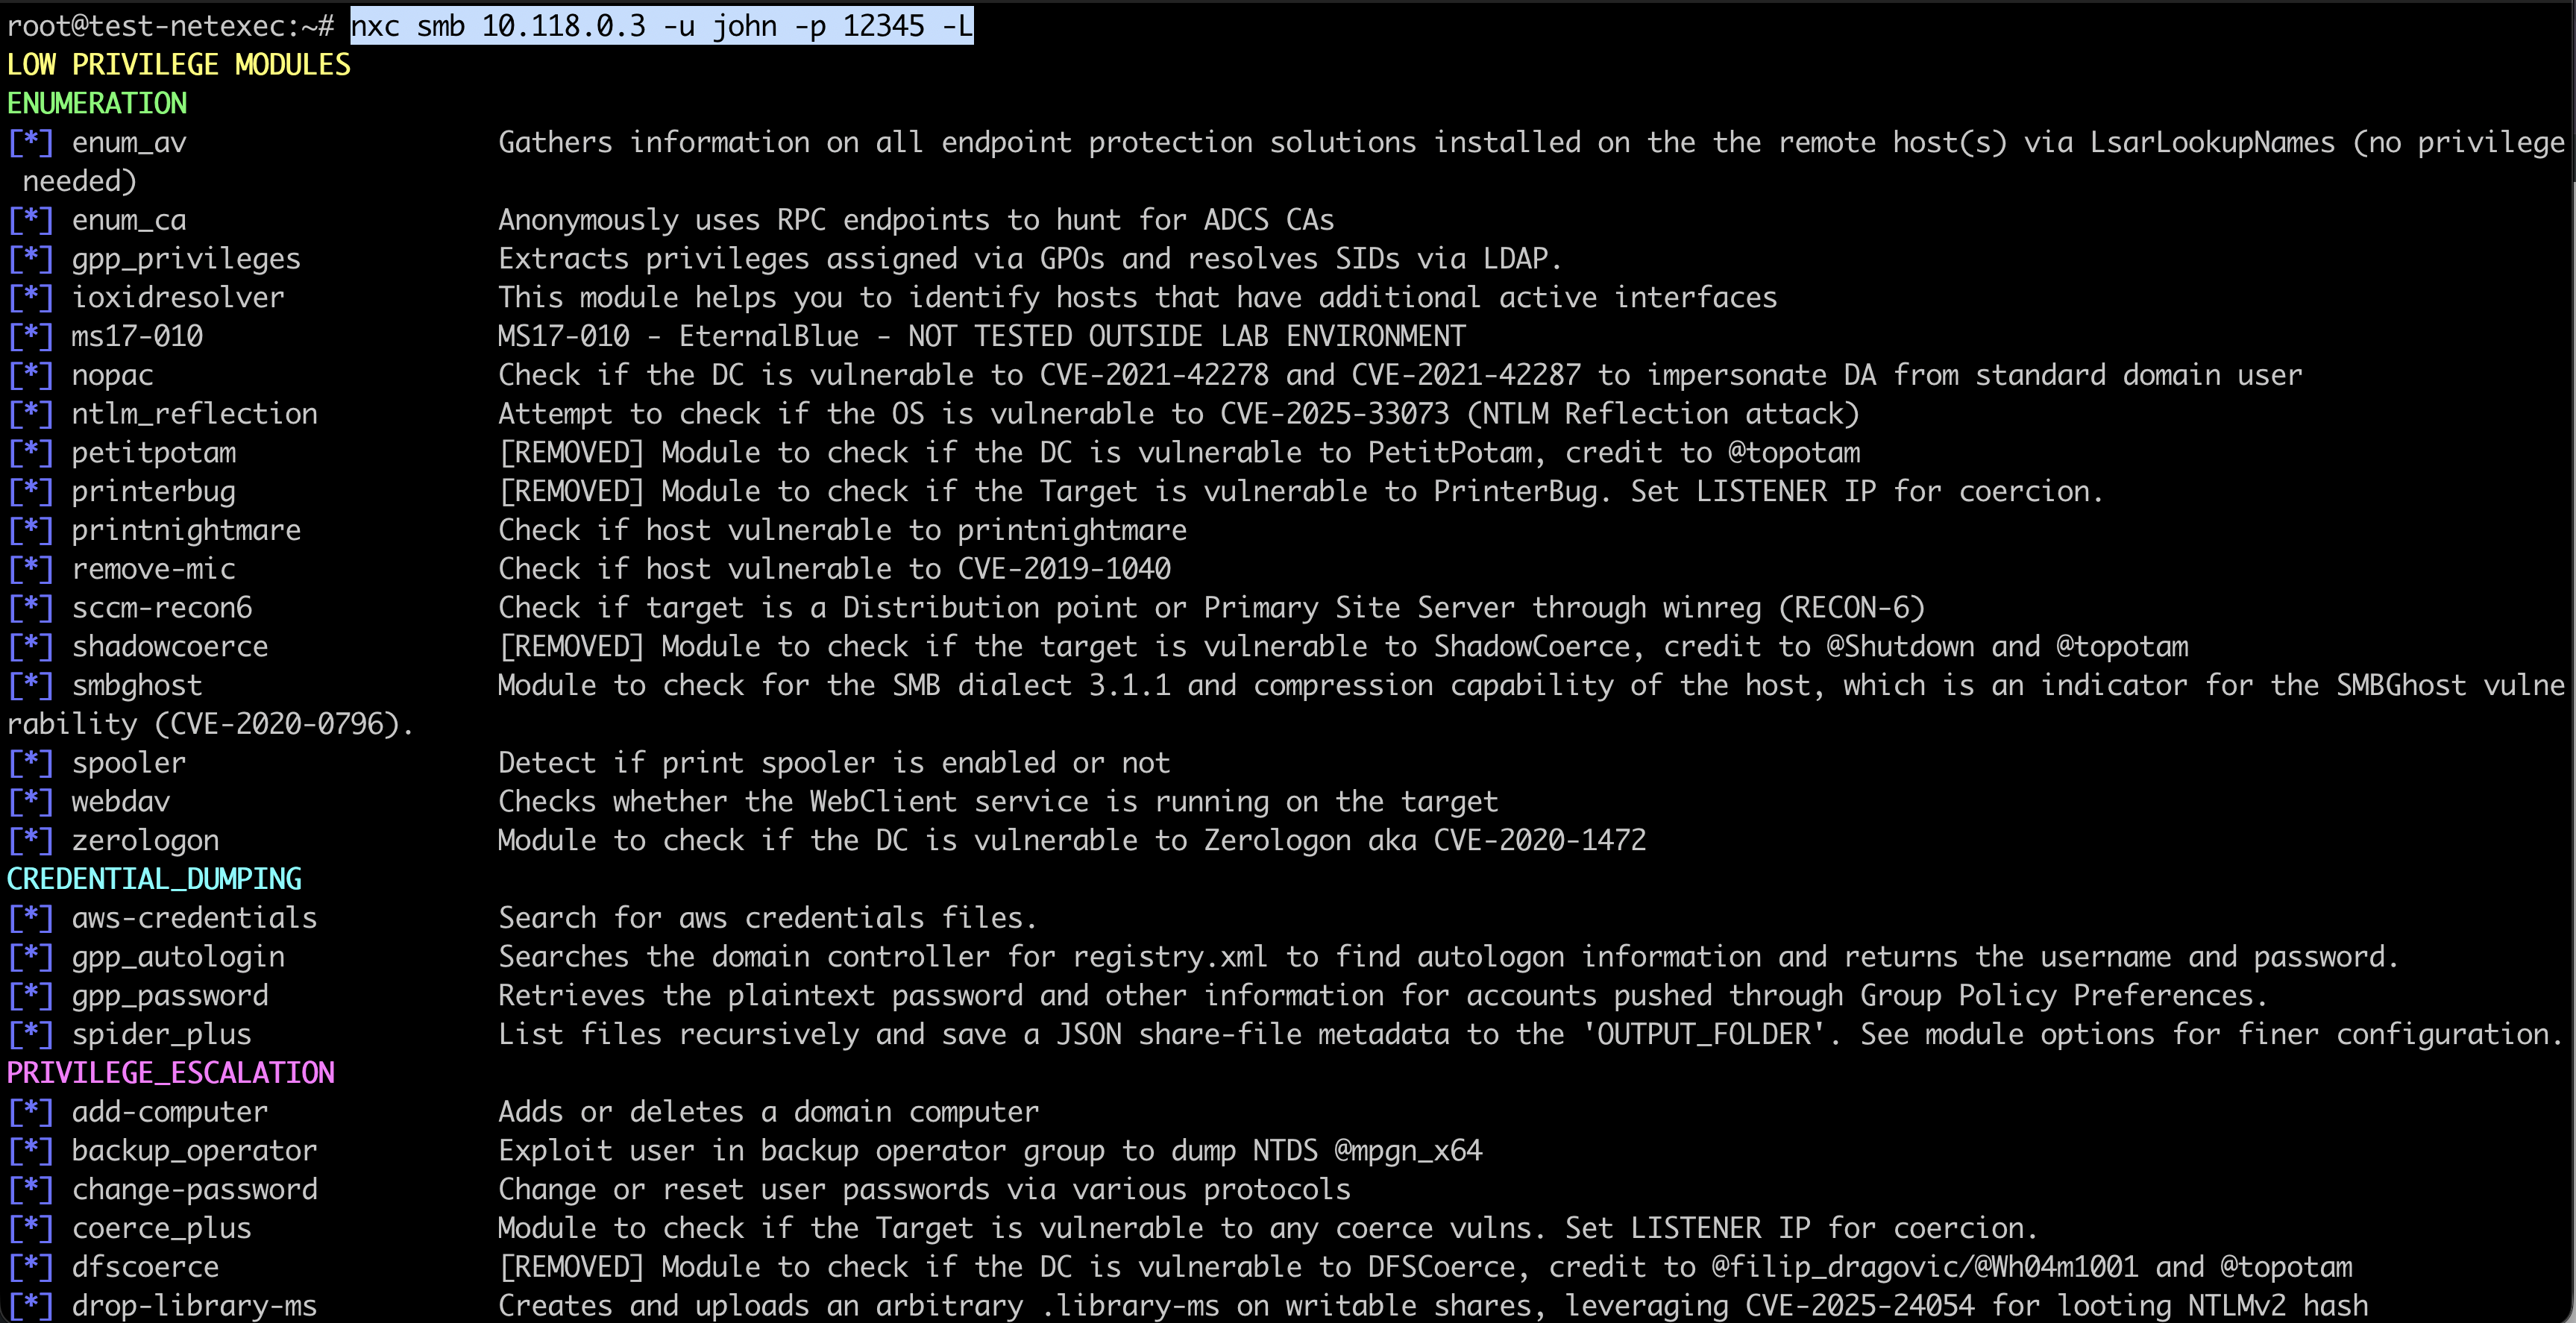
- Module – Enables additional features or checks.
-
Each service has its own set of modules.
-
You can list available modules for a service using
-
nxc <service> -L
-
-
Some options are
Finding Information About the Network
Before you can attack anything, you need to know what exists on the network. This is called enumeration.
Finding Live Computers
The simplest NetExec command scans for computers running a specific service.
To find all computers with file sharing enabled:
This will provide output something like
Lets say we have a single system then the output will be like

We can scan for other services as well

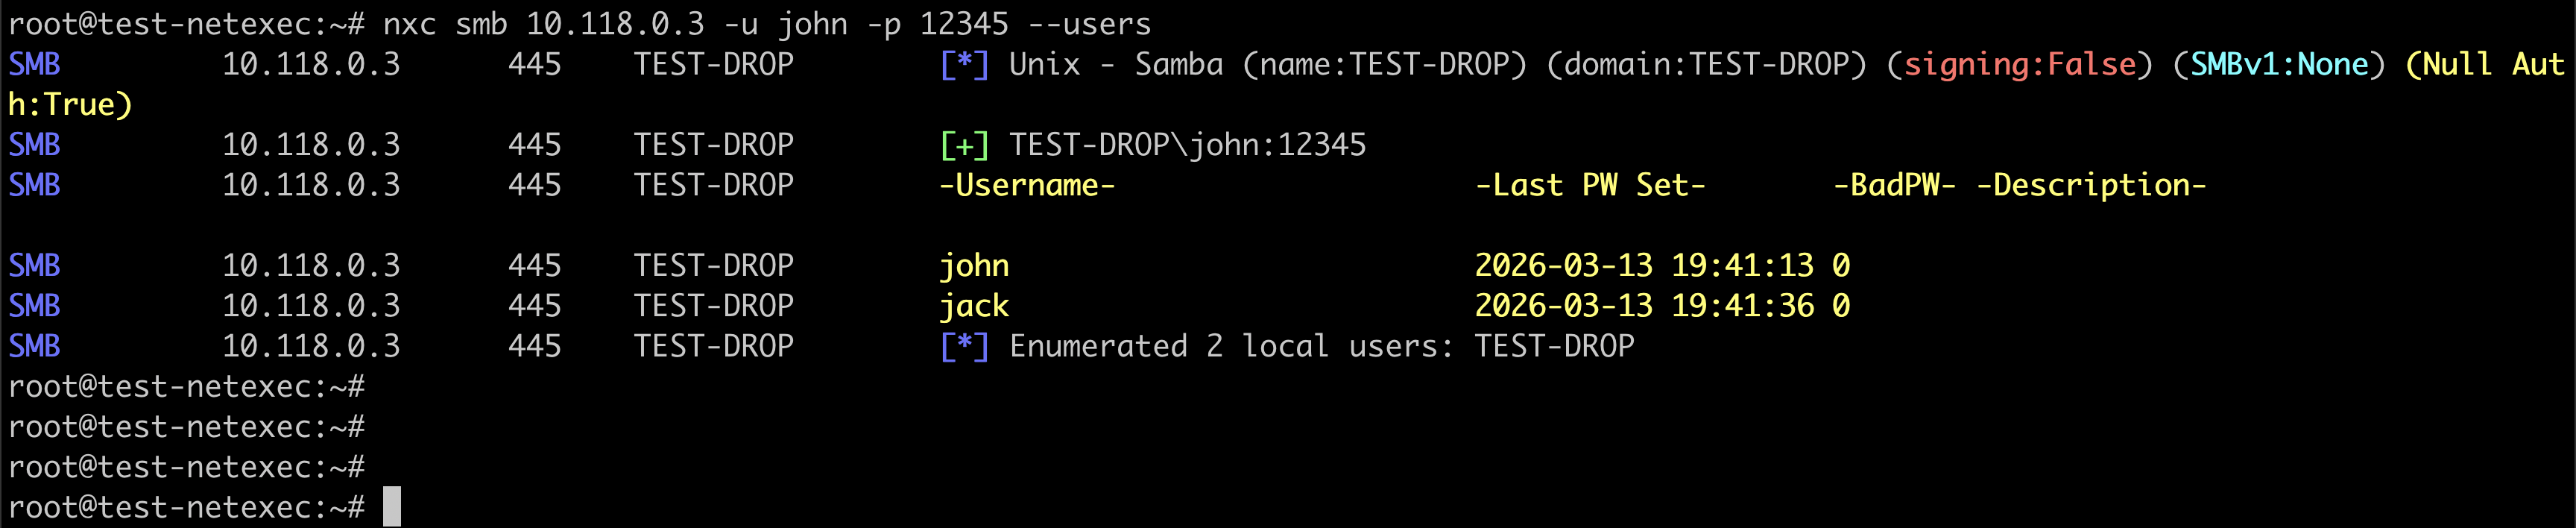
Finding User Accounts
Once you have valid login credentials, you can find all user accounts in the domain.
Finding Groups
Groups tell you how users are organized and what permissions they have.
Finding Shared Folders
Shared folders are places where files are stored on the network. They often contain useful information.

Finding Files in Shares
After finding readable shares, you can look for specific files inside them.
This command crawls through all shares you can read and records every file it finds. The results save to a log file in the .nxc folder in your home directory.
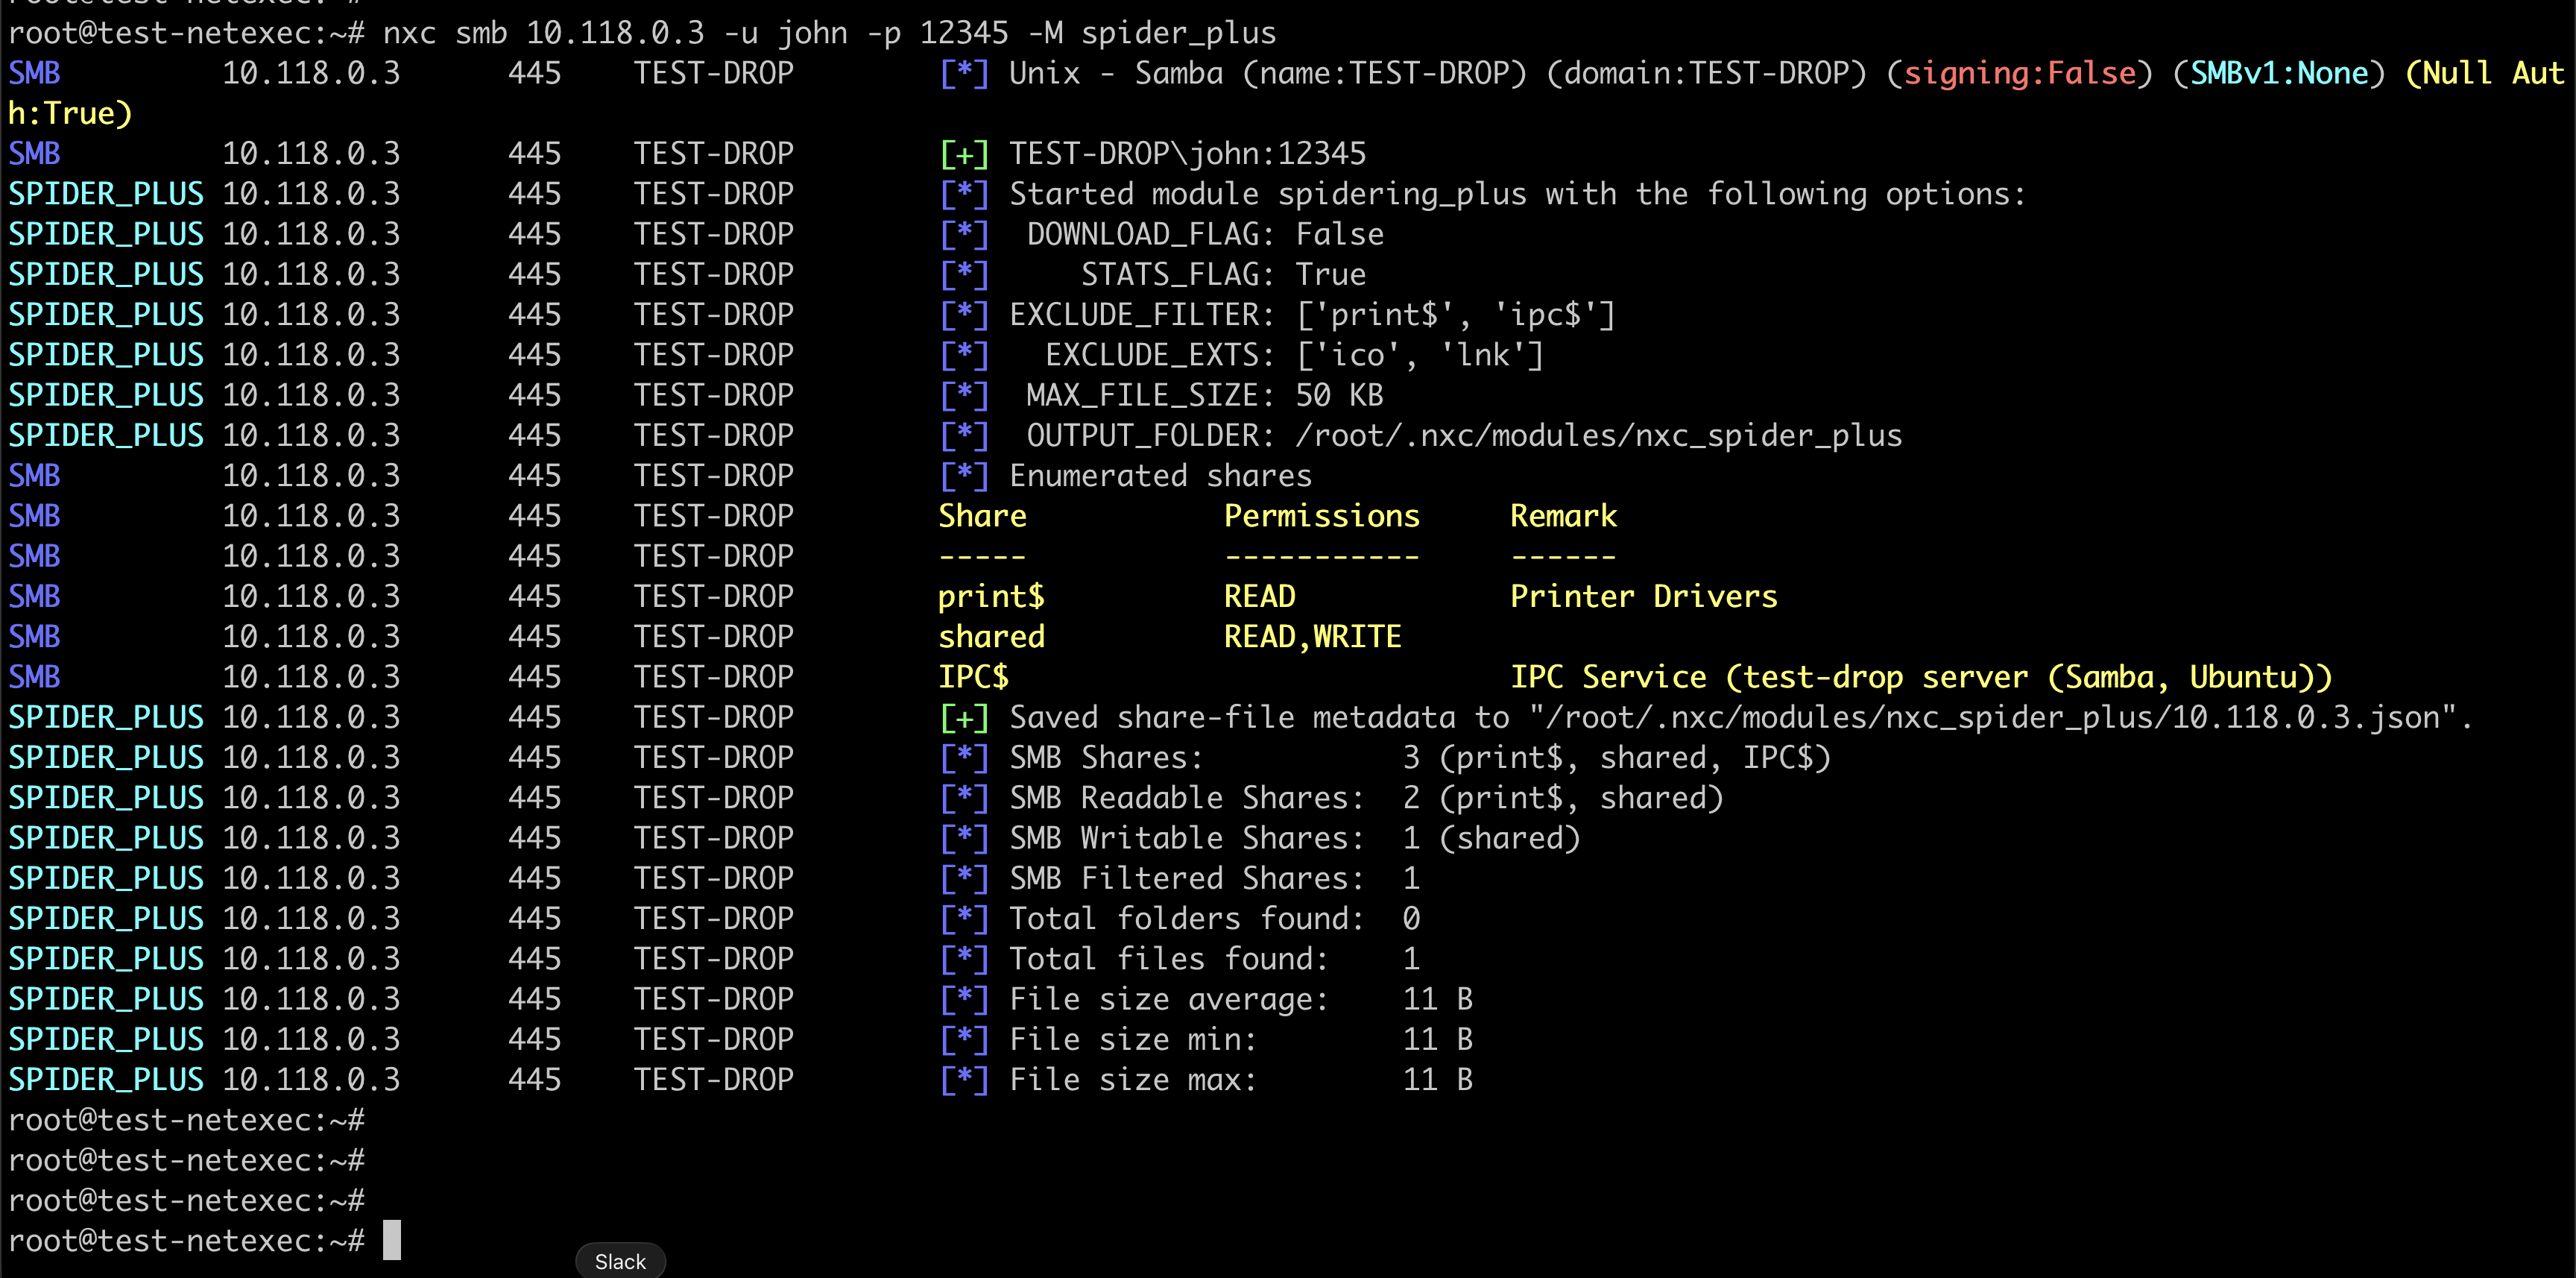
On checking the result file at “/root/.nxc/modules/nxc_spider_plus/10.118.0.3.json” – we see following file details

Testing Passwords
Once you have a list of usernames, you can test passwords against them. This is called password spraying.
Basic Password Spraying
Password spraying tries one common password against many usernames. This avoids locking out accounts.
First create a file called users.txt with one username per line e.g.
Now run command
This will give output

But this gave only one user. That is because the command stops right after it gets a successful login. To continue, we need to use a flag

Using Multiple Passwords
You can also try different passwords against one username. In that case the command would be
Getting Password Hashes
When you gain access to a computer with administrator rights, you can extract stored password hashes.
Dumping Local SAM Hashes
The SAM database stores passwords for local users on a computer. For example,
If the account has admin rights, you will see (Pwn3d) in the output and then the hashes. The sample output will be like
The long string after the second colon is the NTLM hash. You can use this hash to log in without knowing the real password.
Dumping LSA Secrets
LSA secrets include service account passwords and other sensitive data. For example,
Dumping Domain Passwords from a Domain Controller
If you get admin access to a domain controller, you can dump the NTDS.dit file which contains every password hash in the domain.
This can take a few minutes but gives you all domain user hashes.
Using Hashes to Log In
You don’t need the real password if you have the NTLM hash. This is called pass-the-hash.
Logging In with a Hash
If successful, you are now logged in as administrator on that computer using only the hash.
Running Commands on Remote Computers
Once logged in, you can run commands on the target machine. e.g.
Output will show something like
This tells you the command ran with the highest privileges.
Post-Exploitation Tasks
After gaining access, you want to gather more information and set up ways to get back in.
Enabling Remote Desktop
To get a graphical interface to the computer:
Then connect from Linux with:
Finding Security Software
Know what defenses you face with below command
This lists installed antivirus and endpoint protection. There is a list of modules which we can run
Getting LAPS Passwords
LAPS manages local administrator passwords. If you have rights, you can read them:
This gives you the local admin password for every computer in the domain.
Downloading Files
Get files from the target to your Linux machine:
Uploading Files
Put tools onto the target:
Creating a New User
Make a backdoor account:
Working with Modules
Modules add special functions to NetExec. Each service has its own modules.
Listing Available Modules
To see all modules for SMB:
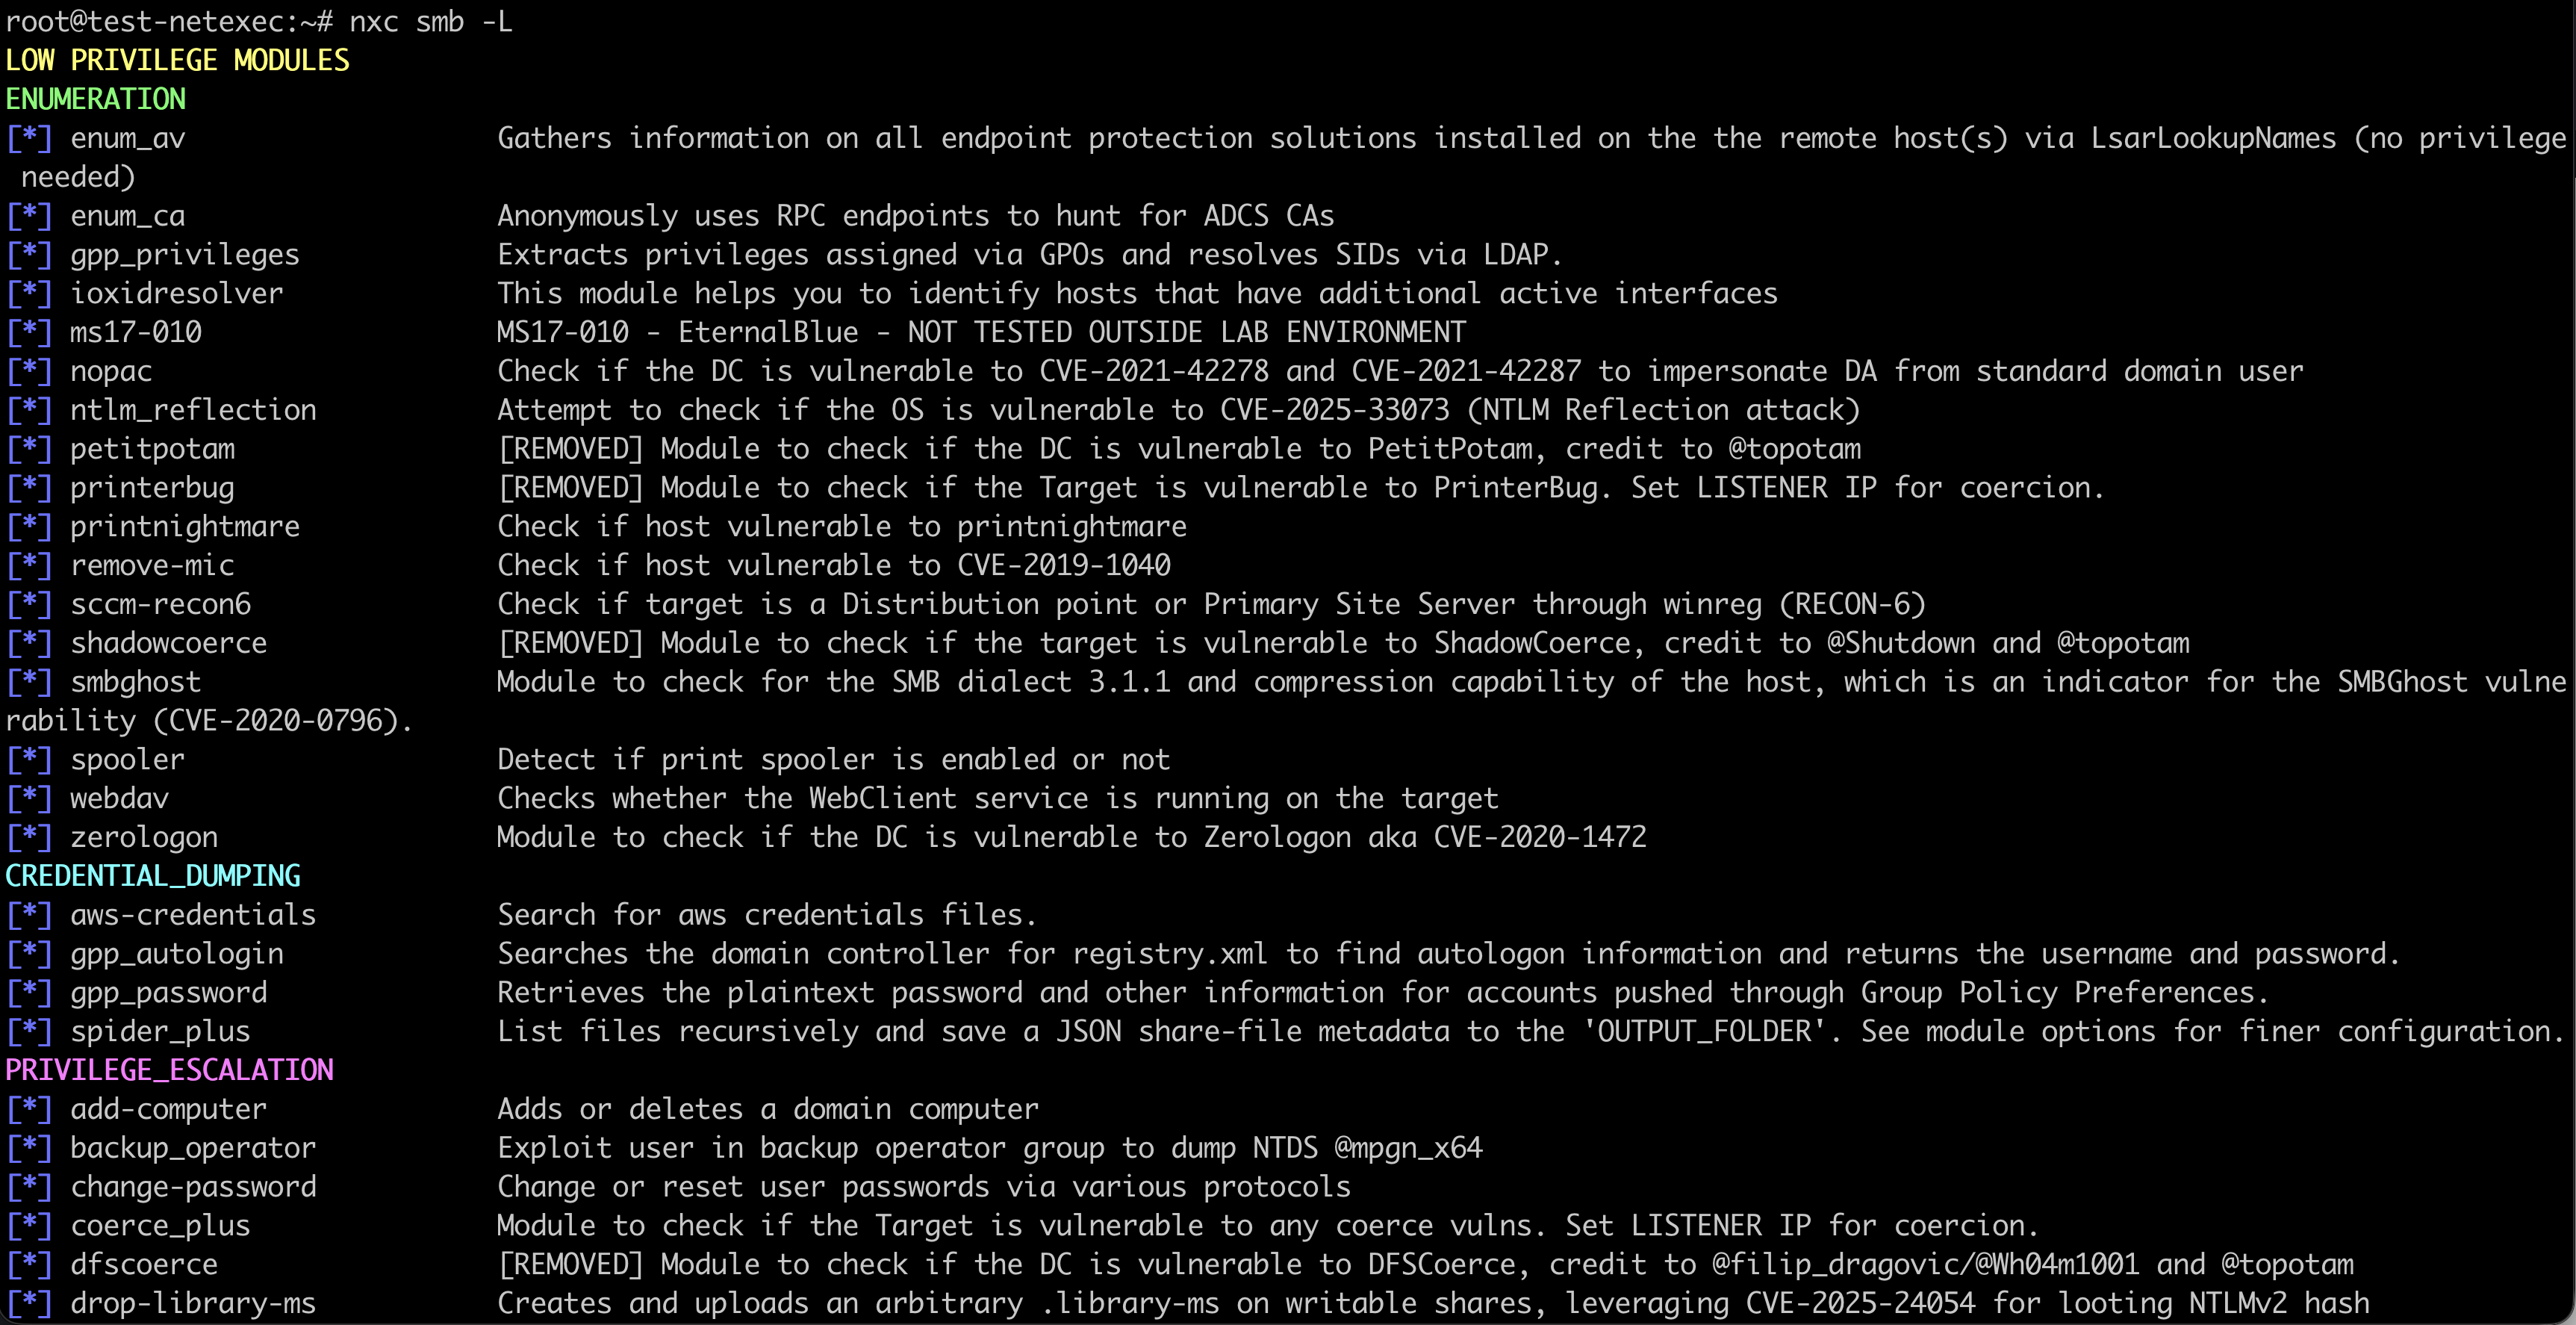
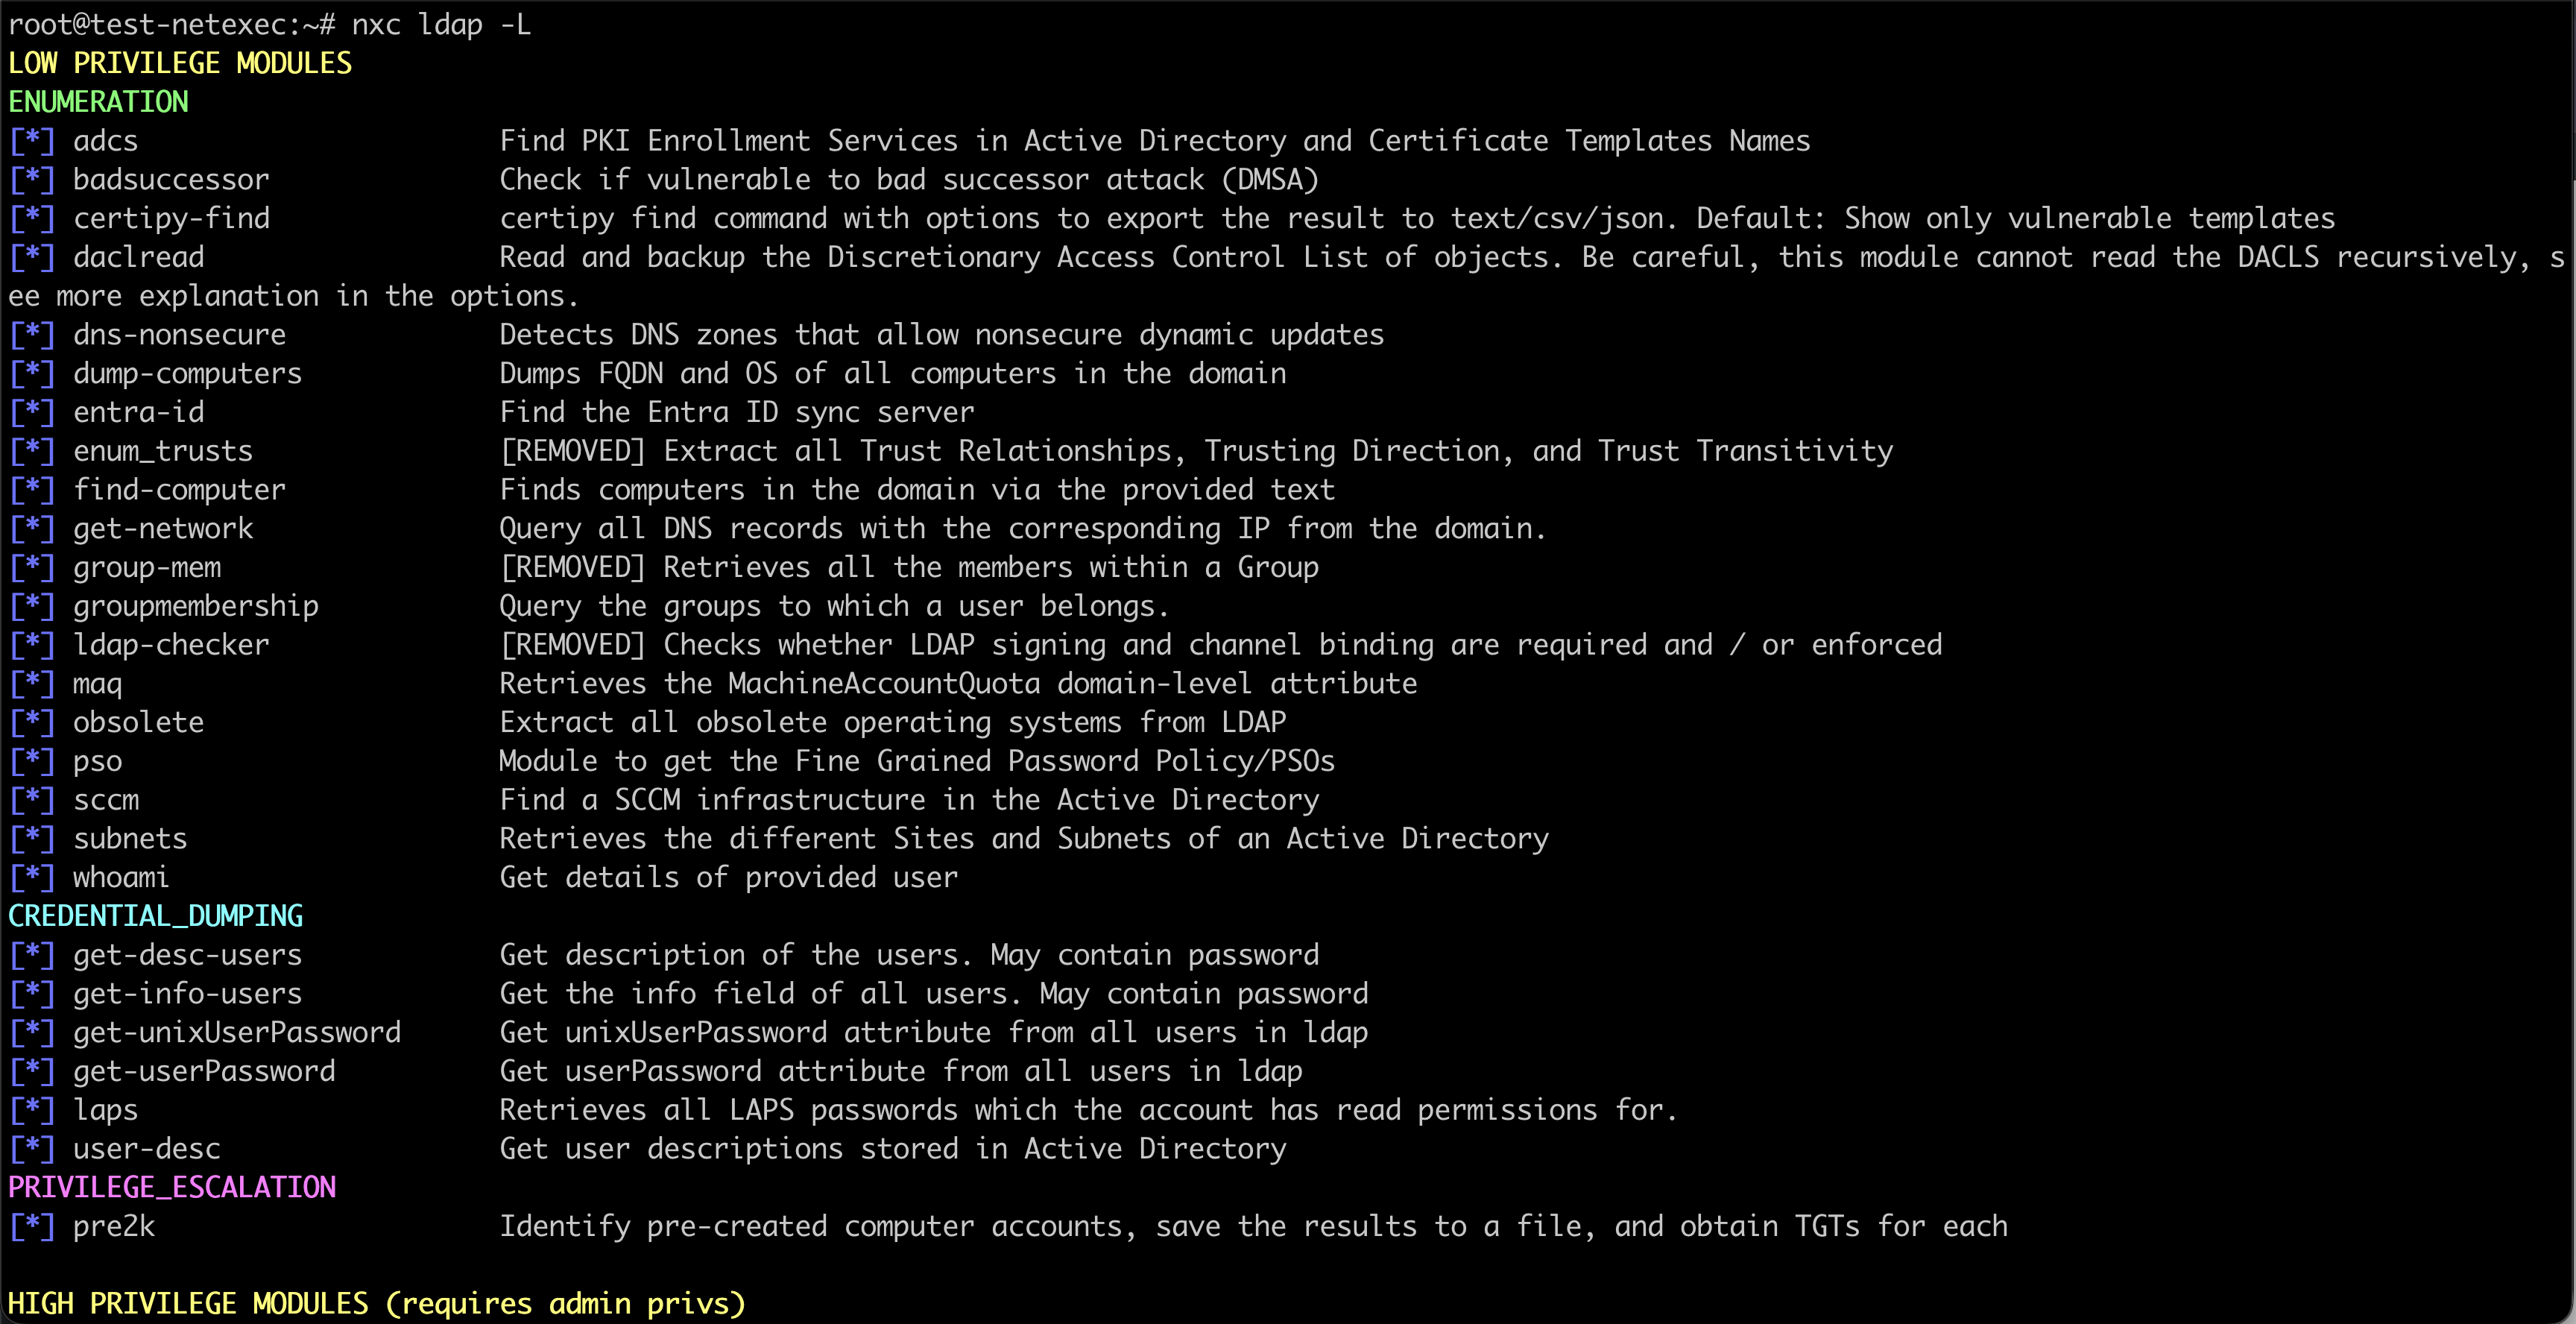
For listing LDAP modules, we use below command
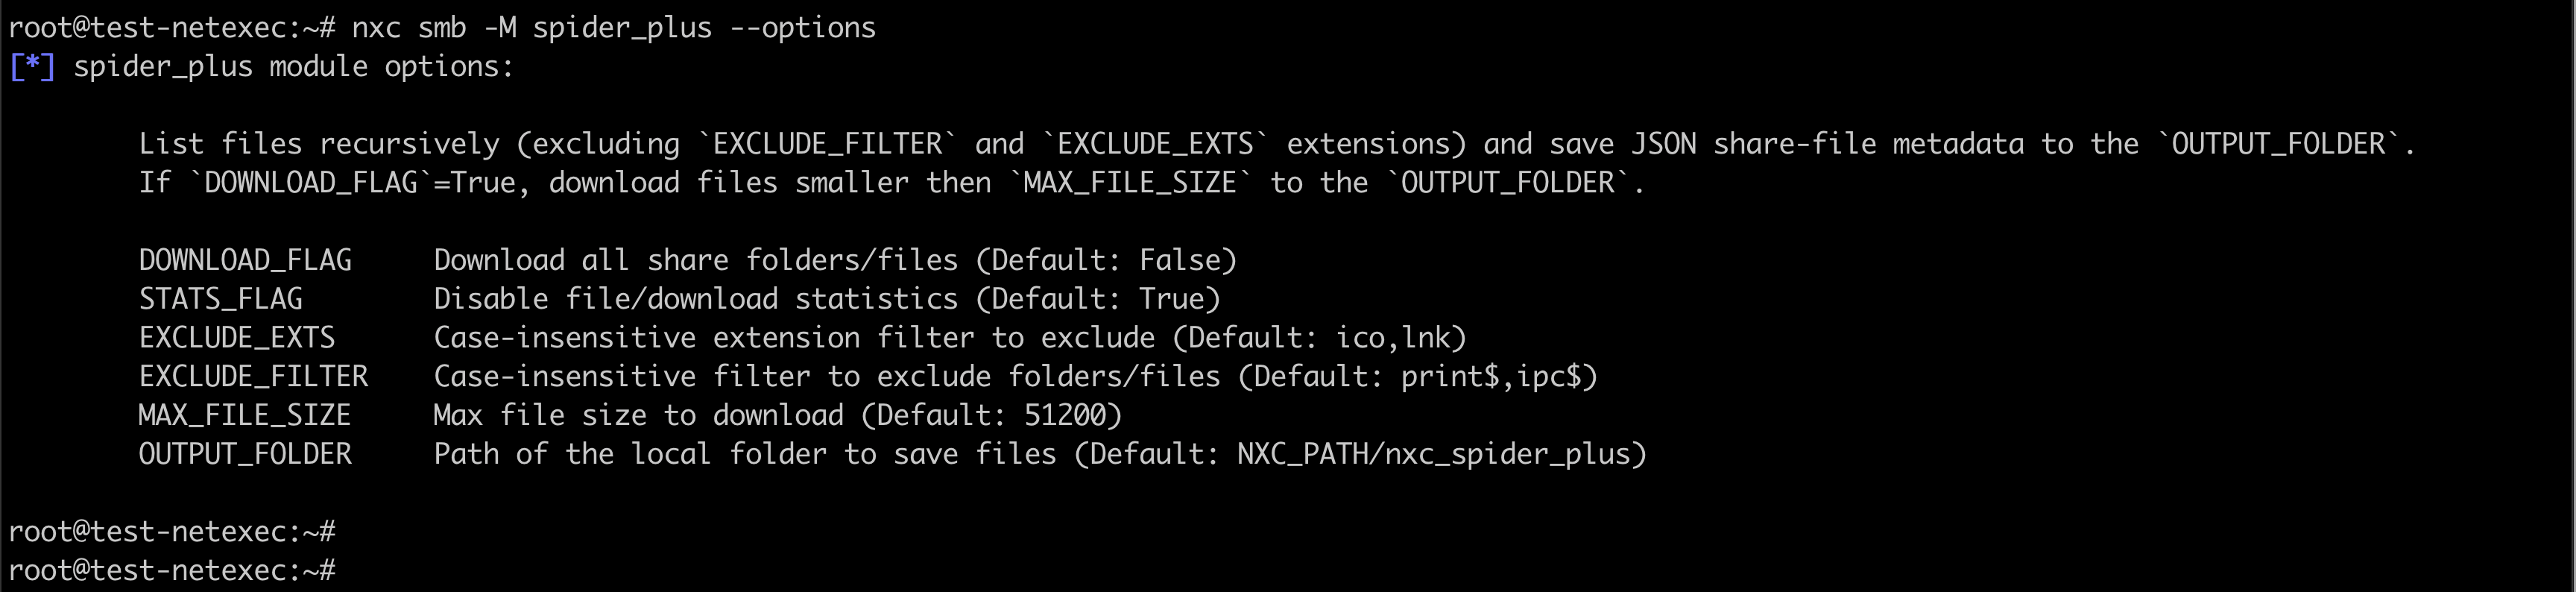
Getting Module Help
To see what a module does and its options:
Troubleshooting Common Problems
Connection Failed
Sometimes users see connection errors. If you encounter that – check
- The target is turned on with ping
- Firewalls are not blocking you
- You are on the same network or VPN
Access Denied
This usually means your credentials don’t have enough rights. In this case, we can try
- Different usernames
- Higher privilege accounts
- Local accounts instead of domain accounts
Slow Scans
Slow scans can help in avoiding getting blocked but in case speed is crucial, we can peed up scans with more threads:
NetExec Cheat Sheet Summary
NetExec is a powerful tool for testing Windows network security and assessing how systems in a network can be accessed or misconfigured. It can discover computers and services, enumerate users, groups, and shares, test credentials through password spraying, dump password hashes from Windows systems, and authenticate using hashes without knowing the actual password. It also allows remote command execution, movement between machines on a network, persistence for maintaining access, and the use of modules for specialized tasks. This guide introduced the key commands needed to start using NetExec, but the best way to understand its capabilities is by practicing these techniques in a lab environment and observing how they work together in a real network scenario.