
Let’s be honest. The world of cybersecurity and network administration can feel overwhelming. It’s full of complex tools and jargon that can make a beginner want to close the laptop and walk away. But every expert started as a beginner, and one of the very first, most crucial skills they learn is how to see what’s on a network. You can’t secure what you don’t know exists.
Think of a network as a dark, vast city. You might know the main streets (your router, your own computer), but what about all the other buildings? Is that a friendly neighbor’s house, a hidden shop, or a secret lair? An nmap ping sweep is like switching on a powerful floodlight that, in one swift motion, illuminates every single building in the city, showing you which ones are occupied.
This article is your guide to mastering that floodlight, using the most trusted tool in the business: Nmap. We’ll start from “What is a ping?” and walk our way up to advanced techniques used by security professionals. So, grab a coffee, and let’s demystify this together.
Part 1: Nmap Ping Sweep Basics
What is a Ping?
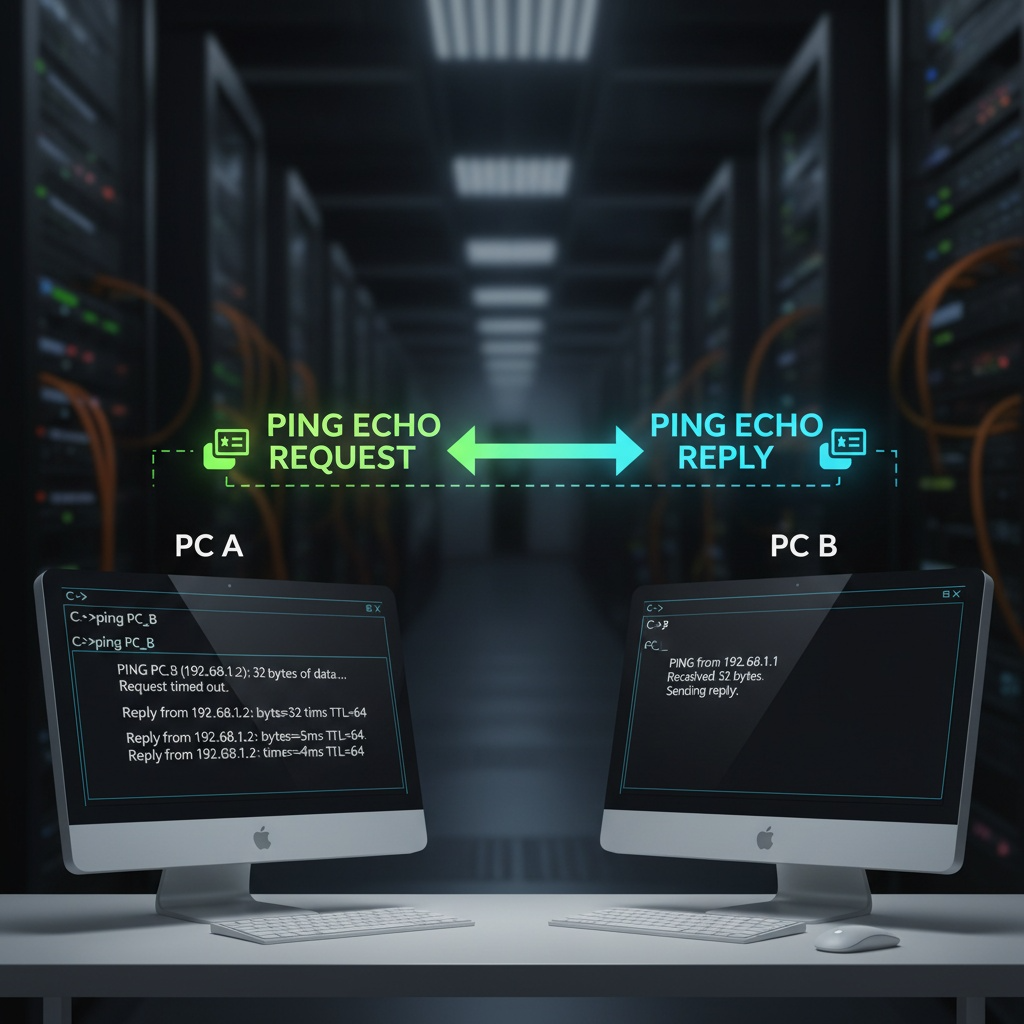
Before we “sweep,” we need to understand the “ping.” At its heart, a ping is the digital equivalent of shouting “Hello, are you there?” across a crowded room. Technically, it’s a small packet of data sent using the Internet Control Message Protocol (ICMP). If a device is on, connected, and willing to talk, it will shout back, “Yep, I’m here!” This simple exchange confirms the device’s existence and gives you a rough idea of how long the round-trip took.
What is a Ping Sweep?
Now, imagine you’re in a neighborhood with 100 houses, numbered 1 to 100. A ping sweep is the process of walking down the street and shouting “Hello!” at every single door—house #1, #2, #3, all the way to #100. You then make a list of all the houses that answered. In network terms, you’re sending a ping to every possible IP address in a range (e.g., 192.168.1.1 to 192.168.1.254) to see which ones are active. This gives you a complete map of live hosts on that segment of your network.

Why is This So Important?
For a network administrator, a ping sweep is a routine health check. It’s like taking a daily headcount. Are all the expected servers and printers online? For a security professional (an ethical “penetration tester” or “white hat” hacker), it’s the critical first step of any security assessment. You need to find all the targets before you can test their locks. Finding an unexpected device could reveal an unauthorized user or a vulnerable piece of hardware that could be an entry point for an attacker.

Meet Your New Tool: Nmap
Nmap, short for Network Mapper, is the Swiss Army knife of networking. It’s a free, open-source tool that runs on Windows, macOS, and Linux. It can do incredibly advanced things and we even have an nmap cheat sheet, but its core purpose is simple: discovering hosts and services on a computer network. It’s the tool we’ll use for all our nmap ping-sweeping adventures.
Part 2: Getting Started – Installation and Your First Command
Step 1: Installing Nmap
This is the easiest part.
-
Windows: Go to https://nmap.org/download.html and download the latest stable installer. Run the .exe file. I highly recommend also installing the Zenmap graphical front-end, which is included in the installer. It’s great for beginners.
-
macOS: The easiest way is to use Homebrew. Open your Terminal and type brew install nmap. If you don’t have Homebrew, you can download it from the Nmap website.
-
Linux: It’s almost certainly in your package manager.
-
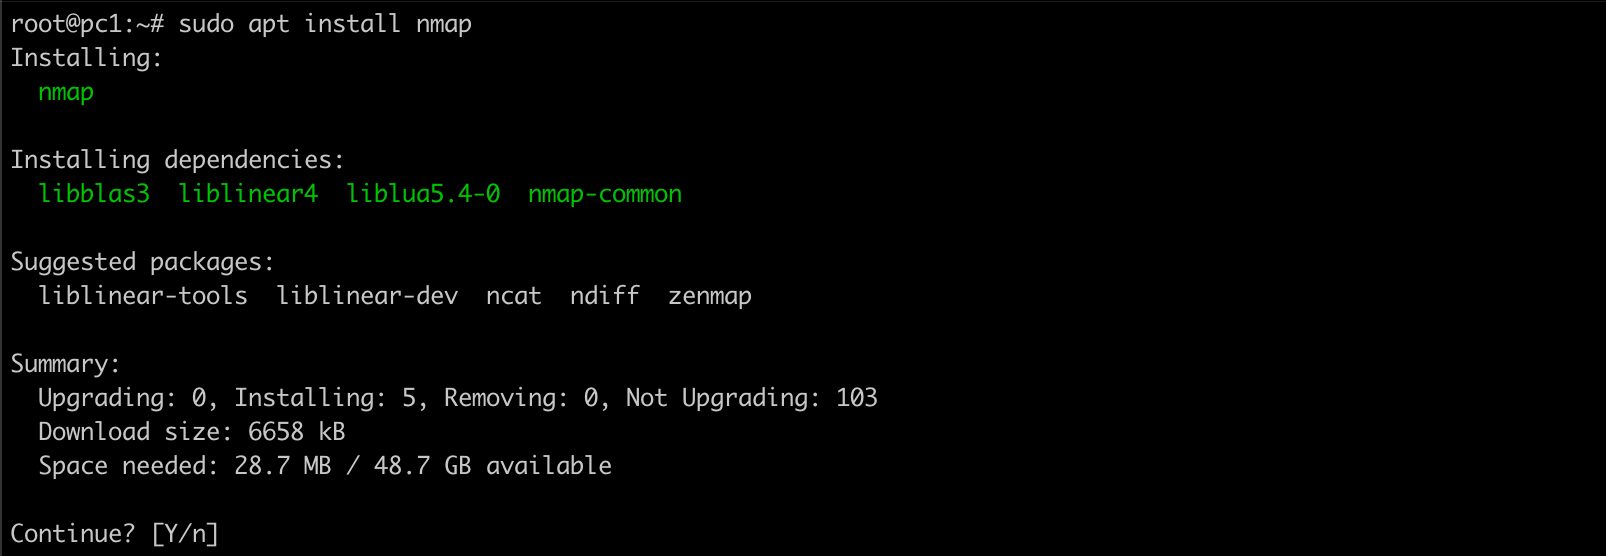
For Ubuntu/Debian, open a terminal and type
-
sudo apt install nmap

-
-
-
For Fedora/CentOS, use either one of below
-
sudo dnf install nmap
-
sudo yum install nmap
-
To verify your installation, open a command line (Terminal on macOS/Linux, Command Prompt on Windows) and type
nmap –version
You should see version information. Congratulations, you’re ready!


Your First Nmap Ping Sweep: The -sn Flag
Let’s perform a simple sweep of your local network. First, you need to know your network range.
-
On Windows, type below in the command prompt
-
ipconfig
-
-
On macOS or Linux, type either one in the terminal
-
ifconfig
-
ip a
-
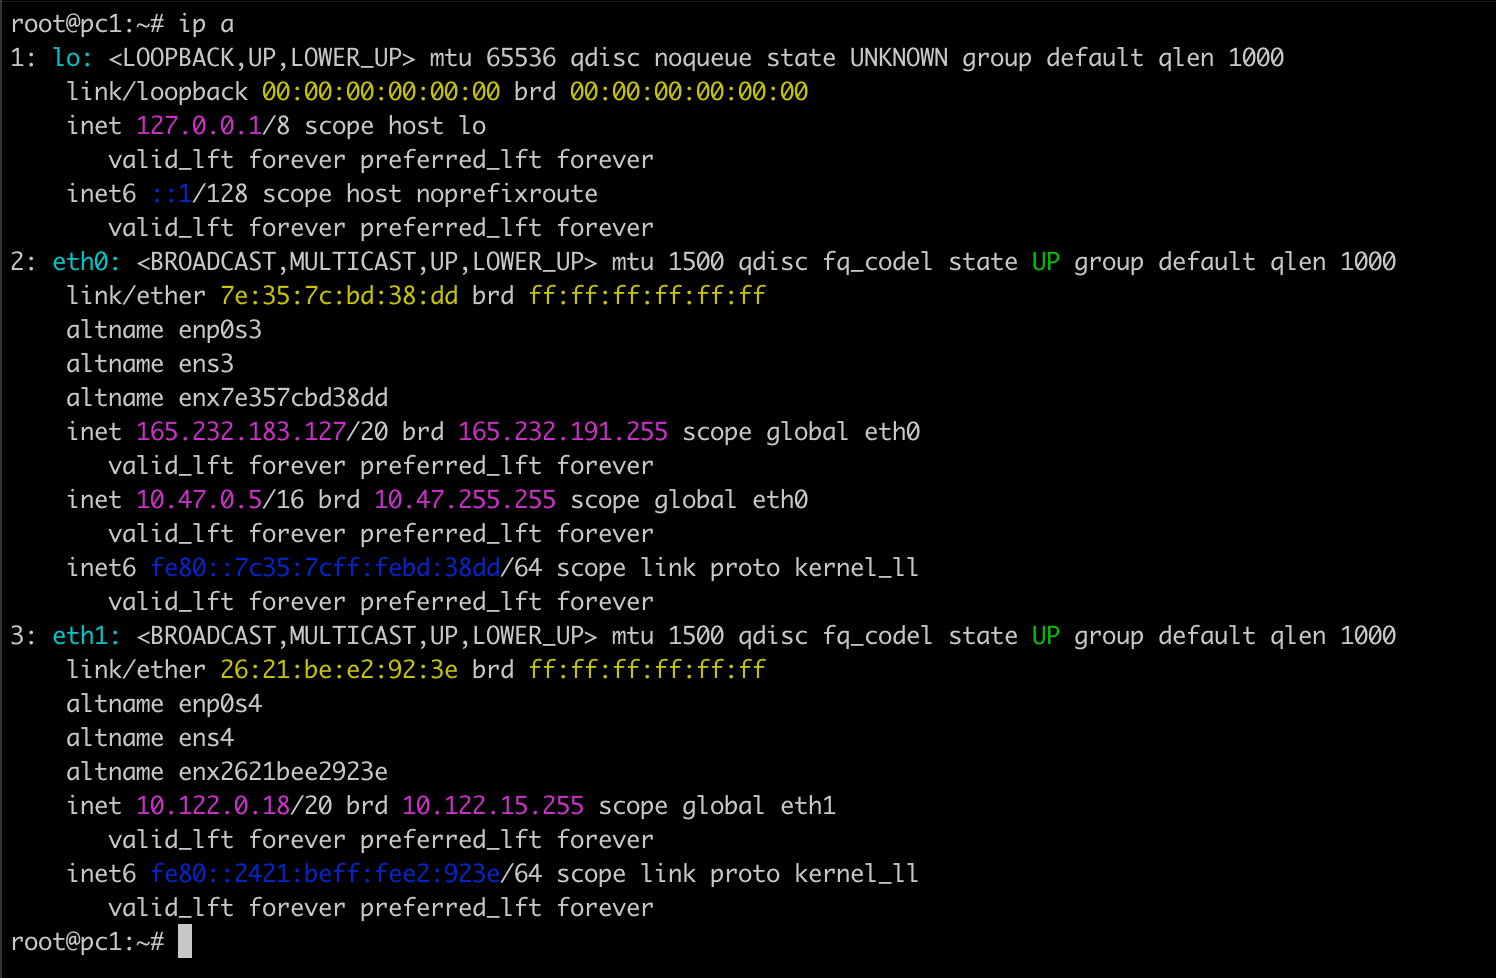
Look for your computer’s IP address. It will probably look something like 192.168.x.x or 10.x.x.x. The last number is your specific computer. The first three numbers (e.g. in above output, 10.47.0) represent the network.
A typical home example used 192.168.1.0/24. On your machine the relevant interfaces and networks are different, so use those networks instead.
Your interfaces show these private networks:
-
eth0 has 10.47.0.5/16 — that’s the 10.47.0.0/16 network (65,536 addresses; ~65,534 usable hosts).
-
eth1 has 10.122.0.18/20 — that’s the 10.122.0.0/20 network (4,096 addresses; ~4,094 usable hosts).
-
eth0 also has a public IP 165.232.183.127/20 (this is cloud/public). Be careful scanning public ranges — only scan addresses you own or are allowed to scan.
Now, for the magic, replace the example network with the one you want to scan. Example commands:
Explanation of above commands is as follows
-
nmap — starts the program.
-
-sn — “no port scan”: only discover hosts (ping sweep / ARP discovery). This is the modern option for host discovery (older docs might show -sP).
-
10.47.0.0/16, 10.122.0.0/20, 165.232.183.0/20 — CIDR notation. The /16 and /20 tell Nmap how big the range is:
-
/16 → 65,536 addresses (usually ~65,534 usable hosts).
-
/20 → 4,096 addresses (usually ~4,094 usable hosts).
-
For /24, it’s 256 addresses (the classic home network example).
-
Let us see the actual command in action
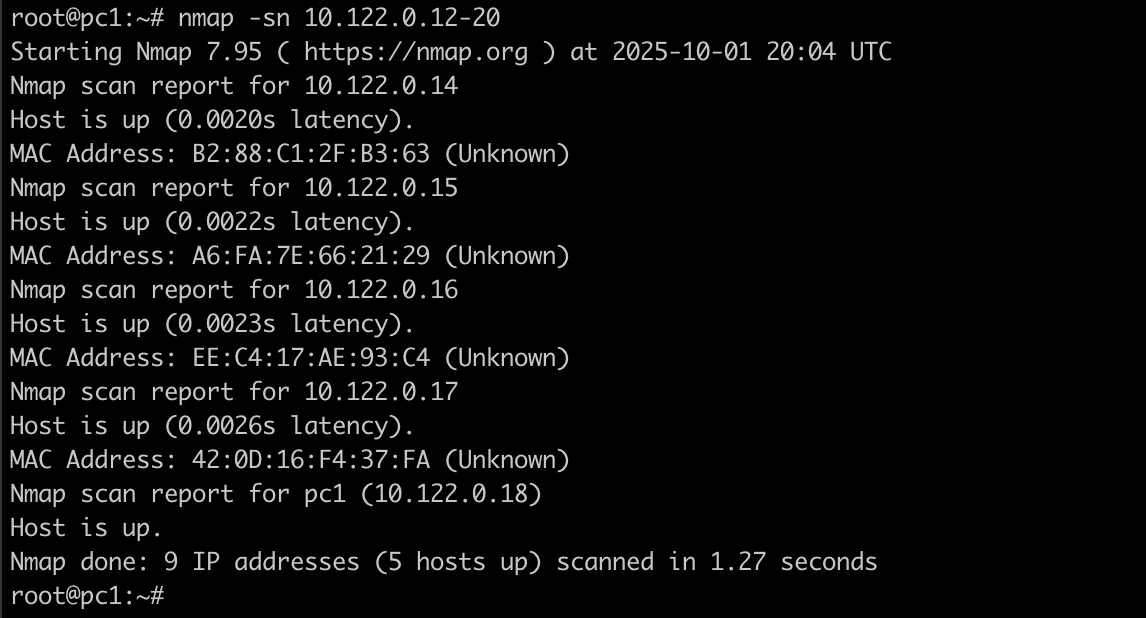
nmap -sn 10.122.0.18/20
Hit enter. After a few seconds, you’ll see a list of results!

Look at that! You’ve just illuminated your digital neighbourhood. You may have found your router, your PC, your phone, or your smart TV. This is the power of a simple ping sweep.
Part 3: Leveling Up – More Control and Useful Flags
The basic command is great, but what if you need more control? Nmap has a flag for that. Let’s look at some of the most useful ones.
1. Scanning Specific Ranges and Multiple Targets
You don’t always have to scan all 256 addresses.
-
You can scan a simple list
-
nmap -sn 192.168.1.1 192.168.1.50 192.168.1.100
-
-
A Range with a Hyphen
-
nmap -sn 192.168.1.1-100 (Scans from .1 to .100)
-
-
Multiple Networks
-
nmap -sn 192.168.1.0/24 10.0.0.0/24
-
-
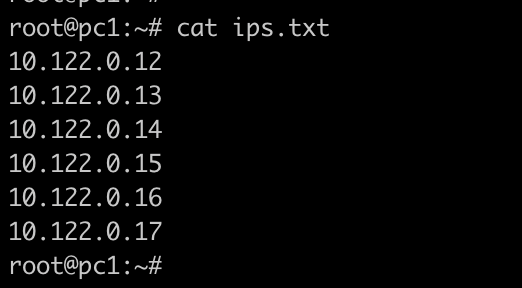
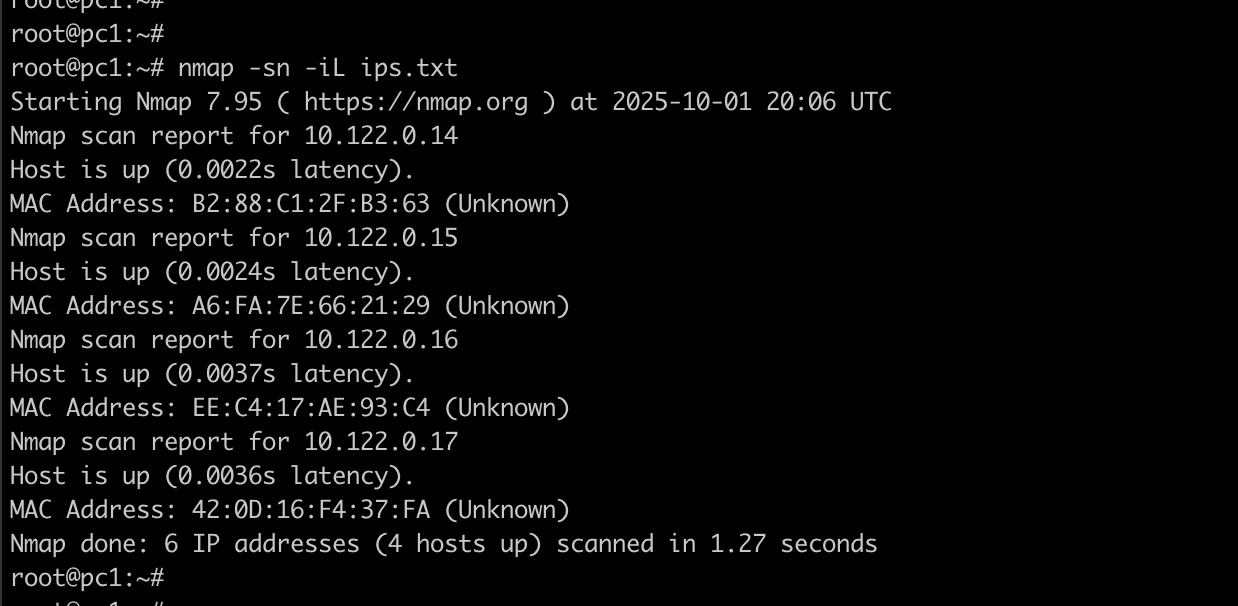
From a Text File
-
Create a file called ips.txt with one IP per line
-
-
-
-
-
-
- then run nmap -sn -iL ips.txt
-
-
-
-
2. Increasing Speed (and Being a Bit Noisier)
By default, Nmap is polite and doesn’t want to overwhelm networks. But on a fast local network, you can speed things up significantly.
-
-T<0-5>: This is the timing template. -T3 is the default. -T4 is faster and is generally considered “safe.” -T5 is “insane” fast, but it’s loud and might crash fragile devices or get you noticed on a monitored network. For a home lab, -T4 is your friend.
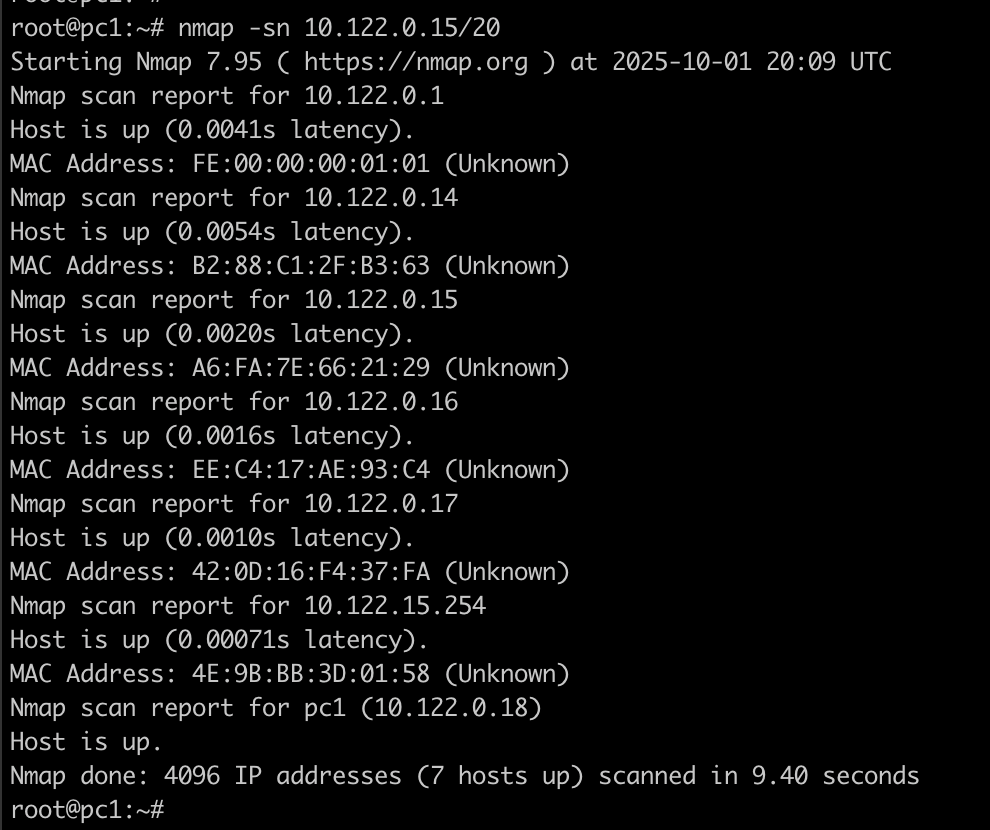
-
Let us perform a ping sweep on our small network and see if we get less time with T4. Below is the output with command nmap -sn 10.122.0.15/20. By default, it uses T3 so we got the result in 9.4 seconds.
-
Now lets use T4 in our command nmap -sn -T4 10.122.0.15/20
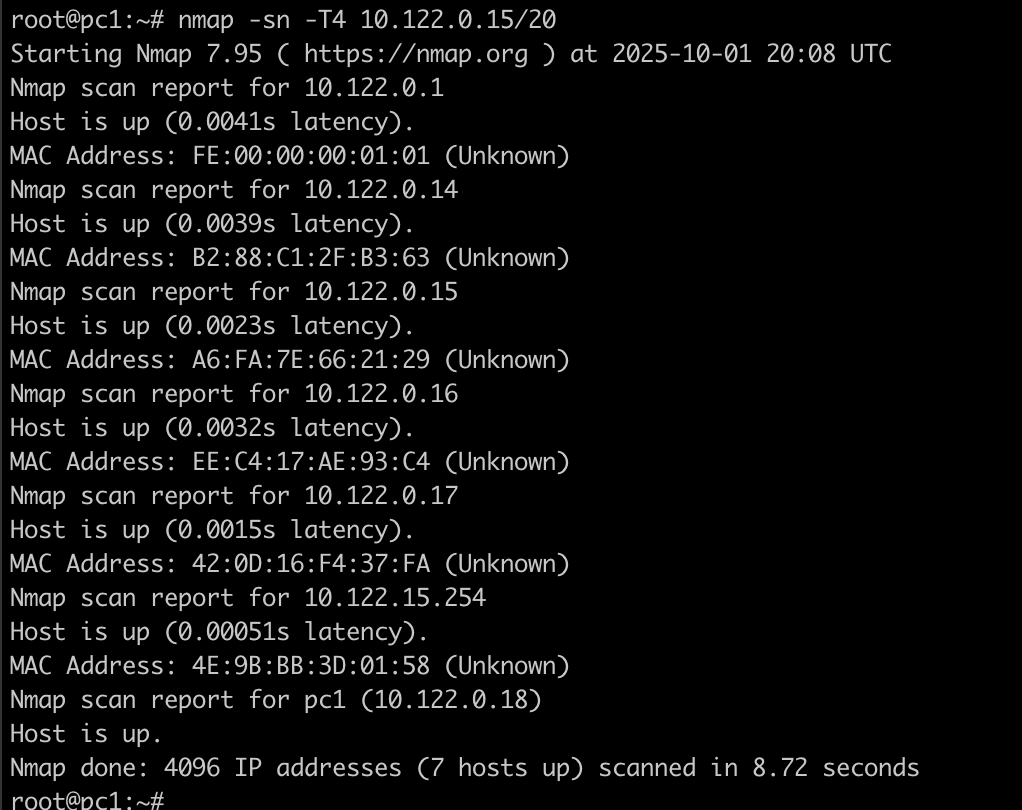
We can see that this time it gave results a bit faster, not much but in the real world it can make a difference.
3. Getting More Details
Curious about what Nmap is actually doing under the hood? Use the verbose flag.
-
-v: (Verbose) Shows you more details about the scan progress and any hosts found.
-
-vv: (Very Verbose) Shows you even more, which is great for debugging.
The output can be really large so better try this on your own
4. Saving Your Results
You’ll almost always want to save your results for later analysis.
-
-oN <filename>: Saves the results in the normal, human-readable format you see in the terminal.
-
-oG <filename>: Saves in a “grepable” format, which is easier to parse with other command-line tools. This is a classic for scripters.
-
-oX <filename>: Saves in XML format, which is perfect for importing into other programs.

Example:
nmap -sn 10.122.0.15/20 -oN my_network_scan.txt
This generates a file whose content can be seen below

Part 4: The Professional’s Playbook – Advanced Nmap Ping Sweep Techniques
This is where we separate the casual users from the pros. The real world isn’t as friendly as your home network. Firewalls, filters, and paranoid system administrators often block the standard ICMP “hello.” A host that doesn’t respond to a ping isn’t necessarily down; it might just be hiding. A professional knows how to use multiple techniques to find these hidden hosts.
Technique 1: The TCP SYN “Ping” Sweep
This is one of the most effective ways to bypass simple ICMP blocks. Instead of sending an ICMP packet, Nmap sends a raw TCP packet to a port you specify (often port 80 for web, or 443 for HTTPS). It’s like trying to open a specific door instead of shouting.
The flag for this is -PS followed by the port number.
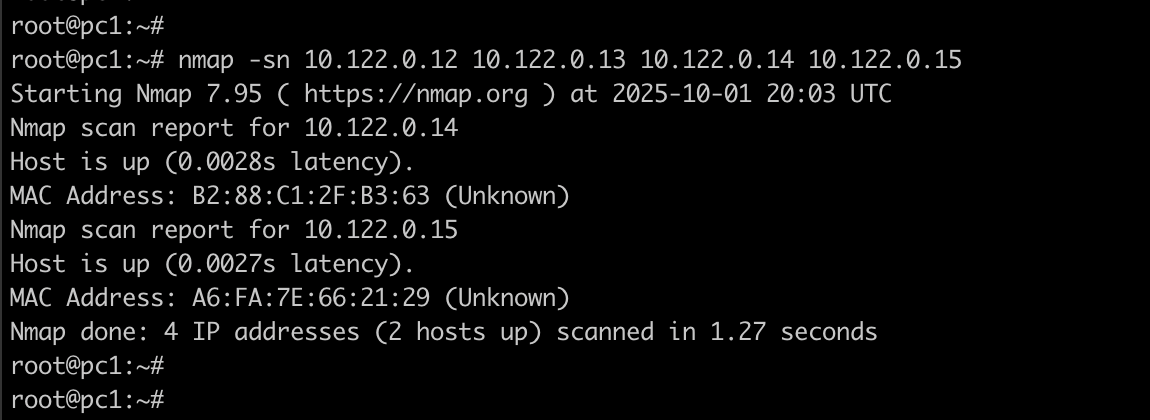
nmap -sn -PS80 10.122.0.14
This command sends a TCP SYN packet to port 80 of every host in the range. If a host responds with a “SYN-ACK” (meaning, “I’m here and that port is open”) or even a “RST” (meaning, “I’m here but I’m refusing your connection”), Nmap marks it as up. The target’s firewall might be blocking ICMP, but it has to allow web traffic, so it responds!

Technique 2: The UDP “Ping” Sweep
Some critical services, like DNS (port 53) or SNMP (port 161), use UDP. A UDP “ping” sends a UDP packet to a specific port. If the port is closed, you might get an ICMP “port unreachable” message back, which also tells you the host is alive. This can be slower but is very useful.
The flag is -PU followed by the port number.
nmap -sn -PU53 10.122.0.14
Technique 3: The ARP Scan (The Ultimate Local Discovery)
On any local network (Ethernet or WiFi), the Address Resolution Protocol (ARP) is the fundamental mechanism that maps IP addresses to physical device (MAC) addresses. ARP is non-routable and cannot be blocked by a host-based firewall. If you are on the same local network as the target, an ARP scan is the most reliable and fastest method possible.
The beautiful part? When you run a simple nmap -sn on a local network, Nmap automatically uses ARP for any targets on the same subnet. It’s so fundamental that you were already using it in our very first example without knowing! You can be explicit by using -PR.

This will almost always find every single device on your local network, even those trying to hide.
Putting It All Together: The Host Discovery Super-Combo
A true professional doesn’t rely on just one method. You can combine all these host discovery techniques into one powerful command to maximize your chances of finding every single host.
nmap -sn -PE -PS22,80,443 -PU53 -PY 10.122.0.14/20 -oA comprehensive_sweep

Let’s decode this:
-
-PE: Standard ICMP Echo ping (the classic “hello”).
-
-PS22,80,443: TCP SYN pings to common ports (SSH, HTTP, HTTPS).
-
-PU53: UDP ping to the DNS port.
-
-PY: A SCTP INIT ping (a less common protocol, but another way to check).
-
-oA comprehensive_sweep: Saves the results in all formats (Normal, Grepable, and XML) with the filename prefix “comprehensive_sweep”.
This command uses five different techniques simultaneously. If a host is up and responds to any of these probes, you will find it.
This command will provide us output in three different variants. Let us have a glimpse of xml ones

Part 5: Staying Smart and Ethical
With great power comes great responsibility. Please use this knowledge wisely.
-
Get Permission: Never, ever scan a network you do not own or have explicit, written permission to test. Unauthorized scanning is considered a hostile act by many organizations and is illegal in many jurisdictions. It can get you fired, sued, or even visited by law enforcement. Always have a signed agreement.
-
Stealth and Timing: The -T flag we discussed controls speed. Slower scans (-T2 or -T1) are much stealthier and are used to avoid Intrusion Detection Systems (IDS). They trickle packets out over a long period to avoid suspicion.
-
It’s a Starting Point: Remember, a ping sweep is just the first step. It tells you what is there. The next step for a security pro is a port scan (e.g., nmap -sS) to find out what services those hosts are running, and then vulnerability scanning to assess the security of those services.
Conclusion: You Are Now Equipped
We’ve come a long way. We started by learning what a simple “ping” is, and ended up with the knowledge to perform multi-technique host discovery sweeps. We now know how to:
-
Install Nmap and run a basic sweep.
-
Use flags for speed, output, and targeting.
-
Bypass firewalls using TCP and UDP pings.
-
Leverage the undeniable power of ARP on local networks.
-
Combine techniques for maximum effectiveness.
The command line is a tool of immense power waiting for your instructions. So fire up your terminal, point Nmap at your own lab network, and start exploring. The hidden devices you find might just surprise you. Happy (and ethical) mapping.