Smart contracts power much of what has happened in crypto over the past several years. DeFi, web3, and NFTs were all … [Read More...]


Learn ethical hacking, penetration testing, cyber security, best security and web penetration testing techniques from best ethical hackers in security field.

Smart contracts power much of what has happened in crypto over the past several years. DeFi, web3, and NFTs were all … [Read More...]

Among cybersecurity certifications, none has the prestige and reputation for offensive excellence as the Offensive … [Read More...]

An API (application programming interface) is a means for making data available to a web application. Traditionally, … [Read More...]
Learn how hackers steal your PGP keys. What may seem secure is not always so and hackers stealing PGP keys happens all … [Read More...]
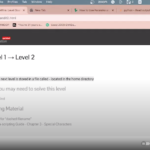
Learn how to code your own solution to CTF (Capture The Flag) exercises. After you manually solve a part of the capture … [Read More...]
Learn how to create your own social media keylogger and by extension how to defend yourself from this kind of invasion … [Read More...]
Smart contracts power much of what has happened in crypto over the past several years. DeFi, web3, and NFTs were all powered by smart contracts on blockchains like Ethereum. As the market for smart contract development continues to balloon, serious exploits have been released that can cost victims tens of thousands of dollars. In this article, we'll give you an introduction to how to find weaknesses in smart contracts, and what you can do with this knowledge. We'll assume, throughout the rest of this article, that you have basic knowledge of working with and using smart contracts. So if you're still new to … [Read More...]
Among cybersecurity certifications, none has the prestige and reputation for offensive excellence as the Offensive Security Certified Professional cert, or OSCP. The legendary difficulty and unforgiving nature of the OSCP exam has lent it something of an icon status. It's the proof that a hacker has indisputable skill and, perhaps more importantly, work ethic. But the OSCP exam is not cheap, and most people fail their first attempt. Thus, we've written this study guide to help aspiring exam-takers follow a path that will lead you to success. It won't ever be easy, but with the right resources and mentality, … [Read More...]
An API (application programming interface) is a means for making data available to a web application. Traditionally, when a server loaded a web page, it would just load any necessary data straight from the database. However, this approach has some limitations. From an engineering point of view, it's desirable to separate the presentation code from the logical part that deals with acquiring and aggregating data. There are a lot of other benefits, and if this were a software engineering guide, we'd focus on that. We can skip all of that and focus on practical API testing for hackers. In this article, we want to … [Read More...]

In the previous article, we went through the different ways of performing the Static Analysis via the APK. Although there are many aspects and other ways, but that was a beginner-friendly post. In this article, we will focus on the dynamic analysis of the application. Dynamic Analysis The dynamic analysis of the application refers to the analysis when the application is running. There are many aspects of dynamic analysis. But we will go through some common aspects and how attackers approach the target applications. Challenges While performing the dynamic analysis, the foremost objective is to … [Read More...]

When you think of hacking, MacOS probably doesn't spring to mind. Likely you think of Linux, BSD, or even Windows as the platform of choice for techies and tinkerers who want to break into something. Yet MacOS offers a unique value proposition: the Unix-y goodness and flexibility of Linux, with the user friendly ease of Windows. Whether it's installing apps via the command line, booting up Kali in a virtual machine, or auditing a smart contract using pentesting tools, using MacOS for hacking is a surprisingly delightful experience. In this article, we're going to cover some common use cases and show you how … [Read More...]

 Loading...