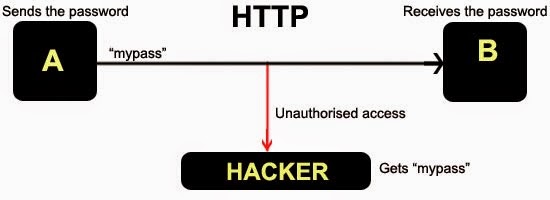
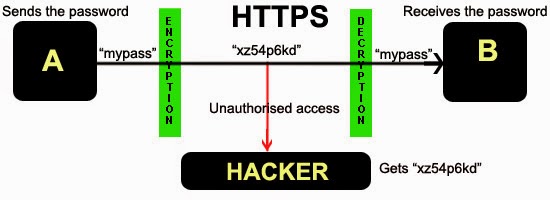
Internet security enthusiasts and penetration testers all know how critical security protocols and privacy tools are. If you browse the Internet without them, your data could easily be intercepted by governmental institutions or common hackers. The good news is that the modern miracle of encryption technologies makes it possible to protect your data, and allows you to browse the web with the peace of mind that there isn’t anyone snooping through your data. This is even better when it is a free vpn product on linux. But there are a couple problems with common VPN services, as we’ll discuss next.
Shortfalls of Commercial VPN Services
The VPN industry is actually very competitive. In fact, there are at least tens of VPN service providers, if not hundreds. And they are a great solution for end users who just want to unlock geo-restricted content or ensure that the government isn’t tracking their online activities. Furthermore, they cheap, dirt cheap. I saw one service advertising their pricing for as little as $2.08 per month. Because they’re so affordable, secure, and convenient, a lot of people are tempted to sign up for their service. But there’s a few drawbacks, as we’ll soon discover.
First of all, a user doesn’t have any control over the service. Sure, some VPN providers allow users to select which VPN algorithm or protocol at their own discretion, but some providers only allow PPTP connections (especially the free services). The problem with PPTP is that it only offers weak security, and it has been proven to be crackable. Furthermore, the end users don’t have any visibility into the VPN service providers network, and they don’t know what goes on behind the scenes. While it is pretty common for these types of providers to have no-logging policies, but even with these policies in place, many providers still make provisions in the privacy policy to reserve the right to log metadata, IP addresses, and which servers a user connects to. Also, how do we truly know that they aren’t logging any of our data?
Secondly, you also need to take great caution when selecting a VPN provider, because many of them are based in the United States. Ever since Edward Snowden blew the whistle, most people are rightfully distrustful of US-based digital services because the NSA was found to be wiretapping legitimate corporations such as Microsoft, Apple, Google, and many others in their PRISM program. Now people just don’t want to risk their data ending up on a governmental database if their VPN service is coerced into forfeiting information by the federal government.
Thirdly, you need to understand that a commercial VPN service does nothing to protect data that your are hosting at your home. For example, a lot of us geeks like to setup our own mini-networks, complete with services like a file server, NAS device, and other local services. It’s great hosting your own file server because you don’t run the risk of a data leak, infringement of privacy, or data loss. The problem is that you can’t access your home file server securely when using a commercial VPN service.
After your data reaches the VPN server, it is decrypted and sent on to your home network. This leaves data vulnerable for an entire leg of the data’s path, and when it’s unencrypted, there’s no telling who might be able to snoop through your data. The good news is that you can easily create your own VPN server using Linux…for free! If you want to, you can even route your Internet data through your home’s VPN server when your on an unsecure network, such as the Wi-Fi at an airport or coffee shop.
Prerequisites
In order to setup your own home brewed VPN server, you’re going to need a few things. First of all, you’re going to need hardware capable of running Linux. Ideally, you’d like to have a desktop computer that you can leave running for long periods of time to provide round the clock access, but you could use a desktop or other device. Secondly, you’re going to need the latest version of Ubuntu, and you’ll also need a router (but most home networks already have a SOHO wireless router). Once you’ve gathered all the resources necessary, you can proceed to use the following guide to setup up your very own VPN server. Naturally, you will want to be the root user when running through this guide.
Step 1: Setting up OpenVPN
 The first thing you’ll need to do is setup OpenVPN on your Ubuntu machine. But before we do, we’ll first need to update the repository data. Start by running the following command:
- apt-get update
Next, we’ll want to go ahead and install Easy-RSA and OpenVPN with the following command:
- apt-get install openvpn easy-rsa
Let’s go ahead and extract the example VPN server configuration file to /etc/openvpn using the following command:
-
gunzip -c /usr/share/doc/openvpn/examples/sample-config-files/server.conf.gz > /etc/openvpn/server.conf
After the data has been extracted, you’re going to need to open up the server.conf file in your text editor of choice. I’m partial to vim, but you can use any editor you wish. Use the following command:
-
vim /etc/openvpn/server.conf
We’re gong to make a few changes to this file. First, we’re going to double the RSA length to increase security. Look for the line with the text “dh1024.pem” and change it to say “dh2048.pem” and then look for the line that says “ redirect-gateway def1 bypass-dhcp.” Simply uncomment this line of text. Now we need to uncomment the following two lines of code:
-
push "dhcp-option DNS 208.67.222.222" -
push "dhcp-option DNS 208.67.220.220"
Basically, this will help prevent DNS leaks. If you want, you can use DNS servers that aren’t the OpenVPN resources. Last but not least, uncomment the lines that say “user nobody” and “group nobody.” You see, OpenVPN defaults to using the root account, but we’ll want to restrict it to the user ‘nobody’ and the group ‘nogroup.’ Be sure to save your changes as you exit vim.
Setting Up Packet Forwarding
Now we’re going to edit asysctlsetting the changes IP forwarding rules. Enable packet forwarding with the following commands:
-
echo 1 > /proc/sys/net/ipv4/ip_forward -
vim /etc/sysctl.conf
Now we simply need to remove the number sign to uncomment another line of code. Uncomment the line that says “net.ipv4.ip_forward=1.” Yet again, save your configurations and exit the text editor.Firewall ConfigurationFirst things first, let’s go ahead and make ufw use SSH for better security with the following commands:
-
ufw allow ssh -
ufw allow 1194/udp -
vim /etc/default/ufw
Now find the line that is labeled DEFAULT FORWARD POLICY. It should already be set toDROP, but we need to change it toACCEPT. Save your changes and exit, and edit the following file:
-
vim /etc/ufw/before.rules
Make sure the top of your file looks the same as the following lines of code:
# ufw-before-input# ufw-before-output# ufw-before-forward# START OPENVPN RULES# NAT table rules*nat:POSTROUTING ACCEPT [0:0]# Allow traffic from OpenVPN client to eth0-A POSTROUTING -s 10.8.0.0/8 -o eth0 -j MASQUERADECOMMIT# END OPENVPN RULES# Don't delete these required lines, otherwise there will be errors
Now, simply enable the firewall with the following command:
ufw enable
It will ask if you want to continue, so enter a ‘y’ into the terminal. It should give you confirmation that the firewall is active and running.
Step 2: Creating the Keys and Certificate
Now we need to setup the keys and CA certificate. Start by copying the Easy-RSA keys as follows:
-
cp -r /usr/share/easy-rsa/ /etc/openvpn -
mkdir /etc/openvpn/easy-rsa/keys -
vim /etc/openvpn/easy-rsa/vars
You’ll want to edit this file and enter in credentials between the quotations as they pertain to you. The file should contain the following information.
export KEY_COUNTRY="___"export KEY_PROVINCE="___"export KEY_CITY="___"export KEY_ORG="___"export KEY_EMAIL="___"export KEY_OU="___"
Also make sure that you name the key, but for the sake of keeping things simple, we’ll just call it ‘server.’
export KEY_NAME="server"Now run the following commands:
-
openssl dhparam -out /etc/openvpn/dh2048.pem 2048 -
cd /etc/openvpn/easy-rsa -
. ./vars -
./clean-all -
./build-ca
Creating the Server’s CertificateMake sure that your current working directory is still /etc/openvpn/easy-rsa, and issue the following command:
-
./build-key-server server
If you named your key something different than ‘server,’ you’ll need to change the command appropriately.Keep pressing enter through the prompt and make sure you leave the challenge password blank. However, near the end, it will ask if you want to sign the certificate and commit the changes. Make sure you enter ‘y’ for both prompts. Next, we’ll copy the keys into the correct directory:
-
cp /etc/openvpn/easy-rsa/keys/[server.crt, server.key, ca.crt] /etc/openvpn
And now it’s finally time to start the OpenVPN service. Also, you’ll want to verify that it’s actually running with the second command:
-
service openvpn start -
service openvpn status
Step 3: Making Keys for the ClientsBy now your OpenVPN server should be up and running and our server should have its own CA certificate. But now we’ll need to build and copy the keys for the clients. The files we create will need to be installed on each device that wants to connect to the VPN tunnel. Also understand that you’ll need to reiterate these steps for each additional host you connect to the VPN. You should still be in the /etc/openvpn/easy-rsa directory, so run the following command
-
./build-key client1
Yet again, make sure you sign the certificate and commit the changes. Now we’re going to copy the RSA template and rename it. It was originally called client.conf, but we’ll give it a name of client.ovpn.-
cp /usr/share/doc/openvpn/examples/sample-config-files/client.conf /etc/openvpn/easy-rsa/keys/client.ovpn
Note that you will need to copy both the certificate and the key contained in the /etc/openvpn/easy-rsa/keys/ directory to each client device. Also, copy over the following two files:
/etc/openvpn/easy-rsa/keys/client.ovpn/etc/openvpn/ca.crt
In summary, each client that wants to connect to the VPN needs the following four files:
client1.crtclient1.keyclient.ovpnca.crt
Step 4: Creating a Global OpenVPN Profile
The next thing we should do is to edit the client.ovpn template to add the CA certificate as well as they key. That way only a single, unified client.ovpn profile will need to be added to the client’s OpenVPN installation. You can name it anything you want, but the name does need to be changed. Henceforth, we’ll refer to our file as example.ovpn. The first thing we need to edit within the file is near the top, and simply substitute the IP address of your VPN server in the field in bold.
# The hostname/IP and port of the server.# You can have multiple remote entries# to load balance between the servers.remote[IP ADDRESS OF YOUR VPN SERVER]1194Yet again, find the lines that say ‘user nobody’ and ‘group nogroup,’ and be sure that are uncommented. Conversely, make sure the following three lines of code are commented out:#ca ca.crt#cert client.crt#key client.key
Now make sure that the xml at the end of the file reads as follows, remembering to insert the names of your certificates and keys:
<ca>(putca.crt here)</ca><cert>(putclient1.crt here)</cert><key>(putclient1.key here)</key>
Save the changes you have made and exit your editor. Congratulations, your client profile has now been configured.
Step 5: Installing the Client Profile
All that remains is to install the client profile on your operating system of choice, but this can vary greatly between different operating systems like OS X, Windows, iOS, or Android. Fortunately, OpenVPN has very detailed documentation that will show you how to install client profiles on just about any operating system you can imagine. We won’t get into the details of how to setup a client profile for every single operating system, however, since it’s a bit outside the scope of our tutorial. However, after downloading your free vpn product on linux and following the instructions on the OpenVPN site, you should be able to connect securely to your home’s VPN tunnel.


