ARP scanning is a process used to identify other active hosts on a local network, and they’re surprisingly easy to perform. Every aspiring hacker needs to have a solid understanding of fundamental networking protocols, and ARP is near the top of the list. Without ARP, LANs would cease to function, and you need to feel comfortable checking the contents of your ARP cache as well as understand how to perform ARP scanning.
What is ARP?
ARP is a very important networking protocol that binds layer two addresses to layer three addresses. With IPv4, ARP (Address Resolution Protocol) makes one to one links between MAC addresses and IP addresses. But ARP is frequently used by hackers to poke around and feel out local network topologies. Most often, the process of using an ARP scan falls under the reconnaissance umbrella, too. But before we look at different methods to perform ARP scans, you need to know how ARP operates on a technical level.
How ARP Can Be Used to Identify Hosts on a Network
When an attacker first connects to a new network, the hacker doesn’t have a clear picture of what other computers or devices are active. As such, they don’t have clearly defined targets for their attacks. Fortunately for a hacker, ARP can be used to illustrate the local network topology and identify hosts that have made ARP requests.
Any layer two device, such as a switch, keeps an ARP table to keep track of which MAC addresses correspond to various IP addresses. Also, most people don’t realize that a home router is really three devices in one. They are routers, wireless access points, and many have a small four-port switch as well. This means that any home router is going to keep an ARP table, but without access to the configuration interface, the attacker can’t see the ARP table’s contents.
You might also be surprised to learn that end-user devices such as phones, tablets, and PCs also keep an ARP table. If they are trying to send data to a host on the same subnet, no routing is needed, so the computer consults their ARP table to find the corresponding layer 2 address (MAC address) to send their data to. If, for example, a host wanted to send files to a NAS device on the same subnet, they would first resolve its domain name to an IP address (if a domain name is used), discover its IP address, notice that no routing is needed since it is on the same subnet, and the consult the ARP table to address frames to the host’s MAC address.
But what happens if the host doesn’t have an entry in the table for a given IP address? Well, the host simply send a local network ARP broadcast, which is very simple in nature. In layman’s terms, the host basically sends out a message to every host on the local subnet along these lines: “Hey, I need to send data to hos X.X.X.X. Which of the connected local devices has this IP address, and what is your MAC address?” After the broadcast has been sent, the correct host will send a unicast message back to the querying device and identify themselves via their MAC address.
Viewing the Contents of Your Computer’s ARP Table
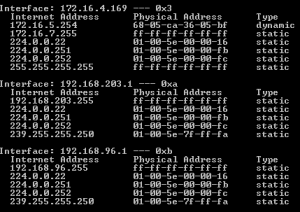
 There are some simple commands that can be entered into a command prompt that will display the contents of your ARP tables on a per-interface basis. For Windows users, simply open a command prompt and enter the following command:
- arp -a
The command prompt will then spit out the contents of the ARP cache and show each known MAC address and its corresponding IP address. For Linux users, simply issue the following command from a command prompt:
- ip neigh
This will display the ‘neighbor table,’ which is just the ARP cache by a different name. Though Linux systems did have a similar arp command, it is now deprecated with the use of net-tools.
ARP Scanning Demonstration
At its core, ARP was designed to trace IPv4 addresses on a local network. That makes it very easy for attackers to increase local network visibility and track down other hosts. In this demo, we’ll assume that you’re performing ARP scans from a Linux system. The following is the structure of the ARP-Scan command:
- arp-scan [OPTIONS] [HOSTS]
The result of this command is that any hosts supplied in the parameters will be sent ARP packets. Then, the command’s output will display any responses that were received, which indicate active hosts. You’ll want to be sure to use the –interface option to specify which interface you want to perform the scan on.
Otherwise, the command will send the ARP scan on the lowest numbered interface. This can be a real pain if you have multiple interfaces such as VPN interfaces, virtual VMWare interfaces, Ethernet, and wireless. Also understand that you can use the –localnet option to specify the local subnet of the desired interface, which helps eliminate the need for tedious subnetting math (essentially, it will scan every host in your subnet).
The end result is that you’ll be able to see all the other connected hosts on your subnet, which could then lead to other types of attacks such as man-in-the-middle attacks, packet captures, DoS attacks, and so forth. Remember, before a hacker can carry out an attack, they first need a target.
