Today we will learn how to change an administrator password in Windows 7 without using any software, CDs, or any tools. This is a perfectly manual method to reset any windows administrator password in Windows 7 in less than a minute. Sometimes users forget their windows password when they have recently reset it, so they don’t have any option to login into system, which can sometimes result in data loss. Note: This method also works on Windows 8 and Windows 10.
Disclaimer : This is for educational purposes only. Breaking passwords of machines you don’t own is illegal.
How to change any administrator password in Windows 7:
STEP 1: First, restart your computer.
STEP 2: Once you get the below screen, hold the power button on the computer until it turns off (no damage will be done, trust me).

STEP 3: You will get a screen as shown in the screenshot below if done correctly. If you get something like “Windows did not shut down correctly,” try again.
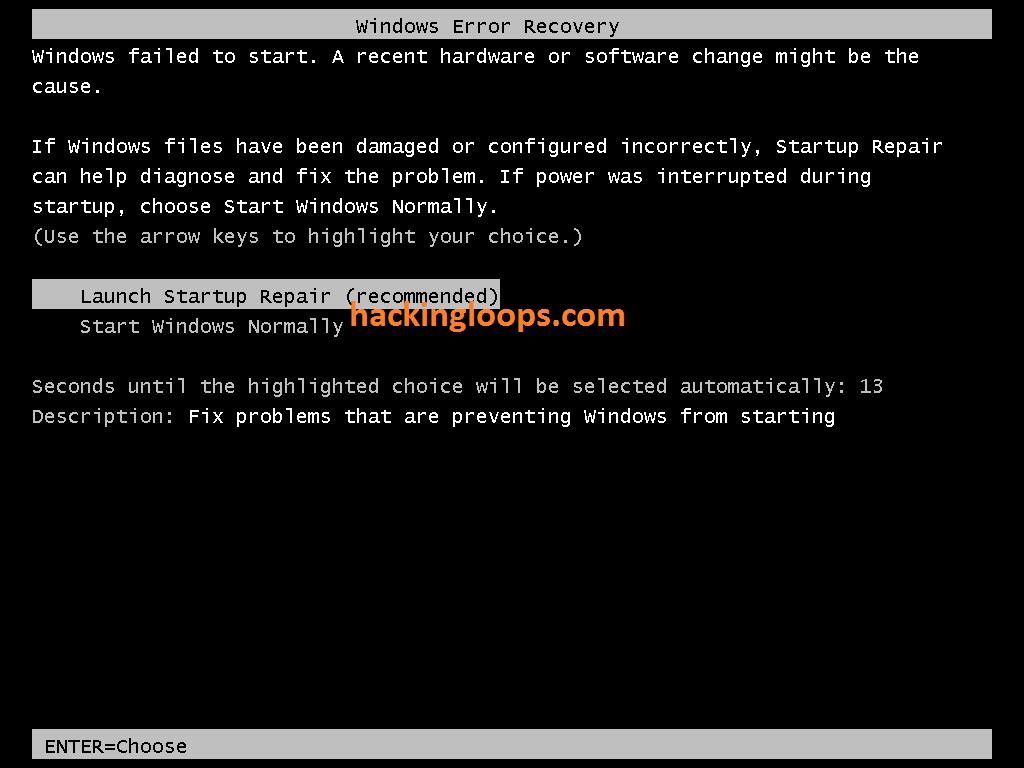
Otherwise, select “Launch Startup Repair.”
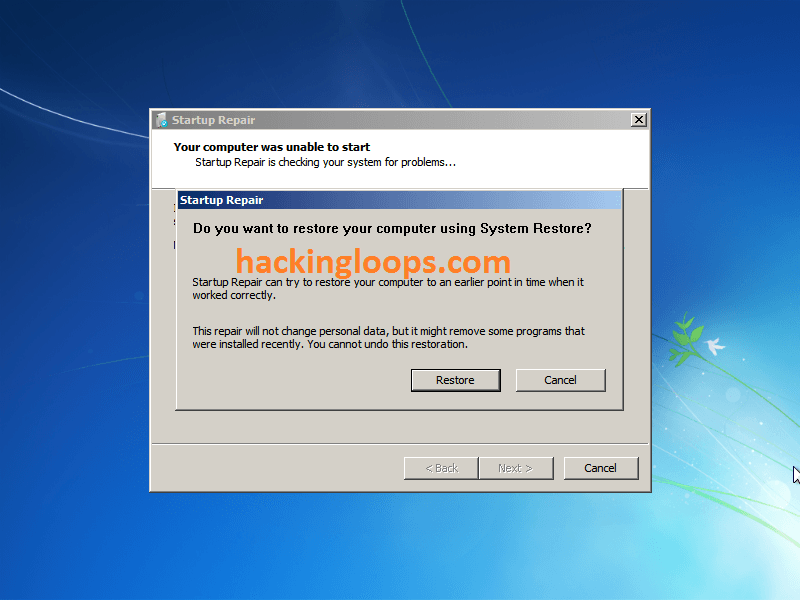
STEP 4: Now select “Cancel” on below screen:
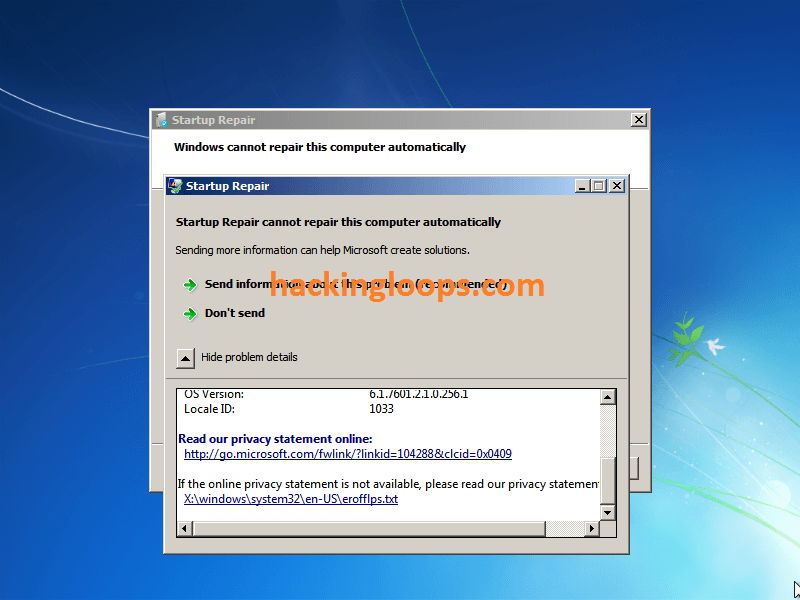
STEP 5: Now click on “Show problem details.” Click the link that appears on the bottom. Your notepad should pop up.
STEP 6: Go to File/Open, and double-click your “Local Disk” ( Default will be probably C:/).
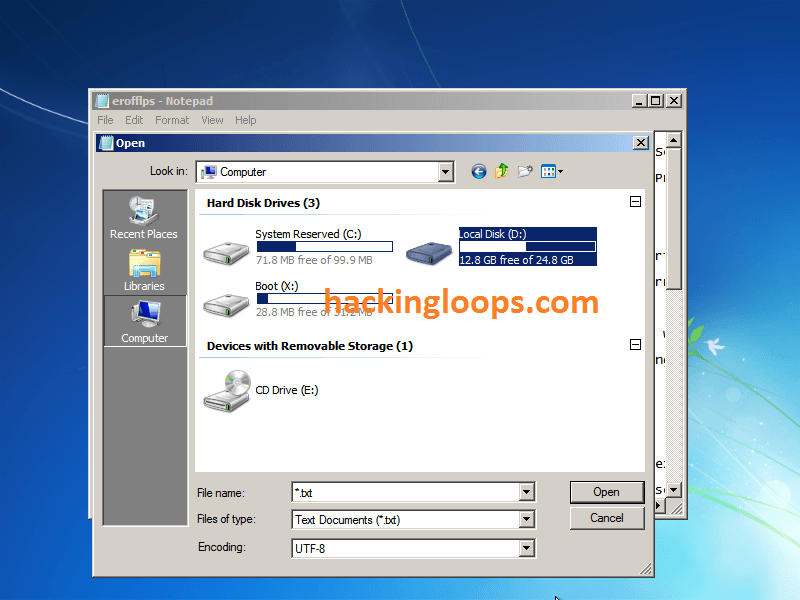
STEP 7: Go to Windows/System32. Now do EXACTLY as I say, or you MIGHT break the computer.
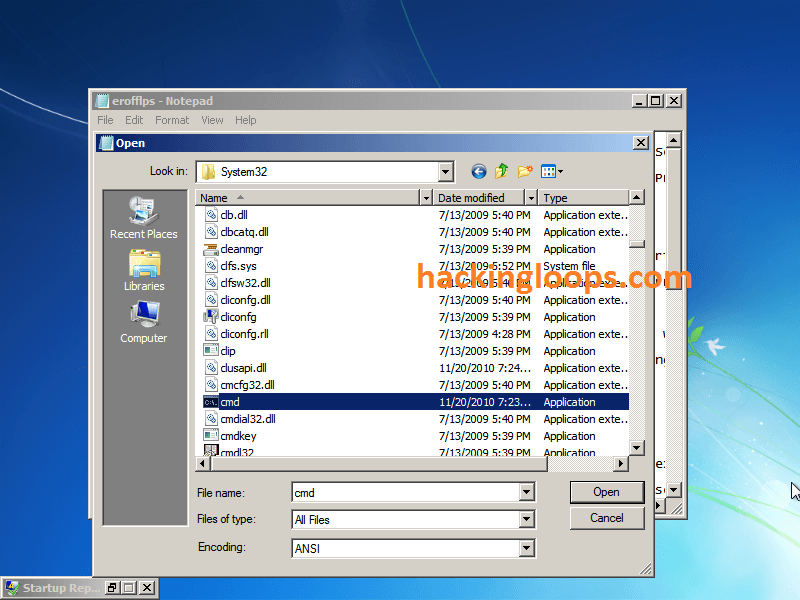
Under “Files of type,” select “All files.” Scroll down and find “cmd,” then make a copy of it in the same folder (Ctrl-C, Ctrl-V).
You should get a file named “cmd – Copy” or somethingsimilar.
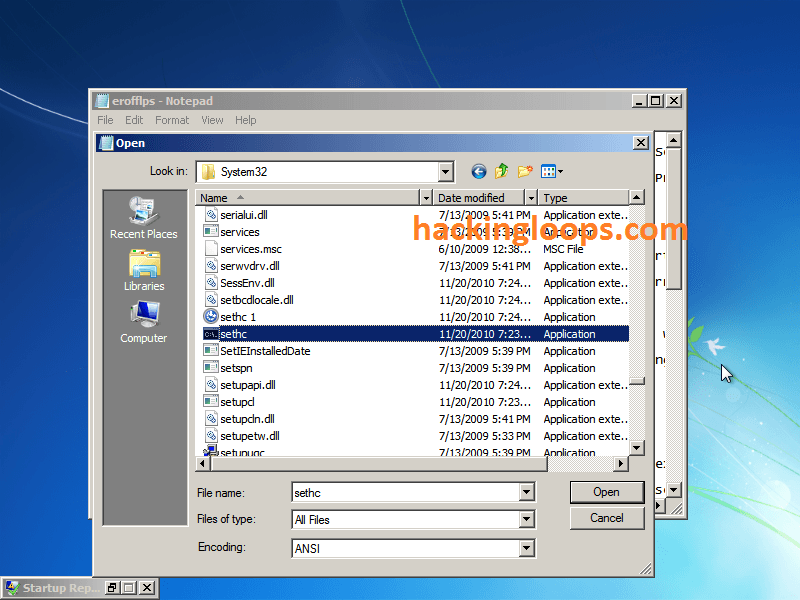
STEP 8: Find “sethc” in the same folder. This file executes sticky keys. Rename it to “sethc 1.”
STEP 9: Rename your “cmd – Copy” to “sethc.” Close notepad, and hit “Finish” now restart your computer manually.
STEP 10: Once you get back to the login screen, press “Shift” 5 times to open up the command prompt.

STEP 11: Next, we need to which user is the local administrator for this PC. To do this, type “net localgroup Administrators” and look for any administrator that does NOT have your school/work domain in front of it, followed by a “/.”

As you can see, one of the admins is named “qwaszx.”
STEP 12: Now, we need to change that account’s password.
Type “net user <ACCOUNT NAME HERE> *” and type the new password twice.
It will be blank while you type the password but your keystrokes will be recorded!

Workspaces also like to disable the admin account you just changed the password for, so you might not be able to log in. If you get that message, complete the step shown below:
STEP 13: If the admin account is disabled, type “net user <ACCOUNT NAME HERE> /active:yes” You will now be able to log in.
STEP 14: That’s it! You now have full admin rights to the PC.
WARNING: I will not be held responsible if you do this at school/work!
This is only for Educational Purpose!!
Thank you :D

nj says
You don’t giving all step it will asking for password when system recovery option start
nj says
Why launch repair start it will also ask for password what can I do I doesn’t go in next step