Open-source Debian-based Linux distribution system Kali Linux is a powerful tool mostly used for offensive security. Previously known as Backtrack Linux, the system is a symbol for security itself. Used by students aimed to learn in-depth computing and seasoned veterans practicing penetration testing and stuff. But to run Kali Linux with the default settings may not be a good idea.
Why? Because default settings are easy to crack, and as the OS is open-source itself, anyone has the right to modify it. Anyway, they want. And it includes making backdoors for running public systems. So, it depends on how a user uses the machine and “if” it needs to be secured. And our answer is YES, it does.
Kali Linux includes more than 600 penetration testing tools included in its build. Nonetheless, there are a few key settings and tweaks that need to be reverted by the user. Today we are going through a brief list of security fixes for Kali Linux and it should keep what’s inside, in! And what’s outside, out!
Discussing security is a vast concept, depending upon tools and procedures and a clear view of the goal is a must. Most people use Kali to test security, but it’s important to secure the system itself.
Change the Default Password
A default password is a bad password and every Kali Linux image has the same user name and password. It is either “Kali” or “toor” by default depending upon how the distro is used. But don’t worry, changing it is a straightforward process.
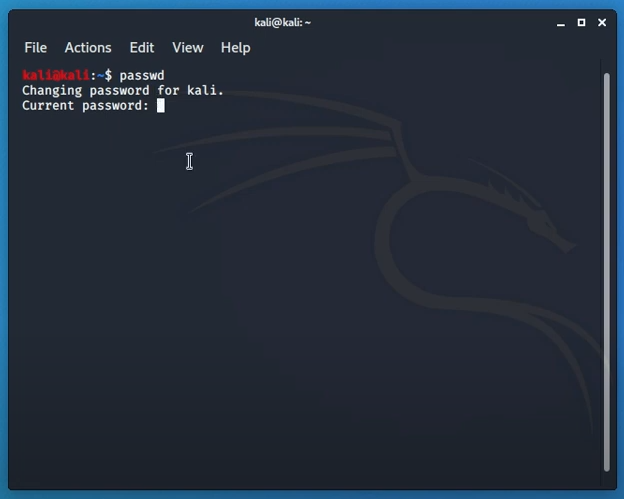
Simply typing in “passwd” in the terminal will prompt for insertion of a new password. Password should contain both uppercase and lowercase letters with scrambles of symbols and numbers. Retyping to confirm the password and entering will save the password.
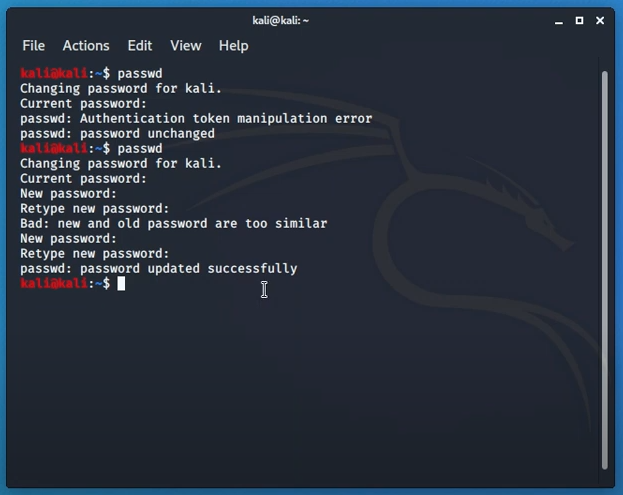
Setting the password to root means, it will have no outside access. Only an admin with a root password can get inside the system and browse data. Tweaking with root can malfunction sometimes. So, it is better not to use it often unless the user is sure of the tasks ahead. User bench statics says it is not recommended to use root for penetration tasks as it complies with vulnerabilities much often.
Unprivileged User Account
An unprivileged account stands directly below the main admin account which holds all the root permissions. Similar to family and parental accounts, we can set up unprivileged accounts. Executing tasks with a root account may pose security threats and reveal sensitive information.
It is fairly simple to create a new user and give adequate permission to it. Simply type in “adduser” in the terminal and give a recognizable name to it. The prompt will also ask for a password for this user specifically. Add a new password, different than the root user password. Once the information is validated, the user will be able to add in a “sudoers” group.
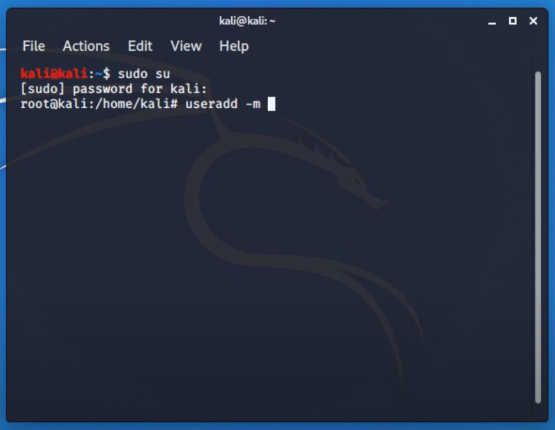
Users listed in this group can perform “sudo” or administrivia tasks. If we type in “usermod -a -G sudo username” then we are done. Here “-G sudo” adds users in the sudo group. Just like in windows we add permissions to other user accounts, e.g., family members. Typing in “whoami” should prompt stats of current users.
Updating Kali Image Frequently
There are countless versions of Kali Linux. The Linux distribution system updates their profile on monthly basis or so. It contains security updates, bug fixes, extension and add-ins protection, and plenty more.
To cope with modern world tech, it is important to stay up to date. And when we download an image to burn in a virtual environment it may already become a bit outdated. Packages can be installed and updated separately which is a beauty of Unix-based operating systems. Updating the Kali image goes through three steps. They are update, upgrade and package upgrade. While they sound like the same thing, they are not.
To clear the confusion, we need to download the updates. Then we get to upgrade it. And later we remove or add packages with a new command. The makeshift parameters confirm a full update.
For updating, the “apt-get update” command is used in the terminal.
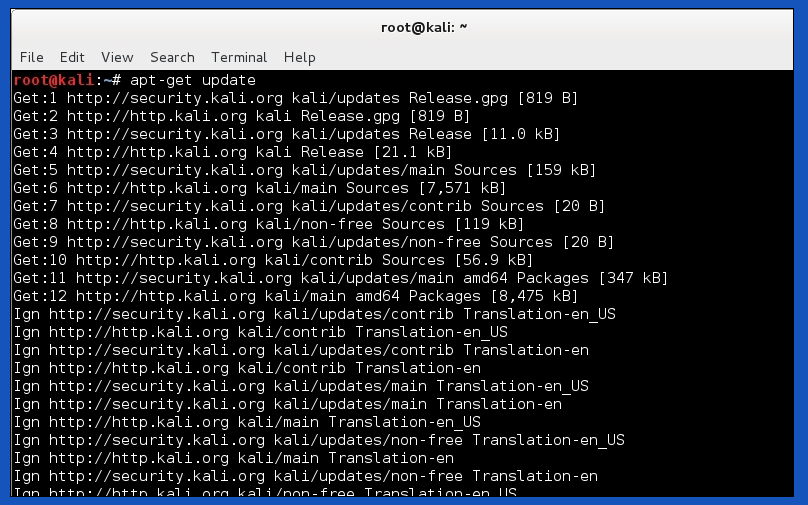
Pressing enter after the command will download and get all the required files on a basis that Kali selects. Once the update is complete, we can see there will be no more downloads. Now we can proceed to the next step which is interesting to look at. Typing in “apt-get upgrade” will now start upgrading the files we acquired previously. And there are several confirmed tags written as “Done”
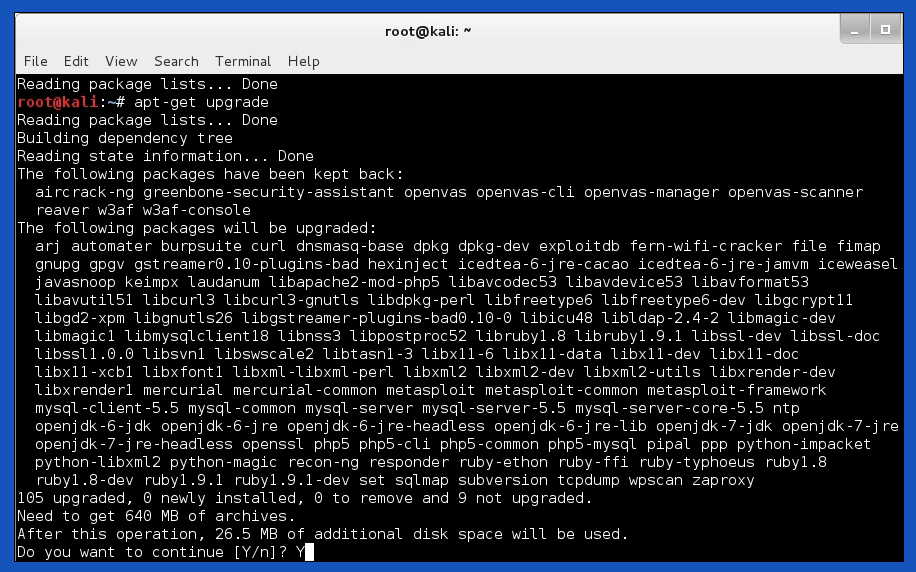
Lastly, it will show version information of previous ones and the ones we are installing now. And the command is “apt-get dist-upgrade”.
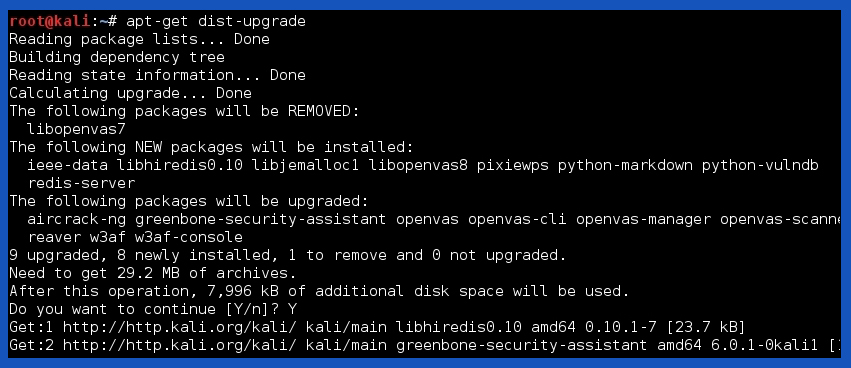
What this command does is, removes outdated packages and installs the latest available ones. This step is quite faster than the two previous. It is important to sequence the steps or the user may miss out on important core packages. If OS is not updated properly, it may reject the latest plugins or totally ignore them. Which ruins our goal.
Users of any platform know how much an update impacts performance and security. And to stay away from older packages, it is recommended to check for updates weekly.
Default SSH Keys are Not Good Enough
Secure Shell or SSH is a network protocol. It lets computers communicate securely. As you’re on this page via the web, you’re already using some sort of SSH. And there is no way around it but to fix present or upcoming security issues. Even for distros we use, there are SSH keys that let us verify authentic files from a source.
It may seem all fine and dandy but the problem is, for everyone they are the same keys. Let’s understand it this way. If we download software from a website, it is the same distribution copy that everyone downloads. Later we use our accounts with the software for a personalized experience. And the service provider gives adequate power according to the subscription under those accounts. SSH keys have quite the same fundamentals but those are used to verify files.
If anyone conducts Man-in-the-middle-attack (MitM), a social engineering protocol, it may hamper our security.
SSH lets users authenticate without inputting passwords every single time. There are two types of SSH keys. One is public and the other is private. We may change our public keys cause for every distro it is the same. And generating a private key will make sure only authenticated users can access it.
SSH keys are located in “/etc/ssh” by default. The list view will shows all the keys inside. Instead of deleting them from the database, we are going to store them somewhere secure as makeshift.

To create a new folder, “mkdir personal_directory”. To move them in the folder we just created, simply type in “mv ssh_host_(full file name)/etc/ssh/personal_directory”. Multiple file names start with ssh_host. All of these are SSH keys. To view them later “ls personal_directory” will bring these keys in front of us.
After the backup process, we can create new ones. In the terminal, type in “dpkg-reconfigure openssh-server” to generte a new set of keys.
Creating SSH2 RSA key; this may take some time ...
Creating SSH2 DSA key; this may take some time ......
Creating SSH2 ECDSA key; this may take some time .........
To authenticate and check MD5 hash values, again type in terminal “md5sum /etc/ssh/personal_directory/ssh_host*”. This command will let us differentiate and check values with plain text and numbers. Which makes stuff pretty easy.
Secure Identity
While browsing the internet with a Kali Linux machine, we can use the “kalitorify” script to browse safely and anonymously. Even though “macchanger” is recommended to change hostname beforehand. We can change our hostname from Kali to a nameserver. And add a host similar to 8.8.8.8.
To download the script in the terminal type in each of these commands and press enter.
“apt-get update && sudo apt-get dist-up-grade-y”
“apt-get install -y tor curl”
“cd kalitorify”
“sudo make install”
Now if we type “kaliftorfify -t” our script will start. For reverting to regular IP, execute “kalitorify -c”. As simple as that.
Monitoring Logs
Analyzing the logcheck program can be a lifesaver. It can send logged messages directly to the administrator’s email. Log files here are locally stored inside “/etc/logcheck/logcheck.logfiles” by default.

Another tool is “Top”, built right into the system that shows real-life monitoring activity. Even the xfce4-taskmanager graphical tool can perform similar actions. GNOME users can use gnome-system-monitor and for KDE, we have ksysguard. They function quite the same and can be used according to the user’s taste.
Packet or Firewall Filtering
A firewall acts as a wall between incoming and outgoing connections. Though the default firewall comes with a set of rules, users can change and modify as per need. The firewall parse all packets and prevent rogue connections and files.
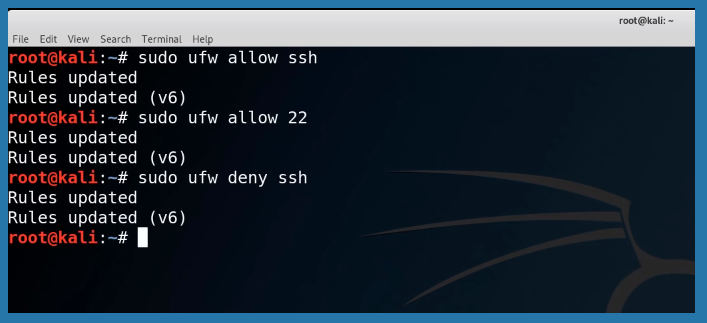
Sudo ufw allow and deny tags can be used to modify commands.
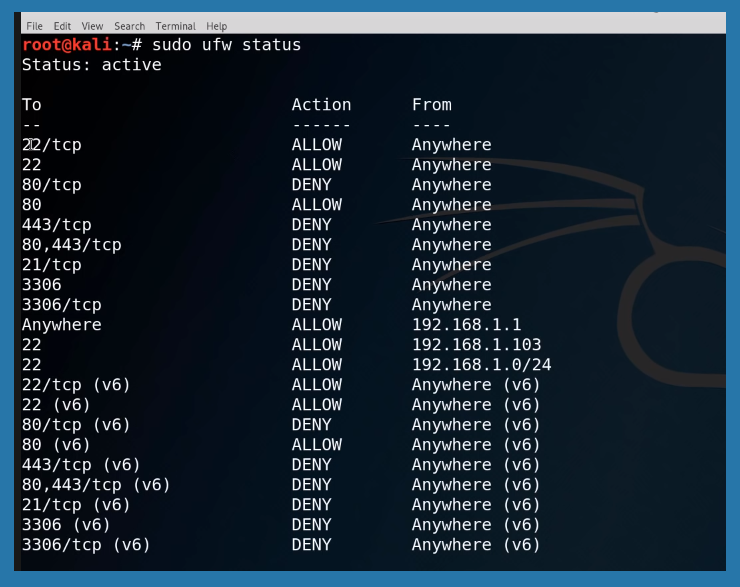
Net filter firewall is based on the Linux Kernel. If we want to control the Netfilter, “iptables” and “ip6tables” commands can be used. Netfilter has certain behavioral statics. It can filter (accept, refuse, & ignore packets), nat (Network Address Translation, examines source or destination of address), mangle (detects types of service) & last but not least, raw (used for manual modifications).
We can go further and explain this broadly, but it will make the article way longer, which cuts away the goal. For now, this is enough to know for staying secure and be a peaceful Kali Linux user.
Summary
Kali Linux is a secure environment itself. But advanced user goes above and beyond for daily tasks and it is necessary to follow proper procedures. New users coming from other operating systems may think just running the OS inside VirtualBox or virtual machine is the safest procedure. It is quite true but certain steps must be taken.
Nonetheless, constant monitoring has no alternative in cyberspace. Users should take time and practice a comprehensive security policy. Alongside, unused services should be disabled & monitored. Similar to general use, HTTP hosts should be visited and by these, a user can feel secure in front of the Kali Linux machine. Hope this article helps our fellow Kali Linux users.

Leave a Reply