
When we talk about learning ethical hacking, the first thing that comes in our mind is the platform where we can practice the penetration testing methodologies. The most common and favorable setup is the Kali Linux OS installed in a virtual environment like Oracle Virtualbox and VM Ware. One can follow our “Kali Linux Pentest Lab” tutorial to get started with Kali Linux as a testbed for penetration testing. This article is about another Debian based operating system called Parrot OS that has emerged as a strong penetration testing platform. The main integrated features of Parrot OS are software development stack and variety of Cybersecurity tools. This tutorial is a step-by-step guide to install and configure the Parrot OS in a Virtualbox for penetration testers and other Cybersecurity professionals.
How to Install Parrot OS in Virtualbox?
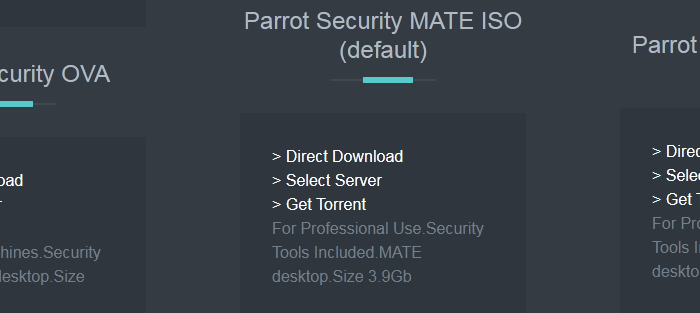
The Parrot OS has different editions to meet the requirements of the users. Since we are concerned about the security edition, we can download the default Parrot Security MATE ISO version from the following official repository.
parrotsec.org/download/
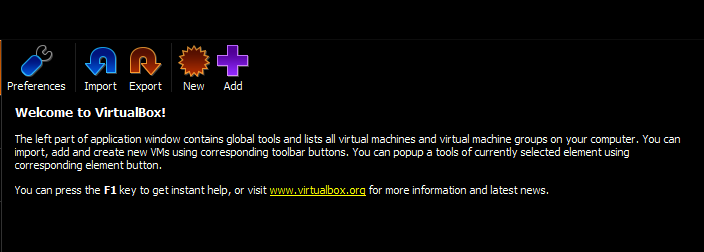
Once the Parrot OS image is downloaded; open the new installation wizard from the Virtualbox dashboard.
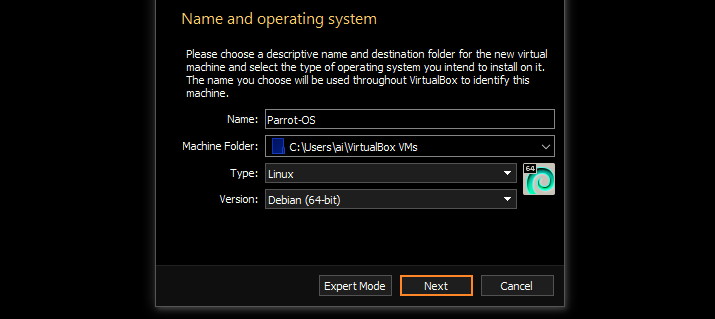
A new window appears that requires name, type, and version of the operating system to be installed. Since the Parrot OS is a Linux operating system based on Debian, select the type and version as shown in the following screenshot. Any name can be given to the new Linux machine. We have called it “Parrot-OS”. The machine folder setting is automatically fetched by the Virtualbox installation Wizard.
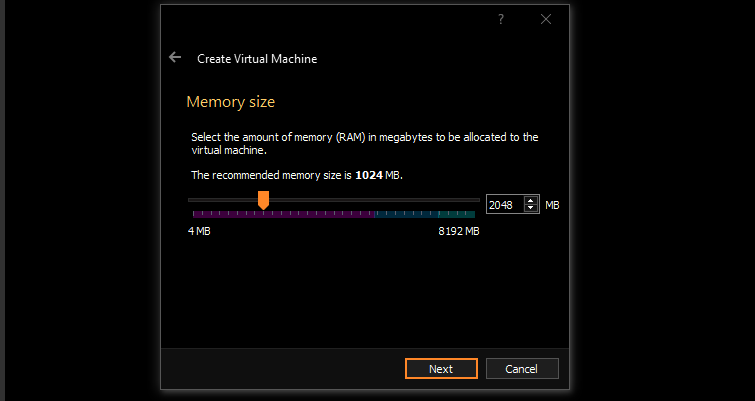
Select the memory for the new OS according to your available resources. Since the Parrot OS is a lightweight operating system, it can perform well with 2 GB RAM.
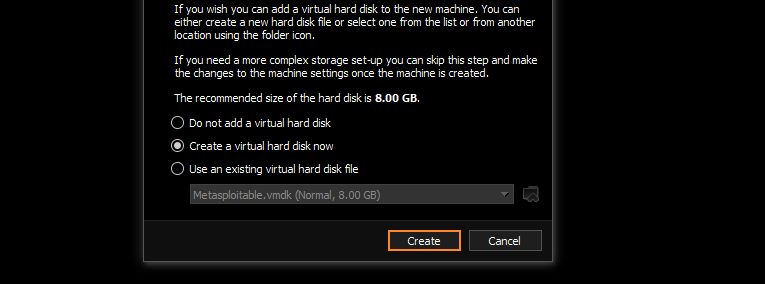
The next step is the creation of a virtual hard drive for the OS.
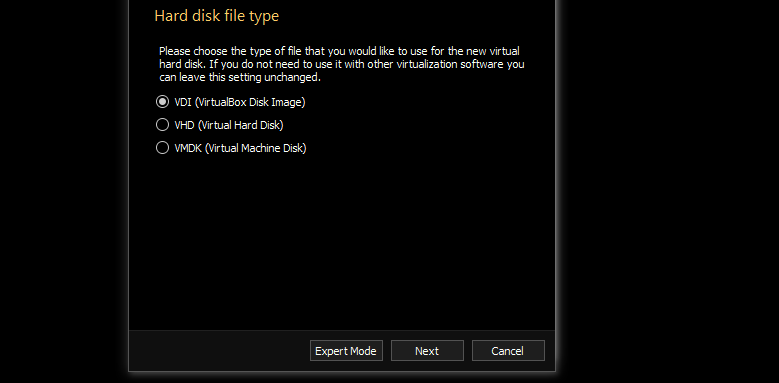
There are three hard drive options in the Virtualbox. For the selected Parrot OS version, we need to choose the Virtualbox Disk Image (VDI) type to create the virtual hard disk.
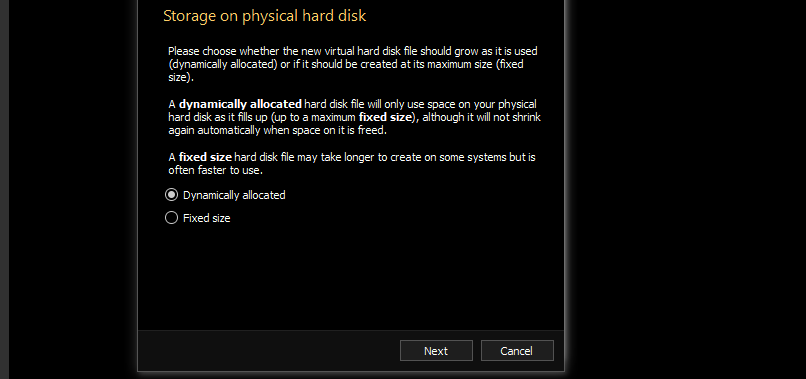
The selected hard drive type can be a fixed size disk or it can be used as a dynamic drive that can expand itself as per requirement. We prefer the dynamic type over fixed size.
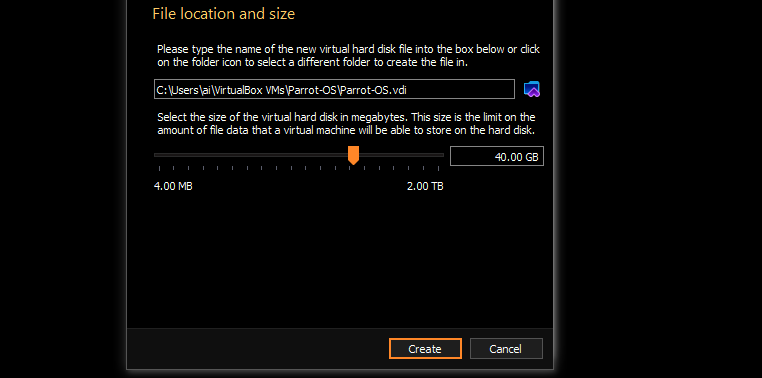
In the next step, select the size of the hard disk. The recommended minimum size is 40 Gigabytes.
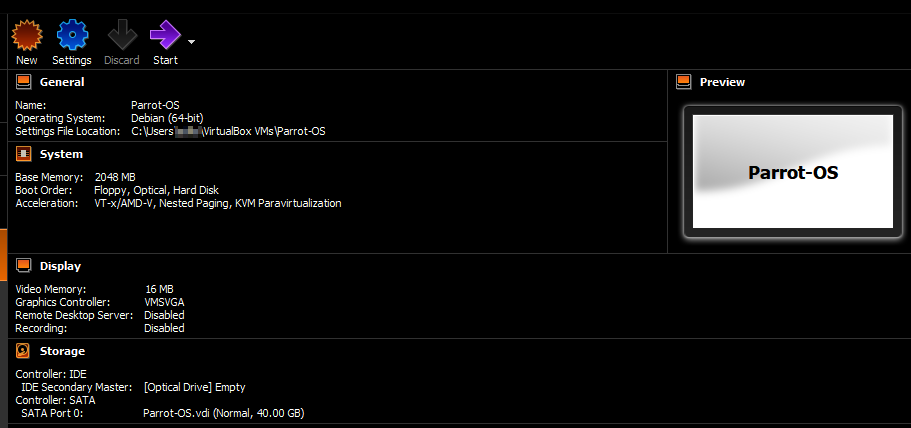
With the hard disk size selection, we are done with the basic configurations required to set up the Parrot OS in Virtualbox. The summary of the selected options appears in the Virtualbox interface as shown below.
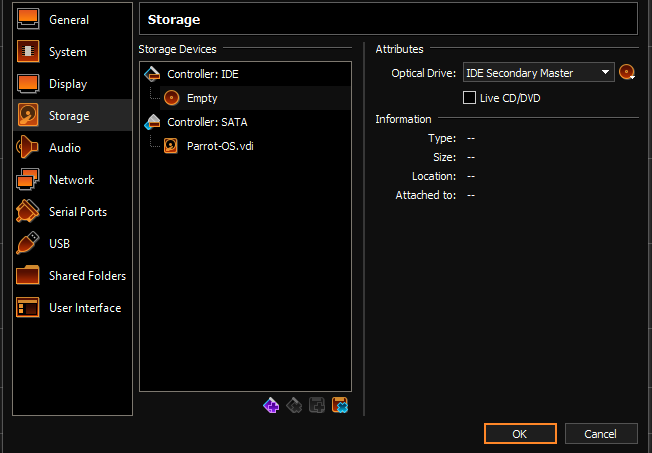
Before initiating the installation process, we need to set a path for the downloaded Parrot OS image. Open the storage menu by clicking the Settings tab from the main dashboard. Click on the empty disk icon under Controller:IDE; Navigate to the optical drive option and again click on the disk icon as shown in the following screenshot.
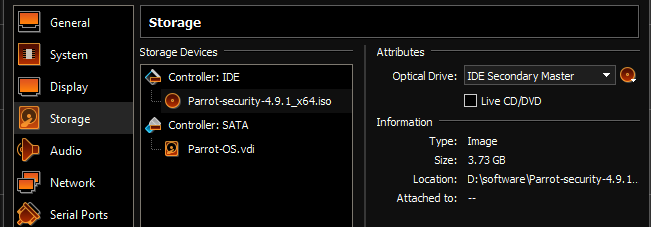
Locate the Parrot OS image on your machine and save the settings as shown below.
Now we are ready to initialize the Parrot OS installation wizard. Hit the Start button from the Virtualbox’s main menu to start the installation process.
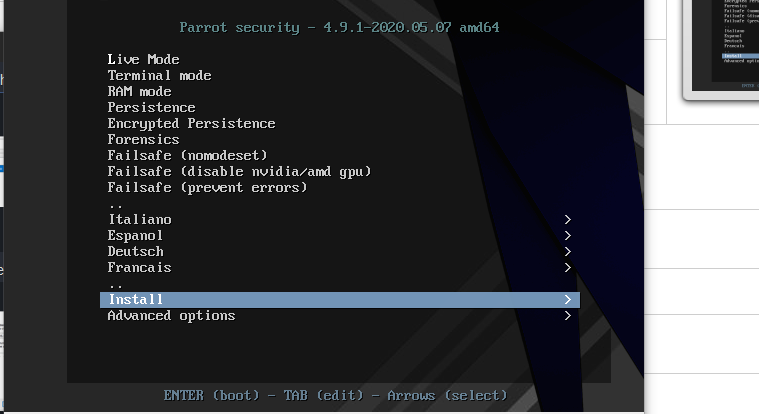
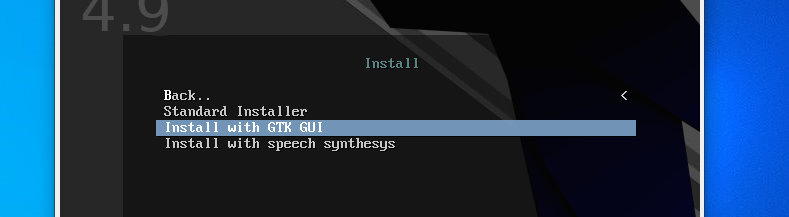
There are three ways to monitor the installation process. We are happy to go with the GUI option since it is easy to follow.
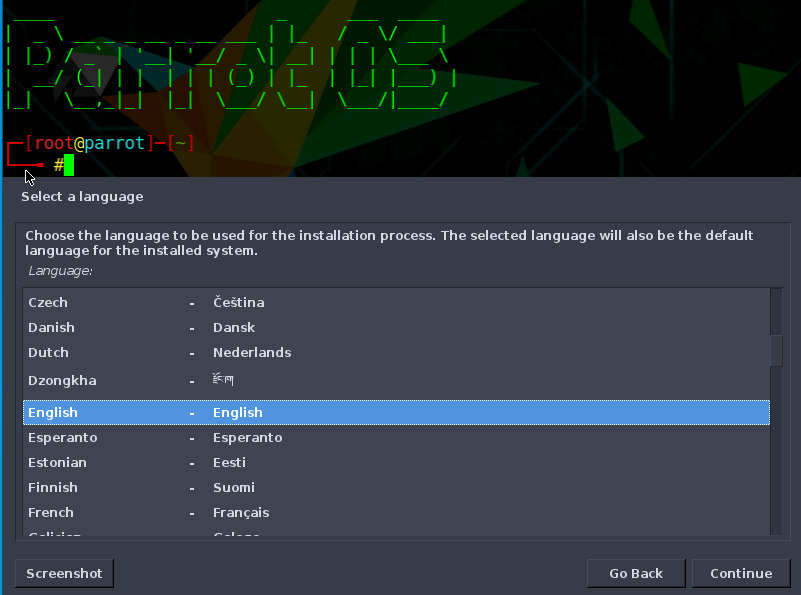
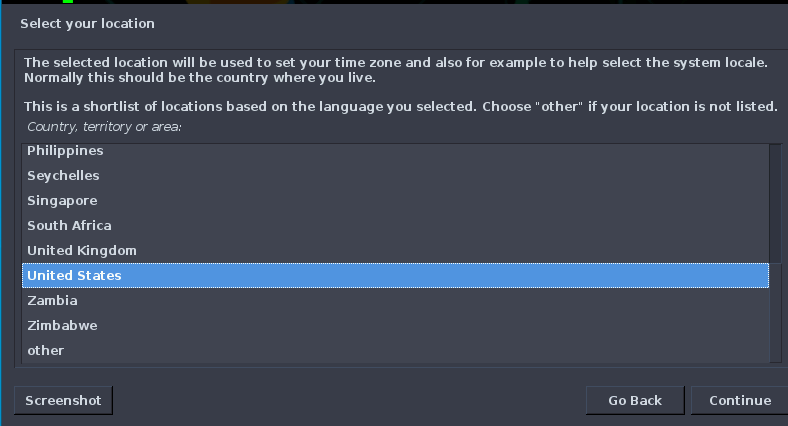
Select the desired language and region from the available options.
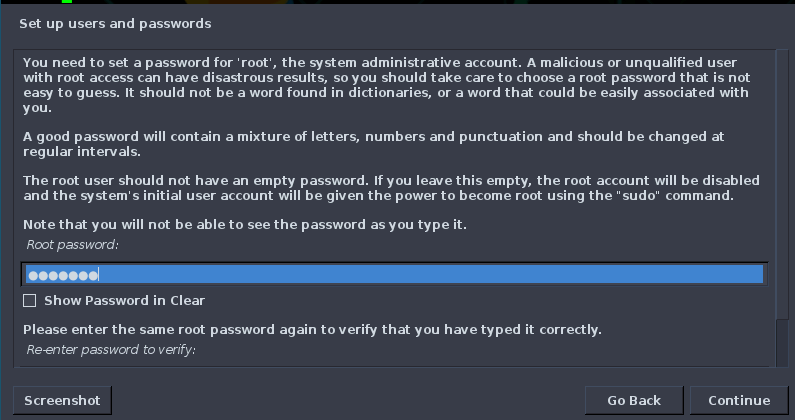
The setup wizard asks for a root password. If we skip the password selection at this stage, the first user on the system shall be given the superuser powers on the machine.
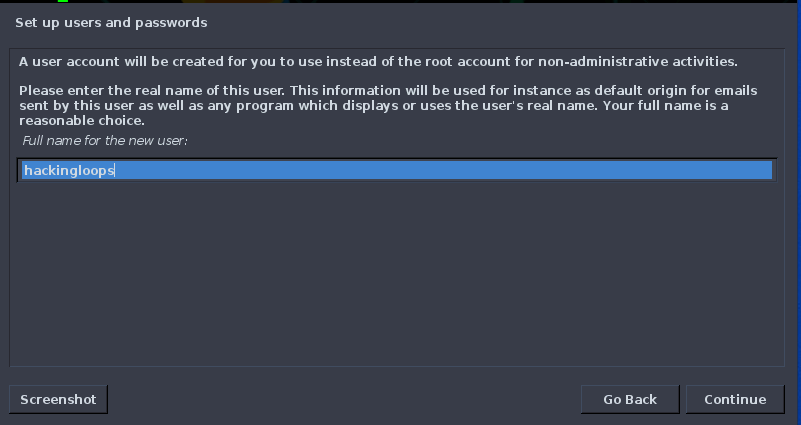
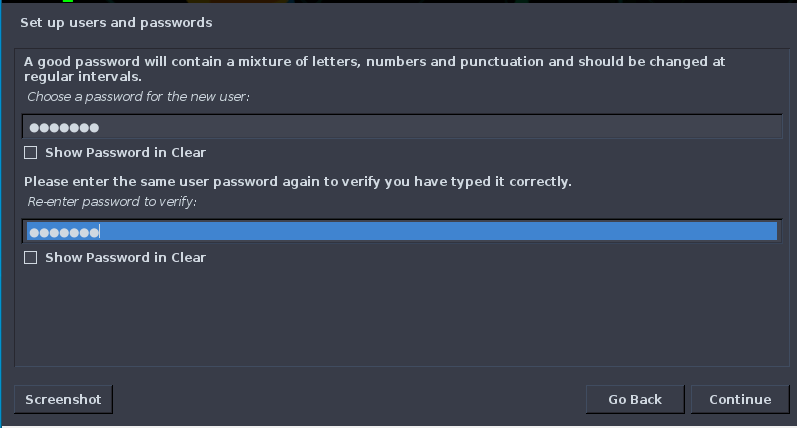
In the next step, we need to create a user on the machine. Type your desired username and password.
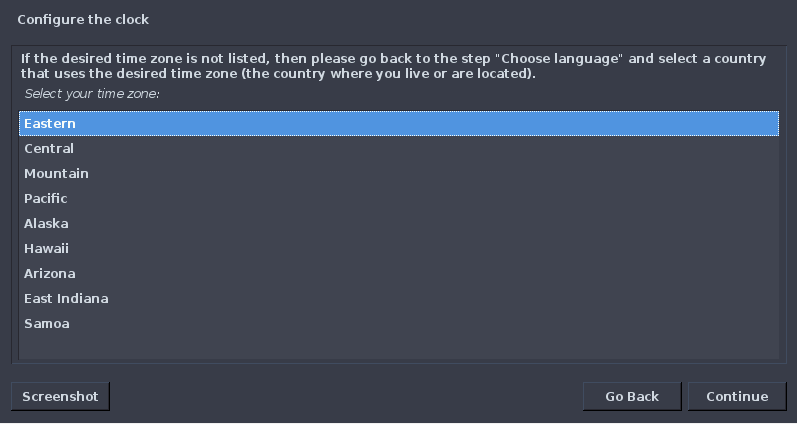
Configure the time-zone according to your selected country.
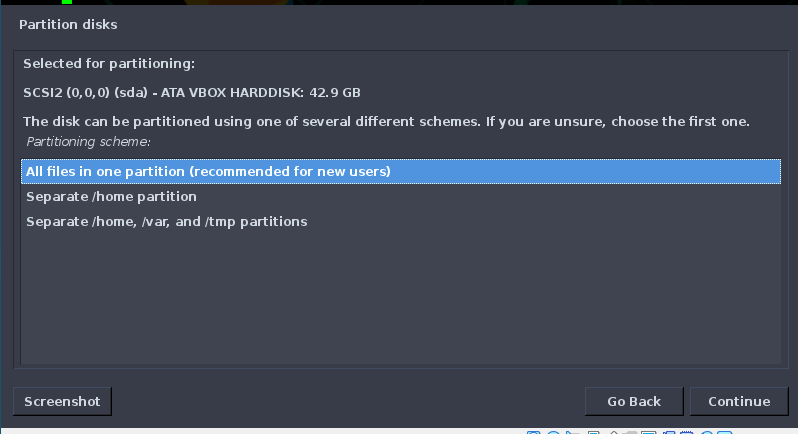
Just like other OS installations, the Parrot OS also offers disk partition features during the installation process. We can perform the partition either manually or select the OS guide to do the task.
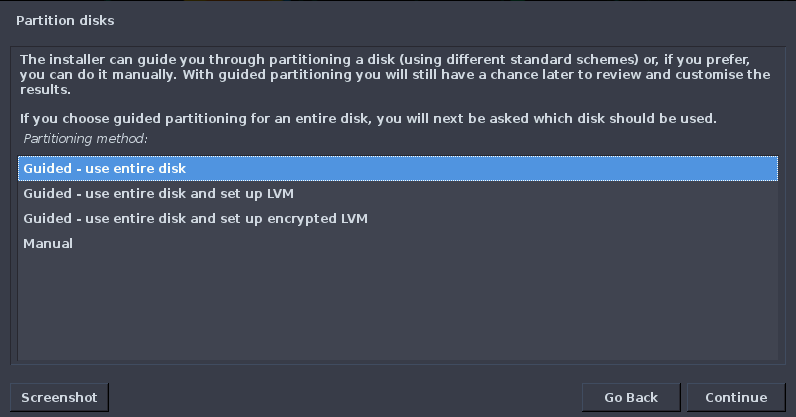
For the current OS installation, we stick with one partition for all types of files to be loaded in the system.
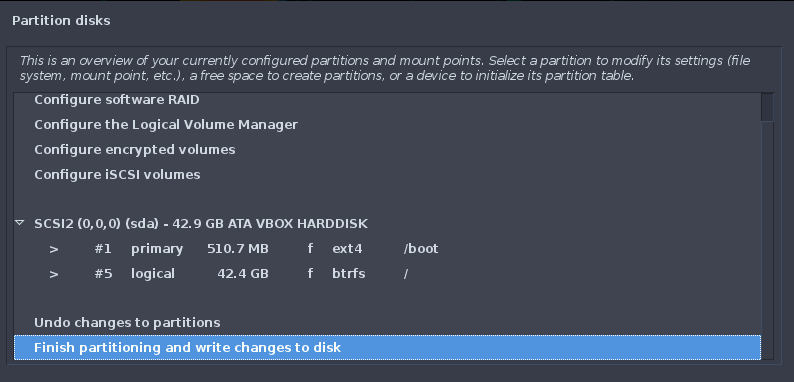
The setup wizard automatically creates primary and logical drives as shown in the following screenshot. Complete the partitioning process to move on to the swap partition option.
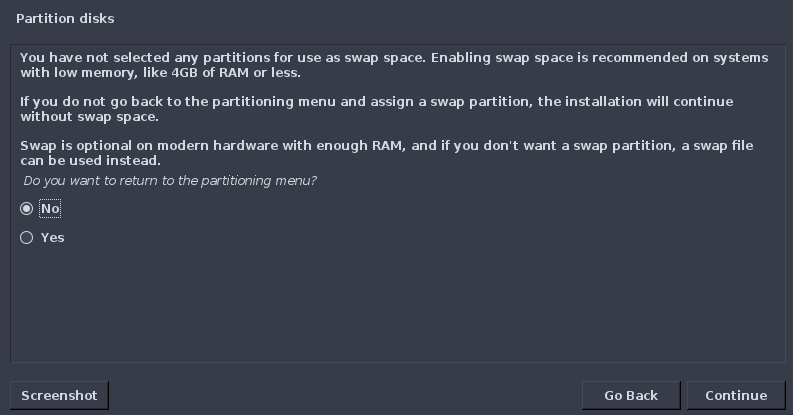
The swap partition is a memory enhancement feature in Linux. When the physical memory (RAM) is unable to write more data, the inactive pages in RAM are moved to the swap partition. Since we don’t have any memory issue; we are not going to create a dedicated swap partition.
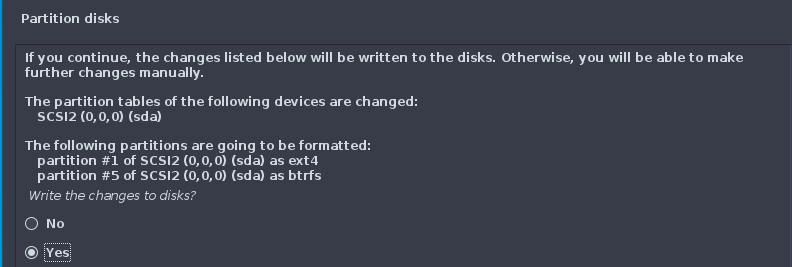
The wizard asks for one more time to review the changes before formatting the hard disk.
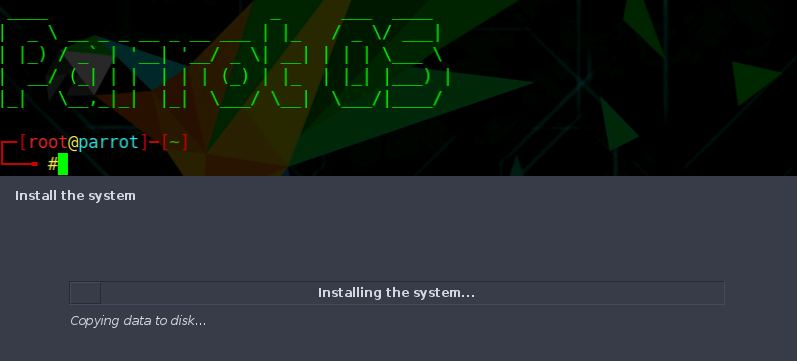
The Parrot OS installation process begins at this stage. The system starts copying files to the selected virtual disk.
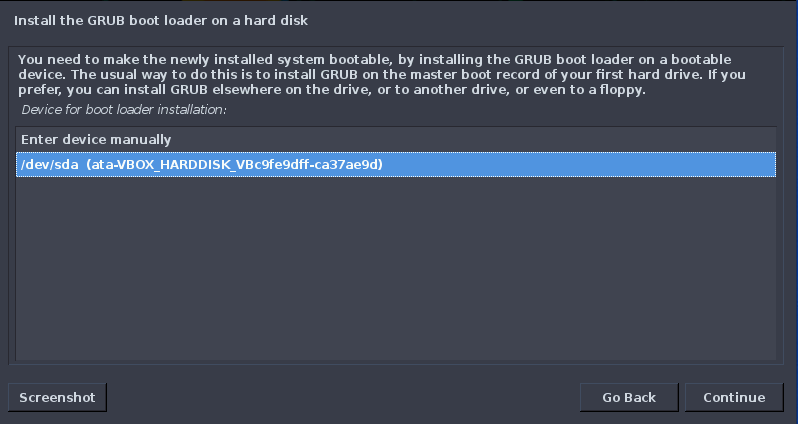
We also need to install the Grand Unified Bootloader (GRUB) in the new OS as it is required to start the operating system.

The GRUB is automatically installed on the master boot record of the hard drive. We can manually change the GRUB path if required.
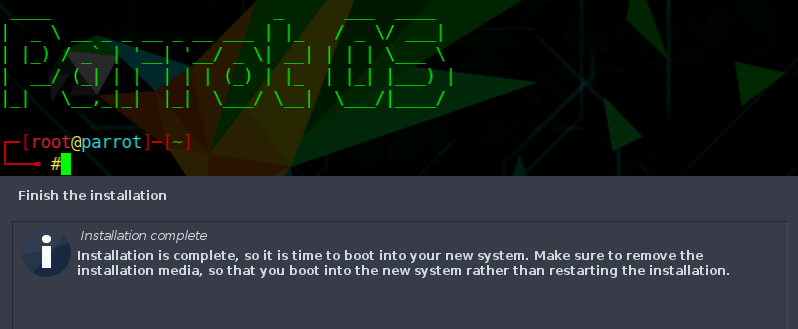
The installation completion message appears on the screen after the successful installation of the OS.
A login screen appears with your selected username and password field; Sign in with your credentials.

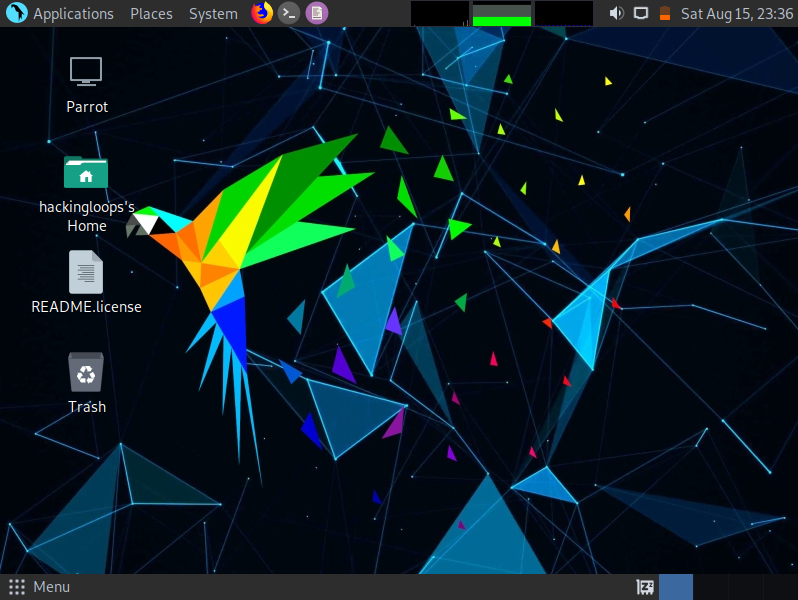
Welcome to the world of hacking with a new testbed–The Parrot Security OS
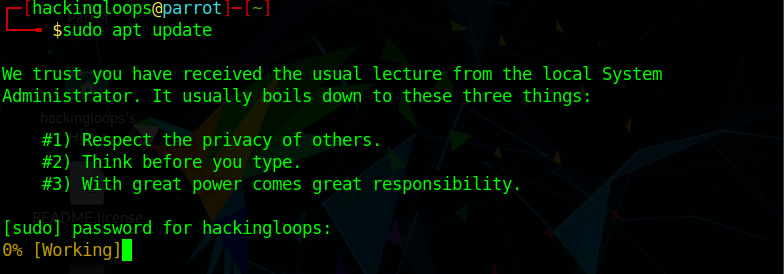
At this stage, we are ready to use the Parrot OS by updating and upgrading all the packages that are pre-installed on the system. The following commands are used to update and upgrade the system packages and utilities.
sudo apt update
sudo apt upgrade
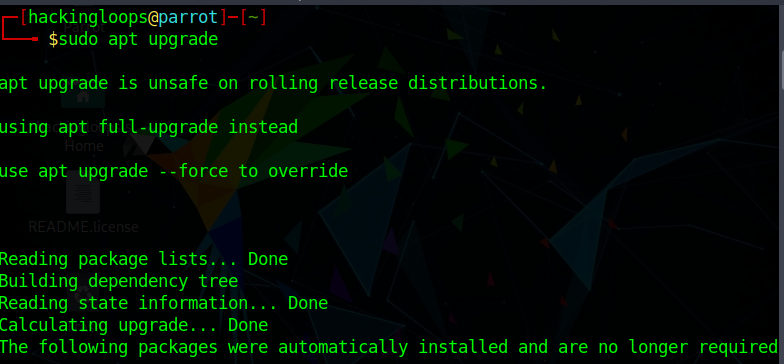
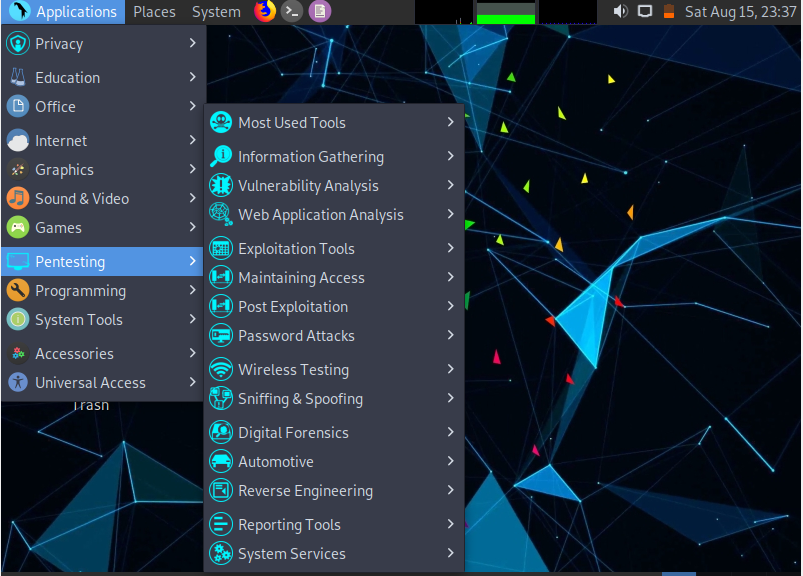
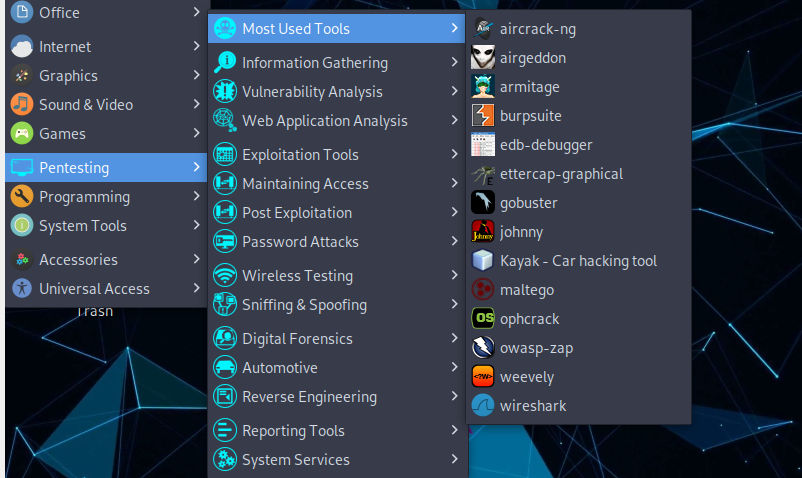
The Parrot OS requires the sudo permission to install the updates. Therefore, provide the sudo password when prompted to update, upgrade, or install new packages. After the updates are completed, we can explore the security tools from the start menu or applications menu as shown in the following screenshot.
The categorization and selection of the tools clearly suggest that the Parrot OS is a well-organized operating system that can be used to perform any type of security audits by red and blues of the Cyberworld.
Installation of Virtualbox Guest Addition
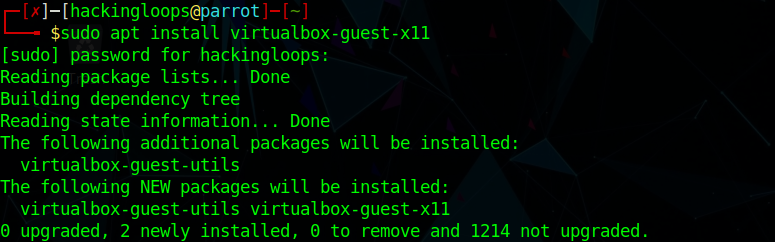
Although we have successfully installed the OS that is ready to perform penetration testing, we are still missing some features, such as full-screen option and bidirectional sharing of files between the guest (Virtualbox) and host operating system (Windows). We can avail of these features through the guest addition package that can be installed using the following command.
sudo apt install virtualbox-guest-x11
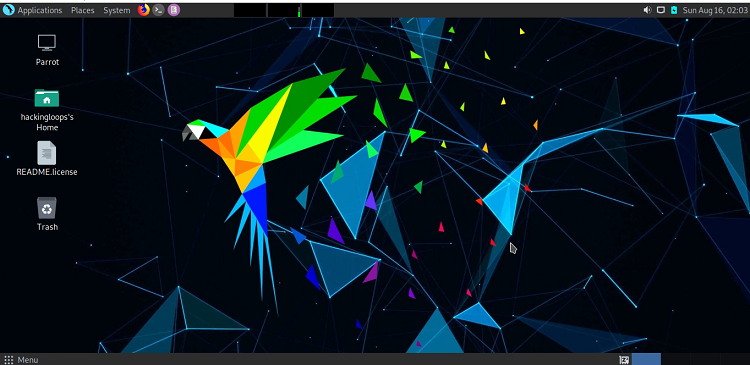
After successful installation, reboot the system to integrate the guest addition features to the system. Now we can see a full-screen Parrot OS.
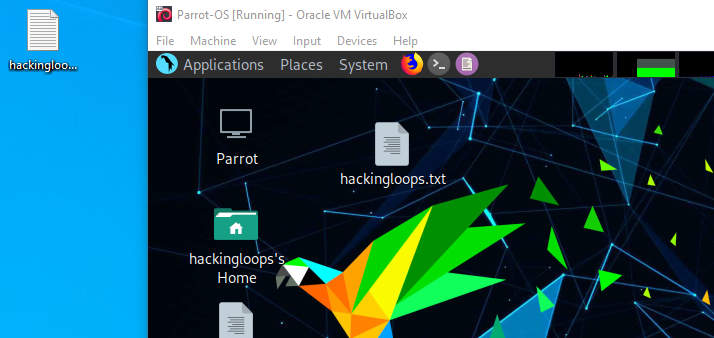
Click on the Devices menu to select the ‘Bidirectional’ option from ‘Shared Clipboard’ and ‘Drag and Drop’ menus.
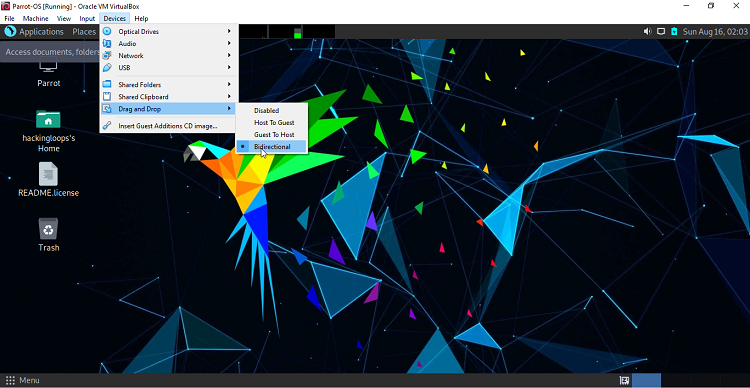
The “Bidirectional” feature allows us to transfer files between the Parrot OS and the Windows OS that hosts the Virtualbox. We can verify the working of the utility by creating a sample text file (hackingloops.txt) on Windows OS and copying it to the Parrot OS.
Conclusion
Kali Linux is the preferred machine of penetration testers. The majority of the newly developed tools are tested and recommended for the Kali Linux platform. However, the Parrot OS has become a strong competitor of Kali by integrating almost the same Cybersecurity tools and providing the same ease of use that is required in ethical hacking.