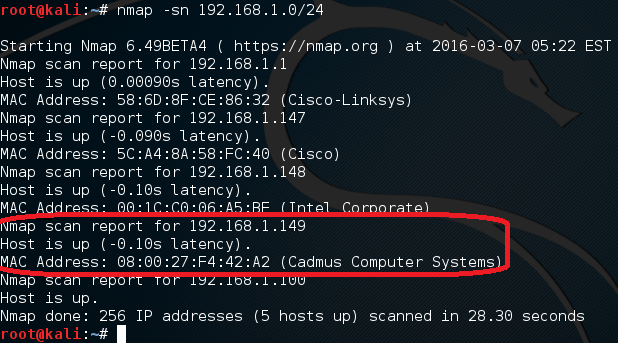
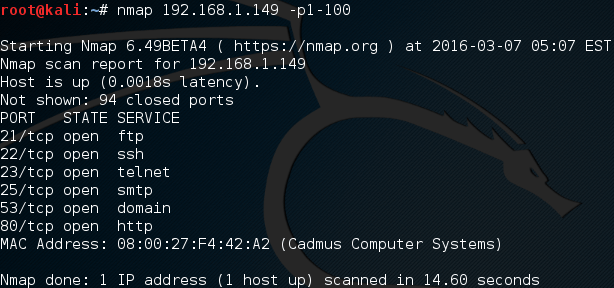
Welcome back everyone! In the last article we took a brief look at recon as a whole, but we didn’t really focus on any particular aspect of it. Today, we’re going to dive into the rabbit hole that is port scanning. We’re going to cover two different types of port scans, but this time we’re going to explain the process behind them. Before we do that, we’ll need to talk about the TCP three-way handshake, and it’s role in our scanning. So, without further adieu, let’s get started!
The TCP three-way Handshake
When making a connection to a port, there are multiple protocols that are used to handle and manage that connection. A protocol is simply a set of rules that both hosts use. This ensures that all hosts know how to properly send and receive data to and from each other. One of the two protocols responsible for transporting data is TCP. In order to initiate a connection, a three-way handshake is performed.
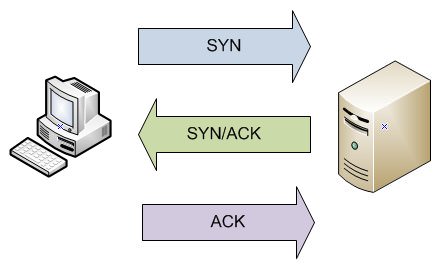
First, the host attempting the connection sends a packet with the SYN flag. SYN stands for synchronize, and means that one host is requesting to synchronize with another. After the SYN packet is sent, the second host must check that the proper authorizations are in place for this connection to be made. If all the requirements are met, then the second host sends a packet with the SYN and ACK flags. The SYN flag again stands for synchronize, while the ACK flag stands for acknowledge. This packet means that the second host acknowledges the original SYN flag, and sends it’s own SYN flag to confirm the connection. Finally, the first host sends a single ACK flag back to the second host, completing the handshake and establishing the connection.
Now that we know about the TCP three-way handshake, let’s move on to talking about our standard port scan. We’re going to be discussing the same form of basic scan we did in the previous article, so we can have a better understanding of it before moving on to a more complex scan.
Explaining the Basic Port Scan
In the last article, we used nmap to perform a very basic port scan. We didn’t really explain this port scan very deep, so we’re going to cover it today.. Remember that three-way handshake we just talked about? Well in order to understand port scanning, we need to know it very well. We’re not going to perform another basic port scan today, as we’ve already demonstrated it.
When we perform a basic port scan, or any port scan for that matter, we have to run through the TCP three-way handshake for every port we want to scan. The type of scan all depends on how we perform the handshake. A basic port scan runs through the entire handshake for every port. While this method does it’s job perfectly well, it makes quite a bit of noise. This means that every connection attempt will be logged by the victim, and this log can be tracked back to us. The basic port scan isn’t anything special, it’s more of an introduction to the next type of scan we’re going to discuss, the stealth scan.
Explaining the Stealth Scan
So far, we’ve explained the TCP three-way handshake, and it’s role in a basic port scan. There are many flags that can be used in a handshake, but we’ve only discussed SYN and ACK. In order to understand the stealth scan (otherwise known as the half-open scan) we need to know about a third flag, RST. RST stands for reset. This flag will terminate any handshake immediately. This can give us hackers an edge for evading those pesky logs!
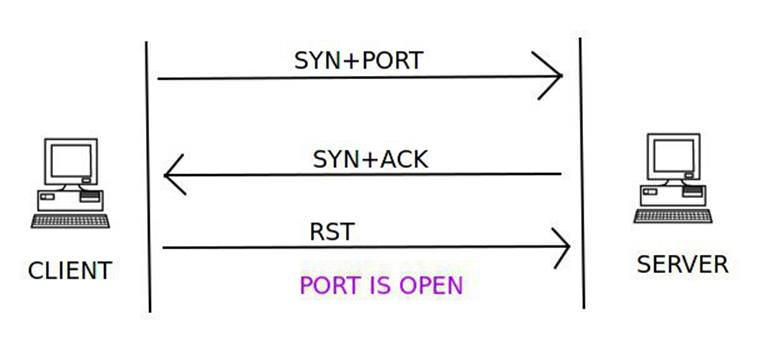
During a SYN scan, the attacker performs the basic TCP three-way handshake as normal. The attacker starts with a SYN packet, and waits for the victims response. If the victim responds with a SYN-ACK, the port is open, and if they respond with an RST-ACK, the port is closed. After receiving the victims response, the attacker sends an RST packet instead of the regular ACK. By terminating the connection before it is complete, it is far less likely that it will be logged as an attempt to connect. This can help us fly under the radar during active recon.
Now that we understand the concept of stealth scanning, let’s perform one using nmap. Nmap supports many, many scan types, including stealth scans. If we want to utilize a stealth scan, we have to give the -sS flag before our target IP address. Let’s go ahead and perform our scan now, we’ll only be scanning ports 1-100:
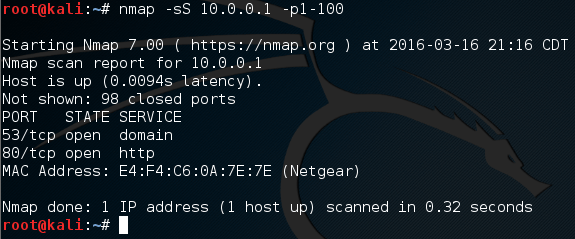
There we go, our scan worked! But in order to better understand this concept, let’s open up wireshark and see our packets as they are transported:

We can see here that there are many packets going to and coming from our attackers IP (10.0.0.19). In this screen shot we can see that our attacker has sent SYN packets to many different ports on our victim. Now that we’ve seen the SYN packets being sent, let’s take a look at some of the victim’s response packets, as well as some of the attackers RST packets:

We can see here that the victim was responding with RST-ACK packets and some SYN-ACK packets. Upon closer inspection, we can see that this SYN-ACK packet comes form port 80 of our victim. This port was also reported as open during our scan! Immediately after the SYN-ACK from port 80, we see that the attacker sent an RST packet to terminate the connection before it was fully established, this let’s us slip by without being logged for attempting a connection. There we have it, we successfully performed and dissected a stealth port scan!
We covered quite a bit here, so I hope the concepts got across well. I know it may seem like this is moving a bit slow, but we really need to understand what is happening and learn the mechanics behind it. We’re here to become hackers, not script kiddies. The next two articles will be a Ruby crash course. It will prepare us with all the knowledge we need in order to build our own port scanner. I’ll see you there!


